Back on it again these last few months, waiting for delivery of different components to get R5’s bad motivator setup all working from one switch off the RC transmitter.
Droid Builder

Extra Projects & Event Page's
- Home
- Trading Card Dispenser (NEW version 3) - TCD [2020/2022]
- Trading Cards
- R5-D4's ....Bad Motivator development
- R5-D4 - silver neck details
- R4-D4 - Dome [wood build]
- R0-D4 Dome [wood build]
- 3D Printing
- *** Star Wars Shoes ***
- GOUD-4 Messenger Droid - Solo ASWS
- Event: Mshed Bristol 2025
- Event: Mshed Bristol 2024
- Event's 2018
- Event's 2017
- Event 2016 - "Celebration Europe"
- Event's 2015
- Event 2014 - Chippenham Sci-Fi
- R5-D4 - events page - The beginning (2013)
- ** R5-D4 patch **
- R5-D4 Photos
- Costume for my Son - Han Solo -
- Costume for my Son - Boba Fett
- Droid Caller - Han Solo style
- Scanning Crew Container - Transmitter Storage Box
- Stormtrooper - me
- Rogue One - trading card storage box
- Rogue One
- Jabba’s gate prop for Celebration 2023
- Treadwell Droid - WED-15-77
July 07, 2025
R5’s Bad Motivator 2025
Back on it again these last few months, waiting for delivery of different components to get R5’s bad motivator setup all working from one switch off the RC transmitter.
October 17, 2024
June 25, 2024
R5-D4 dome build - on this day 2013
May 29, 2023
R5-D4: Update April/May 2023
But on testing it….. I realised that it needed to have a momentary activation rather than an actual ‘switch’. So I’ve been on Radio Model Workshops website and will be ordering a single RC switch relay, which has the option of it being a momentary one. So this control box will get another upgrade when it arrives.
June 14, 2022
New (old) Dome Motor with new Bracket
The shaft hole is a ‘D’ shape to match and I also fitted a recessed nut in the lower diameter for the locking bolt to have something firm to lock with, so preventing the PLA from breaking.
November 21, 2021
R5-D4 - annual maintenance
January 26, 2021
Thingiverse - search section and more
The other day on the Astromech.net forum, it was noted to me that some of my links were flagged up with the dreaded 404 error message screen :D
So I went though and checked them. Some had broken links, others had info missing that you needed to have in order to of published in the first place.....strange??? I then logged out and checked my files that way and they should be all there again.
One thing I did do was to add 'JamesF' to the 'tags'. As with most searches, it all depends on how you think people will search for a file. I thought it would be simpler to add my name 'JamesF' to the tags to make searching easier :D.
~~~~~~~~~~~~~~~~~~~~~~~~~
Next up is a list of 2021's interactions on my Thingiverse page. This was just interesting for me to see what people have been liking and downloading of my files. I'll be keeping track of these for 2021.
Thanks for reading.
#3ddesign #3dprinting #3dmodels #r5d4 #tevotarantulapro #funkopop
December 03, 2020
Dome Bag - 2.6 side stitched up. *CONCLUSION*
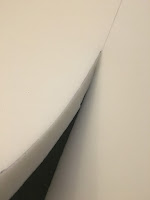
I did NOT included the extra thickness of the foam which would increase the circumference and length of the side materia??? Is this what's happened??
Seriously not happy!!! What I can’t figure out is that everything was ok when I originally marked everything out.
So Bag No2. will also not now be 'correct'. Measured the extra needed, marked out on material and cut it out. Next is to hem the edges etc.
Then try to figure out how to attach it to the main piece.
- suitable for the larger dome R0/R5/R4 & R6: https://artoo-detoo.co.uk/product/padded-bag-for-r0-r5-r6-domes/
- suitable for the R2, R3, R7, R8 & R9 type dome: https://artoo-detoo.co.uk/product/padded-bag-for-r2-r3-r7-r8-r9-dome/
- And for the 39.1% droids: https://artoo-detoo.co.uk/product/padded-bag-for-39-1-droid/
June 04, 2020
Throw Back Thursday [part 2] - June 2019
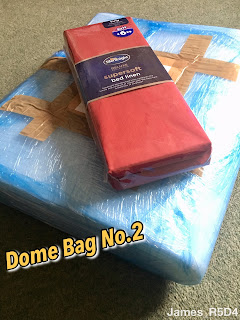
A dome bag, you ask???
Yes!
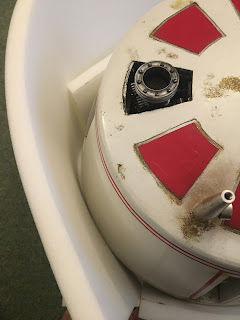
At an event, a co builder asked about how best to carry R5's dome (as it's wood and he obviously didn't want to cause any damage to it. This gave me the idea to make a carrier for it. One that can protect from dust & light bumps etc, but make it easier to carry.
So I started making the above Dome Bag.
Follow the link to follow my original bag making process.
I did start on a more correct size one, which would be used for my R4 dome.....that ones still to be finished tho.
Happy reading!
April 20, 2020
Thingiverse Page - James_R5-D4 = Free downloads
Not done much on R5 these last few days. Have been answering questions about my Adafruit enclosures via my Instagram and Thingiverse pages.
So whilst I was on my Thingiverse page, I thought I'd checkout the views and downloads counts lol.
First up, top 7 Things viewed over the last year:
No.1 top spot, is my Trading card dispenser, lol this is like Top of the Pops 😂.
Next up, top 7 Things downloaded over the last year:
The Fake electronics board parts are what I created to be used for R4-D4's electronic panel on his dome [check out the page at top for the build].
Next up is my Trading Card Dispenser, this one is also No1 in my viewed 'Things'.
In third place are my Frankenstein neck bolts 😄. These I literally drew up and managed to get printed in an afternoon for work college who mentioned he was doing fancy dress the weekend lol.
March 12, 2020
Littlebits - Star Wars Droid Inventor Kit - pt 9 (2019)
Lid update.....R5 now has a 'Bad Motivator':
Printed off the updated R5 lid, which now has the correct orientation 'antenna' and also the 'bad motivator'.
The antenna's front circle needed to be facing the front in relation to the pie panel opening and the bad motivator positions.
I've uploaded a short video onto my You Tube account, it can also be found on my Instagram page.
UPDATE: 12,3,2020
The files have now been uploaded to Thingiverse
June 10, 2019
Dome Bag - 2.5 base & side stitched up.
Saturday I sewed the two pieces together and not without it's problems. The first being I pinned the two halfs the right way round, instead of inside out, so the stitching is on the inside when turned out the right way. The with areas of miss stitching having to be gone over again.
Side material for the foam diameter protection. Placed the foam onto the material and folded it over. Was going to pin but instead used a chalk line as a guide. I added pins away from the stitch area just to help hold the material in place. All stitched up and foam fed into the fold. Test wrap around the dome and..........there’s a gap?!?!?
June 06, 2019
Dome Bag - 2.4 Sewing begins
I should have allowed extra material to add an
extra fold of material to hide the frayed edges when hemming.
Once the thread was loaded up and the stitching was complete, this took about an hour to complete. I thought.....whilst this is all set up, I could look at the fold for creating the draw string. I hadn't ironed this crease, I suppose I could of done, again making life easier, but I hadn't thought that far ahead at the time of ironing lol.
- cut material out for the base foam.
- sew base material & fit the foam inside it.
- sew main panel up & fit the side foam inside.
- sew the two pieces together.....might do this before fitting the foam!
- sew on patch and fit cord lock.
May 22, 2019
Dome Bag - 2.3 measuring & cutting
May 20, 2019
Dome Bag - 2.2 work has begun
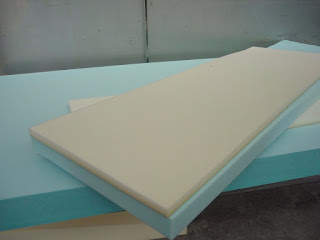
First was marking the foam dome base. I first cut a square piece of the foam, then using the remaining of it, I wrapped the foam around the outside of R5’s dome & marked the thickness.
Next was to measure up a distance that will protect the upper edge of the R5 dome. This was thencut and wrapped around the dome. The foam material I have is enough, but it's not long enough, so an extra piece has to be cut. Well it would just be waisted otherwise.
Here the side is being measured for the extra piece of foam.
This was as far as I got, cutting wise. Once this was done and dimensions written down. I made a start on the sheet material. It was laid out and the elastic corners, trimmed off and corners opened up so the sheet could be laid flat. I then marked out the round base and the start of the main side panel. Ensuring that I had enough for edging, folding over and the pull cord at the top of the bag.
I'll post up more in 'Dome Bag 2.3'.
May 13, 2019
Bad motivator actuation upgrade 1.2 (2019)
This one fitted much better all round. I had made slots in the inside top face , but I hadn't made them wide enough to allow the crimped edges to fit. Also the clearance hole in the top, didn't clear the shaft enough. It didn't need to be so close a fit.
Next I needed to add a new joining pivot piece similar to the previous one which came fitted on the door actuator itself.
Hopefully I’ll get time to test fit this. I’ve included a hole to fit a locking pin through.
May 10, 2019
Dome Bag 2.1 - material obtained
I'll be able to make the new (correct sizes) version, lol.
For Dome Bag v1, check out via this link
April 25, 2019
Bad motivator actuation upgrade 1.0 (2019)
April 24, 2019
Dome Bag 2.0
October 03, 2018
Littlebits - Star Wars Droid Inventor Kit - pt 4 (2018)
It's almost a year since I last posted up about creating an R5-D4 dome for the Littlebits astromech. I had done some work since, but as it was still a work in progress so I didn't post anything up. Earlier this year I signed up to www.thingiverse.com to upload some of my work to share. My link is www.thingiverse.com/James_R5D4
This is just a representation of R5's dome, scale is roughly that of the Littlebit's R2 dome. The last print attempt failed, but that was OK, as the bottom ring was used to check the fit of the dome onto the body location ring.
I posted up images yesterday on my Instagram account and after a bit more work this morning, I've almost finished the build.
 |
| New dome features |
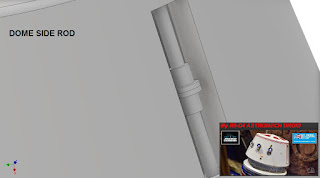 |
| New dome side rod |
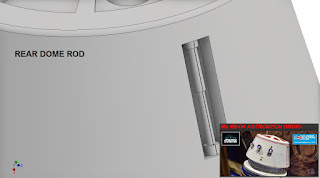 |
| New rear dome rod |
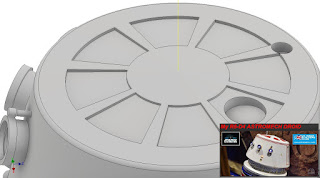 |
| Antenna & Motivator sockets |
I'll post up again once the last two parts have been drawn up. Not sure if to add these as one piece dome or as three seperate parts (dome, antenna, motivator), for ease of 3D printing orientation.


