Showing posts with label future projects. Show all posts

July 06, 2025

Droids @Mshed Bristol 2025 - Feedback

Another fantastic event!


Thanks to everyone that came along,
we hope you enjoyed it as much as we did!

As part of our figuring out advertising freely, it would be very much appreciated if you could answer this one question form. It will help us to better focus our attention on when trying to advertise in future.

You should get to this page, picture below.
Thanks in advance.


Monday 7th Update:
Thankyou to the five people who responded to this link. Like a certain shop says '.....every little helps!'

This link will be being shared on the event page for the wider public who attended to respond. Thanks again everyone who came along to Sundays event, I will be posting up an event report with photo's and videos soon, once I've recovered and sifted through the files.

January 13, 2024

Welding machine: part 1

Welding was something my Dad did for a job and also for enjoyment, creating things. Back then he would have used a stick welder, later becoming proficient in MIG & TIG as well as larger equipment for his job.

He worked for a few companies:
  • Welded Tanks (gone now, was by Templemeads train station).
  • Ashton Gate.
  • Fulton Boilers.
I was taught how to weld in my first year at college. But I learned a lot later from watching my Dad.

I have thought about getting a welding machine over the years, it’s definitely something that would come in handy lol. Then just before Christmas, my friend Paul said he was going to be selling the one he had been left by a friend of his, as he wasn’t likely to ever use it, what with time and learning. So after some thought, I said I would have it.

With the recent passing of my Dad, and inspection of his old garage, there’s a lot that needs clearing out……mostly metal lol. So I'm hoping to be able to make use of it.
There are a few things that require a welder, so this will definitely come in use.

December 18, 2022

Event Report: Droid Builders UK Christmas meet 2022


The day came (Saturday) and Mike picked me up at 7:30am, for the drive up London way.

This was the first time I hadn’t taken R5, as most people have seen him and wood isn’t what people are into these days 😢, so decided to just take up latest projects. WED-15 build and the new top secret project build 🤫🤫🤫.

YouTube video of the day
can be viewed here.

Unfortunately there were a few unable to attend due to the weather and ill health. Best wishes to them for a speedy recovery.

The usual suspects did make it, Lee, Sam, Giles lol. The eBay sales added to the raffle on the day to raise funds for our good charity cause.

Doug & Mark gave me a hand in helping to sort out a few problems with a droid. All hands to help, all minds figuring out problem solving.


We had droid racing, check out the video, droid builds, maintenance, seeing new work done since last time. We weren’t able to have an after event meal as everywhere was booked, so we had McD’s for lunch 😂👍🏽


November 16, 2022

Treadwell WED-15 droid build : Part 2 - Eye boxes and bracket


Friday 11th November

Part 2
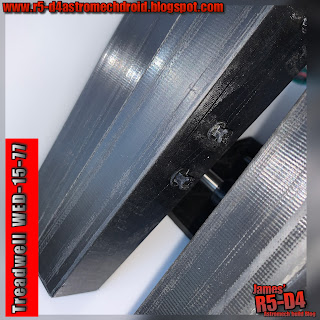
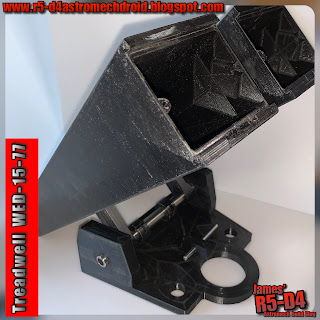
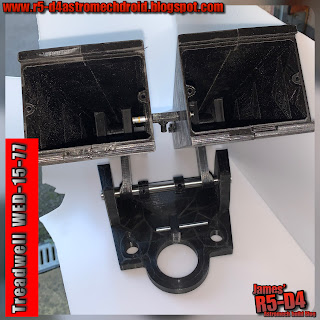
The two ‘eyes’ have now been printed. And also the following parts:
  • Eye brackets 
  • Greeblies
  • Location pins
The lenses can be found on eBay, but can be pricey snd also come with the rest of the slide projector. So I’ll ask if someone who owns a resin printer, is able to produce these for me.

Printer has been busy this week:
Test fitting the ‘eye’ brackets, redesigned them to have two mounting holes. Also, swapped them over, this move’s the ‘eye’ units back a bit more.


 Next up was four of these locking location pins. These aren’t fully cylindrical, to help prevent them binding and getting stuck. The end tab is to help with removing them. The can be cut off afterwards if required.
These will secure the ‘eyes’ onto the supports.

I then drew up a front pivot connection arm. This links the two eye units together and acts as the pivot point to raise and lower them. ……Change of plans 😉.

Threadwell droid
Location pins in position

Treadwell droid
Front/side view

Treadwell droid
Front view
Show’s the central pivot link bar, between the two units.

As good as this looks, lol 😂, I’ll be redesigning and re-printing, some of these parts.

Have also been looking at servo actuation for head/eye movement…… have an idea for this too and have been doing some development ideas 💡.

November 12, 2022

New droid project : Part 1 Treadwell droid WED-15-77

November Friday 4th 2022
The start of another droid, but not another Astromech. Something that there aren’t many of, especially here in the UK. Like R5, this droid has been a favourite for me for its unique design.

Treadwell droid, wed-15-77

The Treadwell droid or ‘WED-15’ has it’s own section on ‘Rebel Droids forum’ for them. A few builders have sketched things up and there are some 3D stl files, but nothing complete in so much that there is not just one set of plans. So I’m going to combine these with my own idea’s, based on vintage film photos and other info, to create my own.

I will eventually produce PDF drawings with dimensions, for others to use and also upload the stl files, if everything works out lol 😆.

I made a start on producing the head component, in 3D AutoCAD Inventor, using dimensions off blueprints. The outside profile wasn’t to hard to reproduce, but the inside carved out section was a bit more of a challenge.
Treadwell droid,

Then after a bit more editing, I decided to make a start on printing the head.

To save on time and not waist filament, I sectioned the head into two halves, so no support material required. I also printed two of the lens holder front pieces, as there was space on the print bed, and the print was going to be done over the weekend (works Ultimaker  S5 printer, free time).

The printer uses a 0.4 nozzle and all my prints this size are at 0.2 layer height.
Treadwell droid, wed-15-77

Before I set the printer to produce a mirror version of this set, I first needed to do some tweaks to allow the front lens holders to sit into them properly as there is a recess in the front.

Tuesday (7th), morning, back in work to find the printed parts came out great (see above picture), the joining faces needed to be smoothed, and once done, the two halves were glued together.

As mentioned, the second tweeted set of two halves, was set to run overnight.

Wednesday (8th)
I made a start on drawing up the main head plate, that the eyes fix too.
Although this has cut outs in places, I didn’t want to risk my first print being structurally weak, so went with a solid plate design. To be honest, unless you really study the closeup pictures, this is not an easy detail to notice.

This piece was left to print overnight, along with some other detail pieces.

Thursday (9th)
The main head plate, printed great!
The one head pivot piece did as well, but I wasn’t 100% happy with the one fixing point (as I had drawn it up with two), so I redesigned this piece to have two location points. I was going to use bolts, but decided that it would be more convenient to draw up 3D printable pieces. So I drew up locking pins. These are a push fit and can/could be glued in place.

They have a flat edge so easy to print, but also they won’t bind up when fitting through the holes. The tabs are to help removal and can be removed if gluing in option is needed. These just needed a light sanding on the front edge.

I used a piece of metal tube which I will replicate as a 3D component, later on, as the main pivot bar. (See picture below).

And here is the main head plate assembly.

Friday (11th)
The locking pins were printed off.

After I had drawn up the head plate, on Wednesday, I made a start on the upper neck pivot ‘rings’. (Below picture)

Held off on printing this piece as wasn’t 100% happy with the size diameter’s, so I’ll do some more research over the weekend and compare with the blueprints. The above is a visual reproduction of the film droid.

#treadwelldroid #3Dprinting #autocadinventor #rebeldroids #thesearethedroidsyourlookingfor

March 31, 2022

Trading Card Dispenser : Version 2…. part 2

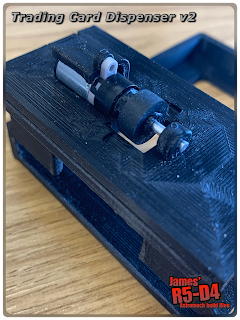
First test printing of the parts at 0.15 layer height.
Then trimming and filing off layer lines so that everything that 'touches' runs smoothly. The card plate and the top plate are printed so they have smooth surfaces from the glass print bed.

Before gluing on the top plate, the card plate and springs have to be installed first. I had to check the cards would fit ok....

Next up was to install the mini motor, wheel adaptor and rubber wheel. Then measure and cut the aluminium rod to length, and push it into place for the wheel support axel. The motor needs to be wired up still, in this next picture.
A few test to be carried out and also a modification to the original bracket to support the new unit, possibly……or the main unit could be redesigned to accommodate a bracket.

......UPDATE

So I drew up a new bracket case version (to fit into R5), and I also made it curved at the front, this is so that it would sit flush with the NEW Utility arm socket screen, that I also 3D printed off. It wasn't painted, so will have to do this before R5's next event.

They were all installed last Friday, ready for action at MegaCON Live in Birmingham, see other post about that day in Event Report.

March 19, 2022

Trading Card Dispenser : Version 2…. coming soon!?!?

I luv using my TCD, I pop open R5’s utility arm and dispense his trading card with press of a button.

It doesn’t hold many though and if you get carried away 😂, before you know it, the dispenser is empty.

After the recent event at ‘Stars of Time’, down in Weston, reloading the dispenser through the slot was a bit time consuming 😣😣😣

So I got to thinking of how to improve the design. I came up with a few ideas and will be test printing soon.

February 11, 2022

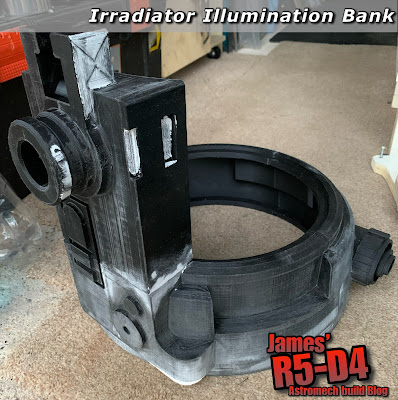
Solo - a Star Wars story - Irradiator Illumination Bank 3D printing Part 1

This print project is massive. It will require me to slice up to be able to print on my printer(s) lol.

I drew this up last year in lockdown, as something to do. I saw it in the Solo a Star Wars story book. See above picture.


I thought that this could be used as a similar item that is used to charge Astromech's, like the ‘Fusion Furnace’.

January 2022
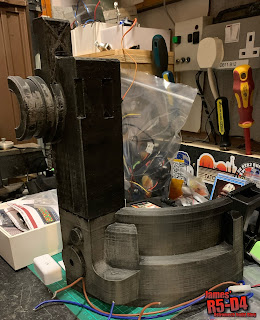
I had to slice up the parts into quarters for them to fit onto the Ultimaker S5’s printer bed. I did a few alterations to the above design. I also created a rear area that’s not seen. The design is based on what I could make out from the photo.

I started to print off the base parts last week. 8hrs per base 1/4 section, so this was an overnight as I’ve become impatient with long day printing lol, also they might need to actually use the printer….for work.

Here’s two quarters and half the upper front piece glued together. This piece was cut because it wouldn’t fit on the printer bed, height wise.

The following week I was a bit restricted for time due to work needing the printer, so I eventually got time to print of the last quarter and second upper section overnight.

The following lunchtime was sanding the edge faces and then gluing them together.
The evening was spent sanding the surface and smoothing the joins. Started adding wood filler.
Once stage one was complete, stage two was applying filler primer.

Applied filler to areas that needed it, once dried it will be sanded all over then re-sprayed with more filler primer.

More to follow……..

January 21, 2021

Questions Time......??

 Do you have a question
regarding any of my projects?
Do I explain things in enough detail?
If so, please add them to the comments
section at the bottom of this post
and I'll try to answer as soon as possible.

January 02, 2021

Mini project: Toolbox Display banner carrying straps

 Back to cutting & sewing.

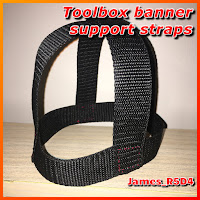
As mentioned in previous post, I wanted something that could hold R5’s display banner to the toolbox for ease at events. I did a few sketches and settled on this simple design. I only have one display, but this can be extended to two, possibly three, depending upon the weight.

Dug out the strap webbing I had bought for the dome bag project. This was used for the handles. Took some measurements and started cutting up & stitching them together.

And here is the start of ...... ‘it’.....

Toolbox banner straps

Did some more planning and then added the second strap. Double stitch by hand for this test piece.
Toolbox banner straps
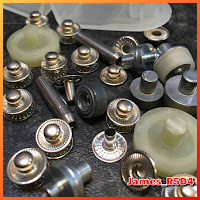
Ordered some pieces as I couldn’t put my hands on items I know I have....stored somewhere lol. I did find them eventually, but they were just leftovers lol only one side of the snaps.
Snaps for Toolbox banner straps
New ones coming soon. Next was making the second strap parts of this project......
I measured up a length and then cut up two  small ‘loops’. These will be for the main strap. They are stitched together and fixed in place on the main strap.
Toolbox banner straps
The banner bag wouldn’t be in place when wanting to open the toolbox. And the straps move and don’t restrict the lid opening.

The snaps came today, so got on with fitting them.
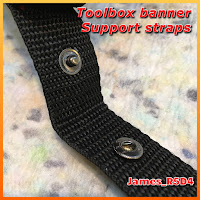
Snaps fitted to lower strap

And this is the lower strap in place.
Snaps fitted and lower strap installed

Next then was to fit the upper strap and mark the single snaps location. And here it is.
Upper strap snap fitted and installed

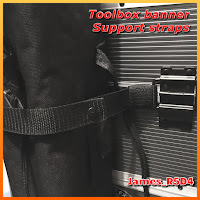
And here’s the finished banner holder fitted on the toolbox.
Straps fitted with banner in place


Really happy with how this has turned out. Next is to modify the design to accommodate multiple banners.

December 28, 2020

And another mini project begins for 2021

 Not actually droid related, ie in building something. But something I’ve had the idea about for some time.

Going to events & having to transport your equipment can be a handful, so this will hopefully help.

There’s going to be two versions of this which I have started working on today.

As always, more updates coming......

November 23, 2019

Another mini project 1.2 ‘Trading Card Dispenser’

So to date I have printed of a few different component versions, trying to iron out bits and pieces. As I typed this yesterday afternoon, the 3D printer is printing three new upgrade parts after another weekend of testing, thoughts and ideas.

Pack 1 of o'rings came yesterday and the results looked promising when tested.
Pack 2 of o'ring should be here this weekend (though I think it’s the wrong size) along with the mini magnets and hopefully anything else I've ordered lol.

Mini magnets & a spare servo arrived. Can’t get over how small these magnets are!

I had the idea of adding a micro switch and LED for indication purposes, so this went into the upgrades that are being printed. Results: worked in principle but not enough force to activate it, so a reposition will be needed.

Due to testing and time, these prints are only at 0.2 layer height, so save on print time and so I can take them home to work on them lol.

November 22, 2019

Another mini project 1.1 ‘Trading Card Dispenser’

Been revising and improving this project on CAD and 3D test printing components for fit.
I’ve already moved on from gear motors to a modified micro servo. Am still waiting on components to arrive from China etc these should hopefully arrive in the next week or so.

Found these micro magnets on eBay that I just had to get them to try out. 1mm diameter x 1mm length!!

Been working on the electronics and have this almost sorted. Found out a few things and am waiting on delivery of some replacement valve pots for one of the boards.

Next up is a new ‘wheel’ to be designed, possibly one with an o'ring to fit on.

November 06, 2019

Another mini project 1.0 ‘Trading Card Dispenser’

This project is inspired my Mike F. originally from way back in 2016, when he brought this project he had made along to the screening of the Rogue One event at Milton Keynes cinema. I’ve always wanted to have a go at making one, but the ability and accessibility of a 3D printer was not an option at the time.

Recently I’ve seen these being offered for sale, but the price isn’t something I can justify, especially when I can design, print & build one myself lol. So decided now was the time to have a go.

I’m already on main body version no.2 lol and have been digging around in my storage boxes for items I have that may be of use. I’ve also ordered some springs which will be here in a few weeks.


I've also been on ebay looking for other components....more in a few weeks.

June 07, 2019

New project.......Schumacher SST chassis - MSE Mouse Droid...?

Continuing on from this post.........

So a few week’s back, I spent some lunchtimes, cleaning the chassis of this RC.
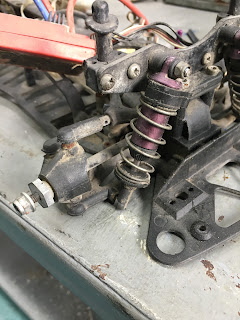
I started to strip the car down piece by piece to service the broken/damaged parts. Namely the rear differential and the belt(s). One of them being broken. A stone had got trapped between the belt and the gears and chewed up both, breaking the belt itself.
Schumacher SST Sport, Schumacher SST '99 Pro chassis
The chassis was, I thought, a Schumacher SST Sport, did a bit of research to find out that it was in fact a Schumacher SST '99 Pro!
Thankfully the replacement parts I needed & have bought were the same!

Schumacher SST Sport chassis, Schumacher SST '99 Pro

Schumacher SST chassis

Schumacher SST 99 Pro chassis

Schumacher SST 99 Pro chassis

Schumacher SST Sport chassis
I gave everything a watch down with an old toothbrush to get rid of all the dirt & dust.
Schumacher SST 99 pro
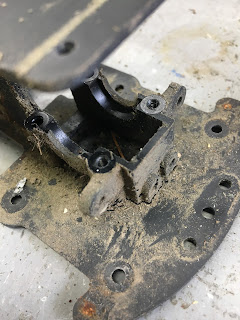
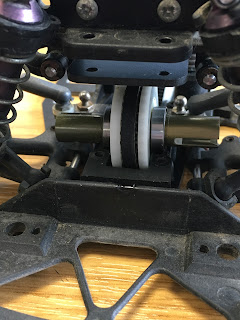
 This is the damaged differential and needed to be replaced.
Schumacher SST
 This is the good one, it just needed to be stripped down and cleaned up, old dried grease to be removed & then re-oiled and re-assembled.
Schumacher SST
I found the belts, main gear and new differential online & on eBay.

Schumacher SST 99 Pro chassis
 All (mostly) cleaned up and re-assembled.
Schumacher SST 99 Pro
Here's the new differential fitting back into place.

Next:
  • Wheels & tyres
  • power & controller check
  • probably a lot of other things I'll find on the way lol.