Droid Builder

Extra Projects & Event Page's
- Home
- Trading Card Dispenser (NEW version 3) - TCD [2020/2022]
- Trading Cards
- R5-D4's ....Bad Motivator development
- R5-D4 - silver neck details
- R4-D4 - Dome [wood build]
- R0-D4 Dome [wood build]
- 3D Printing
- *** Star Wars Shoes ***
- GOUD-4 Messenger Droid - Solo ASWS
- Event: Mshed Bristol 2025
- Event: Mshed Bristol 2024
- Event's 2018
- Event's 2017
- Event 2016 - "Celebration Europe"
- Event's 2015
- Event 2014 - Chippenham Sci-Fi
- R5-D4 - events page - The beginning (2013)
- ** R5-D4 patch **
- R5-D4 Photos
- Costume for my Son - Han Solo -
- Costume for my Son - Boba Fett
- Droid Caller - Han Solo style
- Scanning Crew Container - Transmitter Storage Box
- Stormtrooper - me
- Rogue One - trading card storage box
- Rogue One
- Jabba’s gate prop for Celebration 2023
- Treadwell Droid - WED-15-77
May 23, 2024
Instagram - I'm Back!
December 28, 2020
And another mini project begins for 2021
Not actually droid related, ie in building something. But something I’ve had the idea about for some time.
Going to events & having to transport your equipment can be a handful, so this will hopefully help.
There’s going to be two versions of this which I have started working on today.
As always, more updates coming......
December 22, 2020
Wishing you all a Happy Christmas 2020
Had a surprise Christmas card/gift the other day from fellow Bristol builder Mike B.
Always wanted one of these (below image) and over the years, I have attempted to create one.....but the results where something I wasn’t anywhere near happy with lol. Mike and his design, printing skills, came up with this tho.
Whatever your beliefs for the Christmas season, I’d like to wish all who are reading this, a very Happy Christmas from myself & of course R5.
Mental Health message:
2020 has not been a good year for all of us, in many different ways and then there’s COVID to top it all off. I like to think of myself as a ‘glass half full’ person and try to always look on the positive side of life. Perspective is always a good thing to keep in mind when things don’t look good, they can and do, get better! Find a little something that makes you smile and feel good, keep these little happy moments and add to them. I find (apart from family/my children) that being creative, designing, making stuff really helps me.
2021 is on its way so a new year, new start and hopefully we can all get back to what we used to call, normal!
If you need to seek more help, see your Dr, there’s NO shame in asking for help!
If you don’t feel you can’t in person, then try contacting CALM, the Charity Against Living Miserably.
Click on this link to go to the CALM website.
December 20, 2020
Droid Builders UK - Christmas Special show
Sam and Lee hosted the marathon show today, with special guests
- Sammy Stormtrooper
- Brian Herring
- Jake Lunt
- video interviews with builders
- tutorial
- ......and also the raffle to raise funds for the charity CALM. Plus loads of other stuff.
To re-watch the show, click the following link:
Droid Builders UK YouTube channel.
The aim was to raise £10,000 by the end of the year 2020. It’s not been a good year and for sum it has been so much harder to have to deal with. That’s where CALM comes in.
We are fundraising for the Campaign Against Living Miserably (CALM)
The Campaign Against Living Miserably (CALM) is leading a movement against suicide, the single biggest killer of men under the age of 45 in the UK.Anyone can hit crisis point. CALM run a free and confidential helpline and webchat 7 hours a day, 7 days a week for anyone who needs to talk about lifes problems.
For full details and also if you would like to donate to the charity, please click on the link, you can leave an anonymous donation if you like and every amount big or small is a step in saving a life.....
December 13, 2020
James’ R5-D4 YouTube channel 2020
Had this congratulations email today from YouTube for all my videos uploaded in 2020 lol......all 12 minutes of them :D . Not exactly ground breaking mind you, and a few million off any YouTube awards lol, but I appreciate everyone who has watched etc and I hope they have been entertaining or educational.
See screenshots below.... then head on over to my channel to contribute to the ‘ups’ & likes and shares, thanks everyone.
My YouTube channel link below:
November 11, 2020
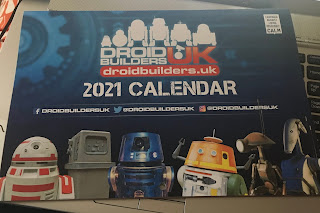
Droid Builders calendar 2021
Something positive to look forward to is 2021!
And with it, a new calendar which arrived today.....
These are available, limited numbers, via the Droid Builders.UK website.
They cost £8.00 (+p&p) & the money from the sale of these calendars goes to CALM, campaign against living miserably.
October 26, 2020
Sounds for Droid 2020 - 1.8 installation
Made up a new bracket for holding one speaker, out of some MDF wood. The prev one was perspex and was attached to the old sound board.
I may mount the second speakers in a rear position.
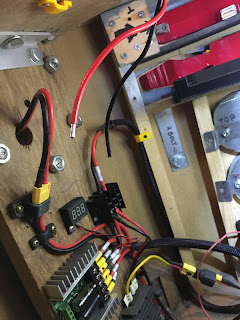
Continuing on with organising the wires, the slip ring underside wires are always annoyed me as they are stiffer due to less strands. This makes it awkward reaching inside as they get in the way. So I decided to cut them short and connect new, more flexible cable. This will also be yellow to match up with identification of the voltages, yellow being 12v positive.
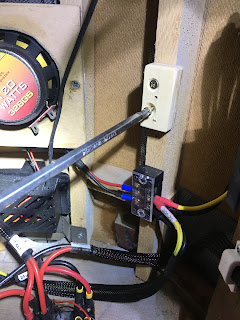
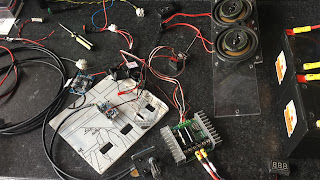
Next up was to install the sound board. I changed my mind about which side to mount it on. Decided that it would be better over on the right hand side. I needed a spacer block, so cut a small piece of wood, marked the boards fixing hole position on it, then drilled clearance holes and screwed the spacer block to the frame.
Next up was to then mount the sound board to the spacer block.
I de-soldered the red power cable on the sound board and replaced it with a yellow one. I had some yellow heat shrink to cover the red wire for the Trading Card Dispenser electronics box.
Next up then is to connect the speaker, route the servo lead which operates the relay switch and test out the amp/speaker. Also need to look at where best to fit the volume control knob.
October 05, 2020
Teeces LED work for Mike's dome [August 2020]
27th August 2020
A few weeks back I was asked to help wire up a set of Teeces LED light and add some LED's to illuminate the Holo Projectors x3.

I fitted a voltage regulator to drop the volts down to 5v.

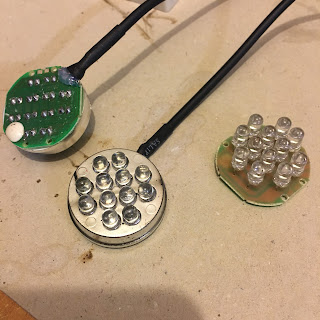
I did some updates to the LED holder, now that the 3D printer is better than the previous one lol and also upgraded the bearing holder.

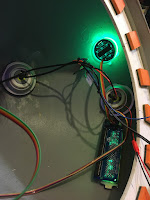
The bearing holder, is designed to be shaped with a file to be a tight fit into the rear opening of the Holo Projectors eye. The whole unit acts as a slip-ring arrangement, allowing the LED's to be connected and lite, but also allowing the Holo Projector to fully 360 degree free movement, without worry of 'Holo wire twist & break'!

Mike's dome only has two moving Holo Projector's, so these received these units. The third Holo is static. Nect up was installing them into his dome.

Next up is to finish installing the power cables, the Teeces units & connecting up the power switches.......
And some pics of LED's illuminated.
Mike was kind enough to make this new tool storage box sticker, nothing wrong with the original lol, but hay....everyone should have their name on their tool box.
Transport sledge modification 2020
1st September 2020
Yep, upgrading the sledge....again lol.
Well, due to circumstances, transportation of R5 may now have to be done in my small car. This does means him being disassembled, legs off, which was also part of his electrical upgrade. So now it’s just figuring out how to get it all IN the car.
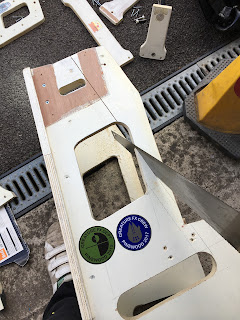
Looks drastic but it’s all part of the plan. The material being cut off will reduce the height when the sled is led down in the car. This also makes it lighter still. Also looking at the handle bar and the bracket that holds R5 at the top, again for when sled is led down. The bracket serves a purpose but also restricts having the dome fitted on the body if you needed to move him as one unit.
Well Hello there.....
.....yes, it’s been a long time since my last blog post. A busy home life has been the reason. Had to convert half my garage into a usable area for my Son. This required new shelves being put up & new lights and sockets being installed.
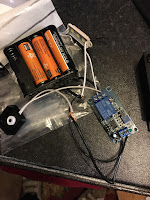
Another little project I was working on was installing an outside light to illuminate the garage door handle. Late nights in the dark, holding things etc and trying to find the key hole to lock the garage door.....no more! I wired up a timer delay off relay I had, along with a strip LED. So as I leave the garage, I can press the button and be able to see to lock it. This setup runs off 12volts.

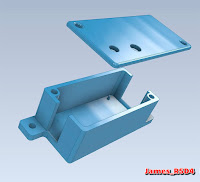

And I designed and printed up my own brackets for some plastic sheeting i’ll be using for an enclosure, more on that in the future.
Did a rewire on Mikes dome switches to change their illumination orientation, I've not posted that yet but will do shortly.
I designed up a 'stop/reset' switch for the Tevo as the open hole was just annoying me lol.
Link will eventually work to Thingiverse......
I have been able to do small amounts of updates to R5, but these will hopefully take up more of my time now that these other projects have been completed.
Lastly for this post....a recent picture of my workbench area.....


August 21, 2020
Tutorial - Remote Control Drive setup - Droid Builders UK
The video tutorial I made for the Club, is now up online.
Dual Remote Control Drive setup Tutorial for Droid Builders Live,
is a 'how to' video showing how to connect up the speed controller,
transmitter and motors.
August 10, 2020
Sounds for droid 2020 - 1.6 transmitter switch test
Forgot to post this.....
A few weeks ago I was asked to do a tutorial video for the Droid Builders UK Live 2020 event, check out the website here & the You Tube channel here. It didn't get aired due to time, but whilst I was working on all the electrical's, I swapped over the transmitter switch I had originally fitted, with a momentary version.
The original 'switch' was a dial which wasn't needed so after watching some YouTube videos on how too, I swapped it for a switch.
Here are my Blog links to prev. work done.
I wanted to have a momentary switch, rather than a normal 3 position one.
As I had already done the hard work in Parts 1 & 2, this was just a simple un-solder and re-solder the new switch.....except that what I didn't realise at the time was that the thread is an M6.....not an M5. So I'll have to make a new switch nut.
August 06, 2020
R5 Button Badges
August 04, 2020
Workbench lockdown 2020 - new paint & finished seat

After cleaning off dirt and chipped paint, I started with painting the vice.....and then the visible parts of the metal bench framework. There’s still some parts I need to paint, but so far it’s looking good.
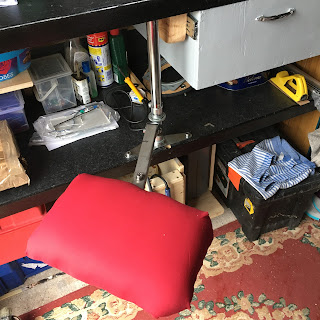
The seat needed modifying, the arm was just a few inches to short, so when sat on the seat my long legs would hit the bench. I found a extra piece of the steel angle and some flat plate. Had to buy a carbide tip drill bit to drill the holes through, then clamped the pieces together.
Next up I used some 18mm thick leftover wood stapled on some thick foam that I had for the dome bag projects. To cover it I used some of the material also used for the bags.
It’s not bad and is actually comfortable to sit on.
July 24, 2020
Throwback Friday - 10 years of the UK R2D2 Builders Club
July 23, 2020
Workbench Lockdown 2020 - storage unit
Was going to start on fitting a sliding shelf for storage under the draw. I can put all my electronics/electrical components in/on it for easy access.
But before I made a start, I instead started on making a wheeled storage unit for under the bottom shelf. I wanted it to hold my drill and drill bit boxes and anything else could be stored in it.
I cut the base and fitted casters I already had. The above picture shows the short side opening for the drill and bits boxes.


