Showing posts with label radar eye. Show all posts

December 08, 2017

R4-D4 Dome work progress 3.0

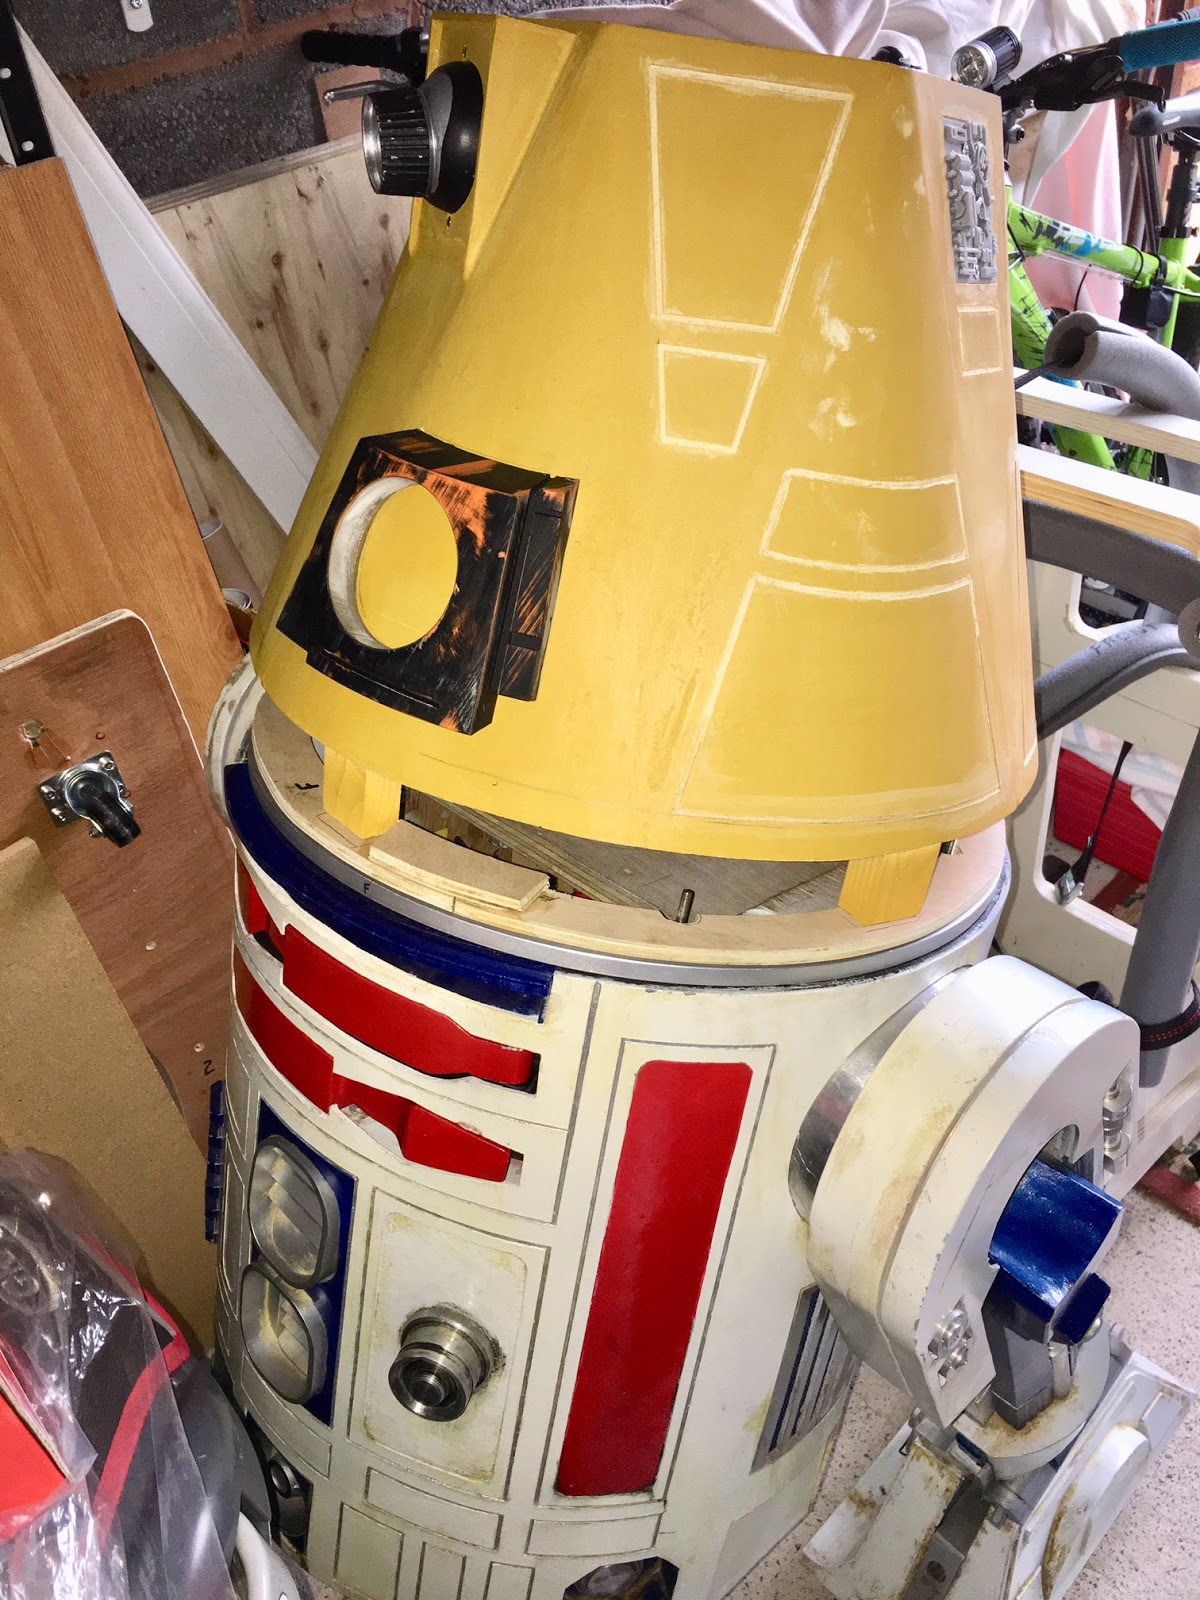
Finished off the last grooving to the curved panel.
Lightly sanded it and applied a PVA wash over it.

Next up was some silver detailing on the radar eye. I sprayed some into an empty can cap and then using a file paint brush, hand painted the slots on the eye.

Then I used the brush to 'dry brush' over some of the edges.
This helps create the chipped paint effect.
Still a work in progress as need to add darker colour's to add 'dirt' effect.

Next up was to position and glue into place the Radar lens. I used fiber glass resin, marked the position and fixed it in place. I then screwed it back onto the dome so that any resin would be shaped by the dome, before it dried and that would of meant more work.

As I'm not sure about the final colour scheme for the dome, I did decide that regardless, the dome will need a white coat of paint. So I started on the lid.
A few coats and wow, what a finish!
The waves in the reflection near the middle, is the extractor filter, not the surface finish lol

December 07, 2017

R4-D4 Dome work progress 2.9

Friday, I fitted everything onto the Dome. Used temporary screws to hold the circuit panels in place & wired up the LED's to mini 12v battery. Ready for Saturday at Leamington Spa Wars event, see event report coming soon.
The radar eye still needs work on it, to get the edge fitting nice and tight. And still one last half panel to groove.

See Event Report Blog for Spa Wars at Leamington Spa.

Sunday afternoon, I test fitted the lower location ring onto the domes spacer blocks.

After aligning it up centrally, I measured the height, and yep, in my infinite wisdom, I'd not taken into account the thickness of the location ring....in my defense I have had a lot going on lol.

So next up was to trim the blocks down.


Once this was done, it was a case of screwing the location ring on.


Next up is the bearing location pin blocks.


Marked there rough position on the location ring. Then marked and drilled a slightly over size 5mm hole in them. Once this was done, I then used PVA wood glue to secure them in position & left to dry overnight.
You can see them circled in red in picture above.

Once dried I then drilled holes and countersunk them for clearance, and screwed the blocks in place.


~~~


Been also working on smoothing out the Radar Eye more.
Primer sprayed it (and the lid) the other day.

And sprayed it up metallic Red.
Wasn't impressed with the usual mat black finish.
I still need to work out a paint scheme for the dome tho....

November 24, 2017

R4-D4 Dome work progress 2.6

Some good news and some not so good news.

My 4 pack of fake CCTV dome camera's arrived yesterday. And spent no time stripping two of them apart lol. That was all I could do as the Radar Eye was in work. The other plus is the on/off loop relay unit arrived as well.

The not so good part of the night, was spending hours figuring out how to and the best way to wire up what I had to operate the holo projector circuit 😒
What I have won't do what I want.....so onto plan 'B'......

~~~

To not get distracted with this disappointing evening, tho some bits were actually fun when bits worked, today's efferts are working on the Radar Eye & it's lens.

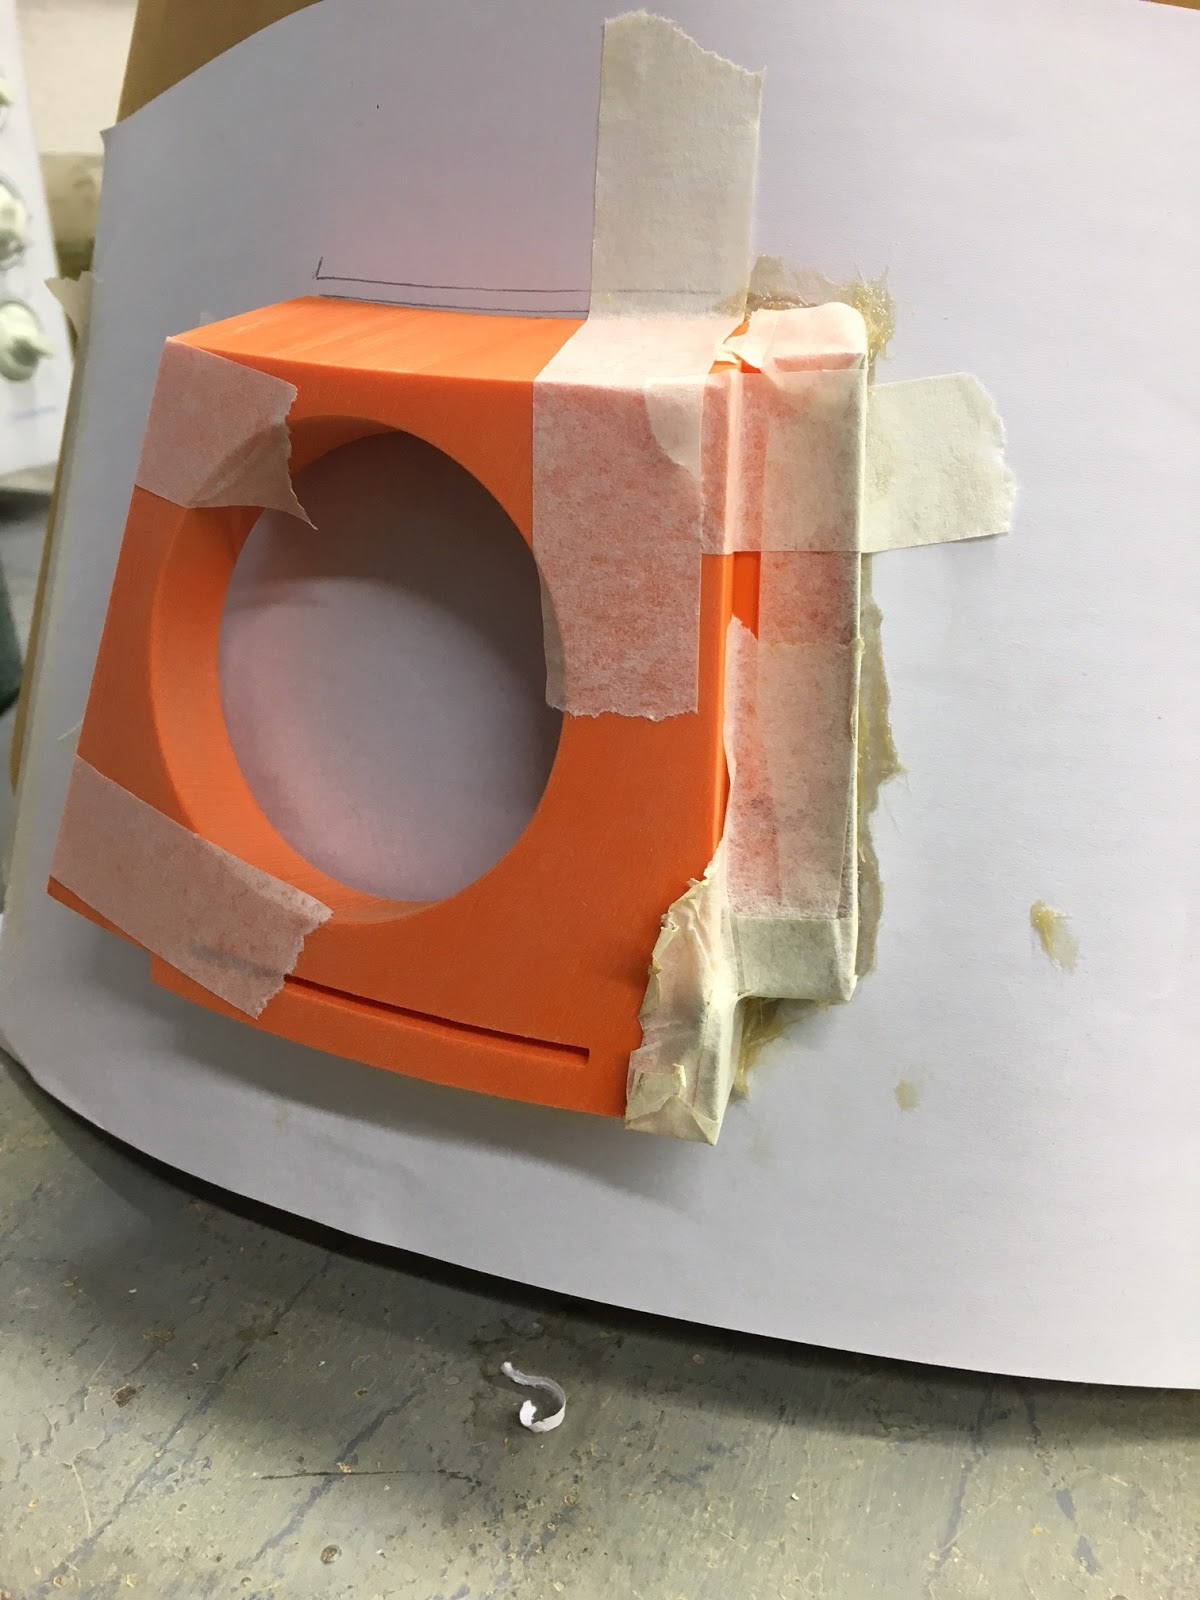
I taped a piece of paper onto the dome as to where the Radar Eye will go. This was to stop it messing up my nice clean surface lol. I then mixed up some glass fiber and applied it to one side of the eye's cardboard'd edge.

Lunchtime, I got on with cutting the radar eye's lens. I marked in position and then using a saw, cut to size.
 
After this I applied glass fiber resin to the other side edge of the radar eye, as the first side had set, as seen in the above pic.

~~~

Marking and grooving out the panels....
There are a few different 'styles' for the panels on an R4. The paint/colour design is another thing too. So I'm going with a standard'ish design.

I started with the 'lid' panel.
Drew on the groove details and then scored and scrapped out the groove detail.

I gave the groove a PVA wash to seal, and then once dried I lightly sanded them.
As the hardboard is only 3mm thick, the grooves are only about a 1mm deep. They are just for effect.

I drew up some templates in cardboard and cut them out. I then started to mark up the panels at the top of the dome.

I'll be taking the dome home again for the weekend, hopefully get some more work done on it then.

Looking forward to Sunday tho as a few members of the UK Builders are coming round to my house.....more info next week.

November 21, 2017

R4-D4 Dome work progress 2.4

Today saw the second can of primer/filler used up on the dome. But it was worth it.

The lid edges were shaped to specifically match each corner, so only one orientation. I applied PVA wash over the edges. Before it was dusted with spray. So this part of the dome is done. But there's still loads to do.

The light really shows up the edges best in this picture. Am really pleased so far.
Once all dry, a light sanding will follow.

I started on location lugs for the lid to fit inside the dome's hole. More on this in next blog post, if it works lol.


Here's a picture of the new/old 3D printed panel that didn't print so well. I did test fit it to see how it looks inside the dome.

The new new 3D printed panel is being printed. Two hours and it's only half way through lol.

Some good news about the Radar Eye lens. After searching shops for the 99p fake CCTV dome version, I had to bid on eBay. Found a set of 4.....yes, I know, but in order to get them this side of Christmas, it had to be done. The price for the 4, I could of paid for 1, the increase since I bought one for my R0 dome last year is ridiculous!!

November 15, 2017

R4-D4 Dome work progress 2.2

Came up with an idea to cover over the screws for the Holo projector Eye.
3D printed a ring with some details on it. Slightly filed two flats to better fit the panel side walls.

And here it is test fitted on the Holo pod.
The idea is that this could be fitted and if work ever needed to be done,
so unscrewing required, paintwork wouldn't be damaged.

Not posted up pics of the LED lit up inside the Holo Eye, theres a mini video on my Instagram page. The pictures give the impression it's REALLY bright, but that's just the camera adjusting to the brightness.

The second picture is better for being able
to see the insides of the nozzle.


---

My friend Paul popped over with a un-used 3D printed Radar Eye. It will of course need the sides worked on to get them sitting flush to the curvature of the dome panel. But I've managed this before on R0-D4's dome.


Had to be done, lol, a test fit of the Radar Eye on the Dome.


---

Then it was back on with sanding the primer
& then applying wood filler onto the panels again.

June 16, 2016

'R0' dome build - 3.9 'Radar Eye - silver detail'

Was in two minds about how best to apply the 'silver' detailing to the radar eye. I found that my small paint brushes had seen better days......so painting was out the window lol. So I got out my silver tape that I had used on R5's lower neck ring. I measured and cut it to width.

I applied the two side grooves first then applied the full length groove.

I decided not to spray the radar eye, as only have gloss clear and I want matt clear.

Test fitting on the dome.


Next is white spray paint.....

June 10, 2016

'R0' dome build - 3.5 'Radar Eye - side gaps'

There was a slight gap around the outer edges of the radar eye as it doesn't still sit flush to the dome skin. So as I'd seen this done before, I used masking tape to protect the wood dome skin & located the fixing holes.


Next I mixed up some filler (not fibre glass) and liberally applied it to the edges of the radar eye. I then screwed it into place, so that the excess filler would ooze out.


Before the filler dried fully, I scraped away the excess (no picture of this), to make life easier later. Once dried I removed the radar eye and cleaned up the edges.

May 10, 2016

'R0' dome build - 2.1 'Radar Eye'

The May Bank Holiday weekend (UK) I managed to work on the Radar Eye lens, in between 'life' and the dome itself.

Whilst searching the net for radar eye lenses, I found a Blog where the user had found and used the dome off a fake security camera. I watched a video about how he did it and then searched eBay for a cheap camera. Found this one for less than £2.

It came within a few days. Lol glad I only need the dome as the camera wouldn't fool anyone it was the real deal lol.

I placed a piece of paper on the dome skin and then the radar eye onto it. Then I drew inside the hole. I cut out the paper and used it as a guide to mark the plastic dome for cutting it out. This was the plan but when I transferred it to the Radar Eye rear hole, this plan wasn't going to work.


I thought that the radar eye hole should also be built up, but this seems to not be the case as the lens then doesn't sit correctly in it.

So I removed the material around the hole for the lens to sit how it should, as if it was to sit on an R2 dome. 
After a lot of shaping on the rear of the opening so the lens fitted as best as possible, I then marked again where best to cut with clearance.

Then used the sanding drum on the dremel to reduce and shape the lens to fit the rear of the eye.

A bit more sanding to get the edges of the lens flush with the radar eye, to achieve this final look.....

'R0' dome build - 1.7 'Radar Eye'

26th April

Picked up a tub of P40 glass fibre bridging resin, to fill out the back of the radar eye. I added some more cardboard where it was needed and once happy, started to mix up small amounts and applied to first area.
R0-L0, Astromech droid
I slotted some cardboard into the data slot just to keep it open.

Second lot of resin applied to right side area next...

And here's one in colour, so you can see the resin lol
R0-4L0, radar eye

Made me chuckle looking at the front & lid of the P40 tub, as the 'un-offical' image of an MG Meastro lol, and the instructions have not changed since 1985!!
.........once fully cured, I trimmed off the excess.
~~~

Taped down a sheet of course sandpaper and holding the radar eye as horizontal as possible, moved it from side to side, then vertically. I kept testing on the panel next to it for fit, no wobble an minimal gaps.
R0-L0

R0-L0


I then applied filler to the edges to sit flush with the dome.

'R0' dome build - 1.5 'Radar Eye'

April 22nd 2016

I thought I'd see what all this 3D printing stuff is all about lol.

My Bosses Boss, recently bought herself a 3D printer and offered to print different stuff to test the machine. So I found an STL R2 radar eye and she was kind enough to print it off.
R0-L0

R0-L0

Material is PLA, which on reading up is not the best if you want a good surface finish.....on the radar eyes front face, lol. Never mind. Nine hours later and I have a radar eye printed.
Just needed to be filed and sanded, filered and re-sanded to get a good smooth surface finish on the front faces.
Radar eye, R0-L0

Radar eye
The 3D file was not 100% correct. These little details were corrected tho.

Next was to build up the rear to meet the domes surface. I used car body repair resin, once I had boxed in the sides etc. Added some cardboard to the side's and inner faces.
Radar Eye


Radar eye

The cardboard gives a rough idea of the level needed to be filled so the Radar Eye sit's flush with the dome.