Showing posts with label Pie hole. Show all posts

January 27, 2022

The Book of Boba Fett: R5-D4

*** SPOILER ALERT!!! ***

The Book of Boba Fett

*** DO NOT SCROLL DOWN ANY FURTHER *** 


*****


****


***


**


*


Sat down to watch Episode 5 of The Book of Boba Fett and was excited (as always) to see R5 in action 😍😍😍😍😍

Flicking between watching the scene and paying close attention to R5.... I was disappointed to notice continuity errors in his appearance 😞😞😞😞😞.

When R5 was re-introduced in The Mandalorian, session 2, there were the usual hype and details noted which could be explained away as 'over time this and that were fixed'. OK, so THIS version is the NEW version, that's cool.

Then in his latest appearance, I noticed a few details and ALL in the one scene!

The above images were captured, in time order in the scene he appears in.

  1. shot, no motivator panel, no rear box red strips.
  2. shot, motivator panel in place, red box strips.
  3. shot, repeat 1st shot.
  4. shot, repeat 2nd shot.
Now, either one of two things:
  • The version with the motivator panel in place [which was seen in the behind the scenes documentary on Disney+] is the REAL remote controlled version.
  • The version with no panel in place is either a repainted version [filmed at a different time] or is CGI.

January 07, 2021

R4-D4 dome lid modification - part 2

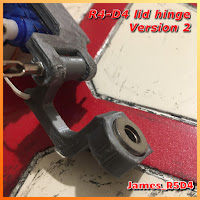
 Did some 3D design work for a servo pie panel hinge.

Flat servo panel hinge

Yes, there are ones out there, but they are designed for R2’s dome (curved). So after looking at some, I designed version 1, that hopefully will work. It also has to be able to be mounted to the underside of the dome lid, which isn’t very thick. So after testing this version 1 out, version 2 may have to be slightly different to be able to be mounted.

Lid hinge version 2

So version 2, incorporates a larger area to allow a magnet to be glued into it. This would attach to the lid panel with location pieces of wood perhaps and them glued in place?? The washer would also be glued to the lid. The servo holder part may also need to be updated to be able to be secured in a similar way.

Had another idea ......which I liked better than securing the magnetic hinge part with wood. I drew up and printed off a 3D panel which looks ‘mechanical/electrical’.

More in next post....


July 23, 2015

Motivator Pie hole - internal wall's upgrade

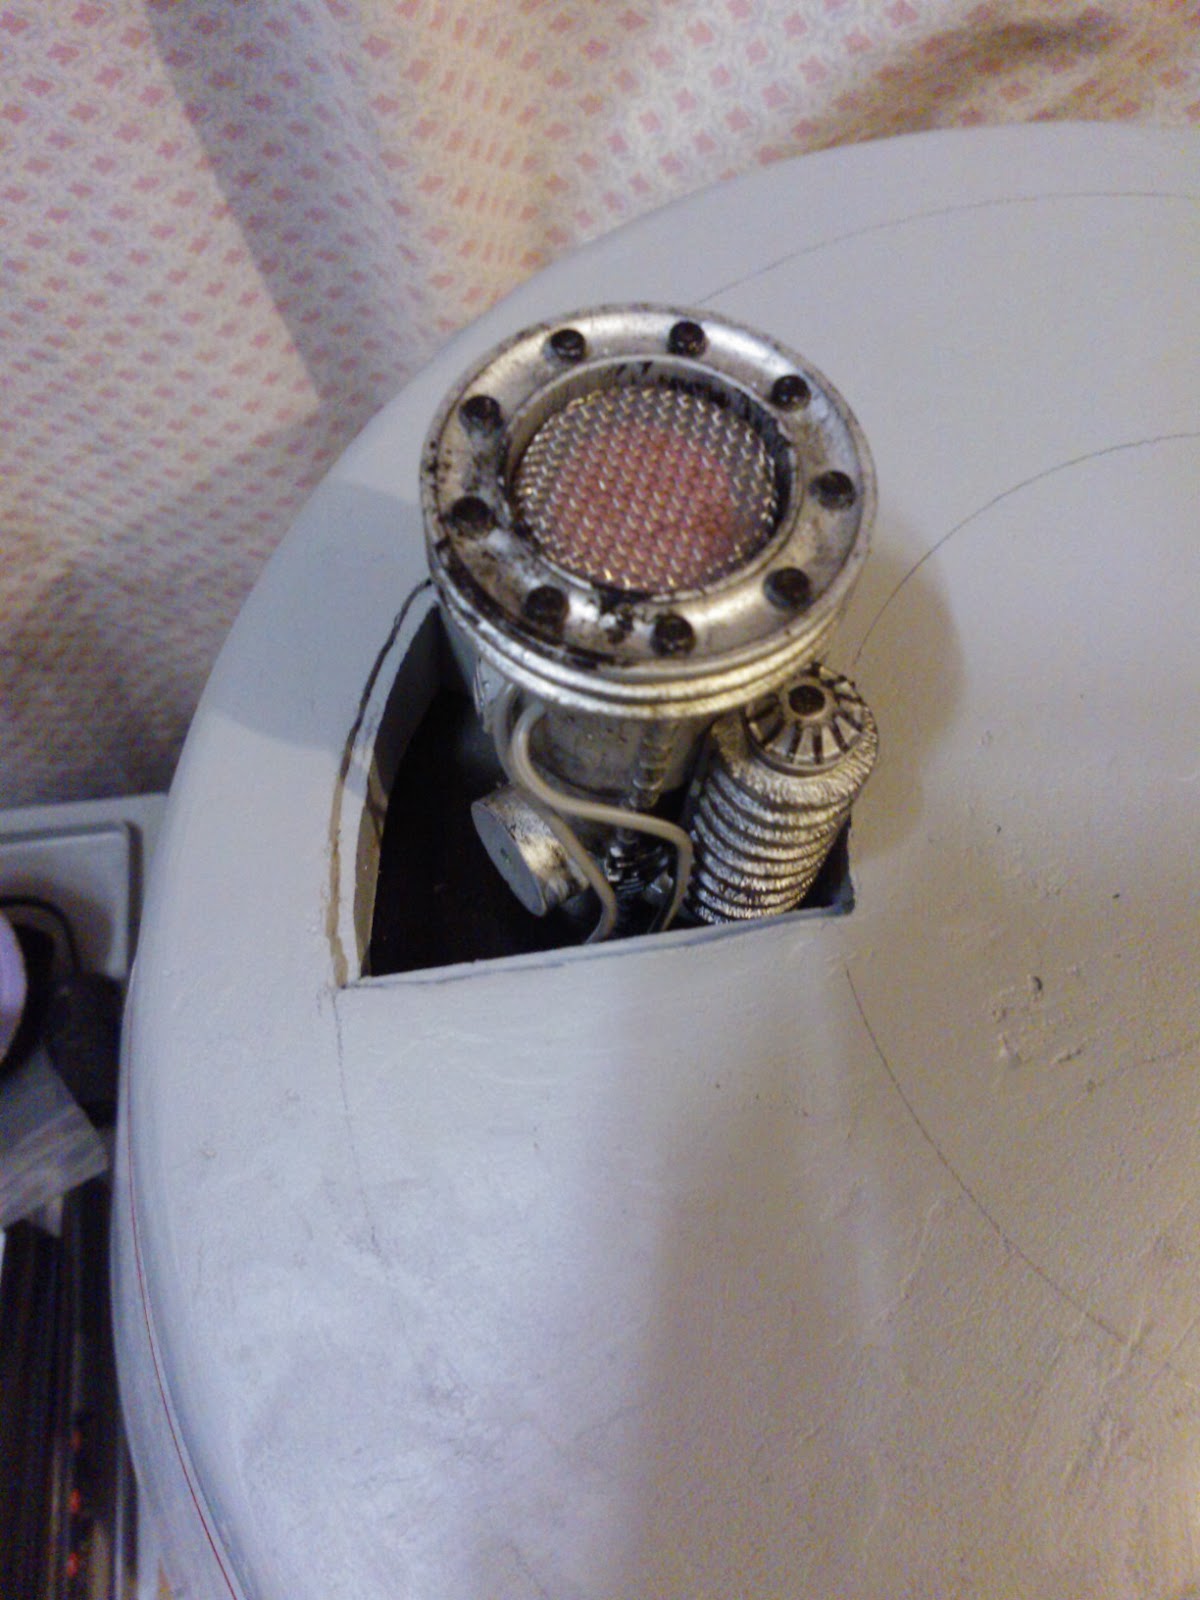
The internal walls of the motivator pie hole need some work done on them. So cut up some circuit board and shaped them a bit. Keeping it simple, the boards are flat with low flat chips on them. Then sprayed them up with grey primer. I added some holes and fed some thin wires through. These were glued in place with a few then being cut. I added these after the primer to retain the wire colours. I then sprayed some black over them. The can I used was old and rather than give a nice fine mist, it spat the paint out. Wasn't what I wanted, but actually, it's not that bad lol.

Next I painted the inside of the pie panels with grey paint, before glueing in the circuit boards. These had to be positioned so as to allow the motivator movement up and down. Once this had all dried, I got out some black pained and filled in between the circuit boards to darken the sides up and give it the burnt, smoke damaged look.
R5D4, bad motivator

R5D4, bad motivatorR5D4, bad motivator

February 23, 2015

R5-D4 - Bad Motivator Smoke system 1.3

Installation of smoke system into R5-D4's head.

Un-installed the dome digital voltage meter, not going to need it 'inside' R5's dome for the upgrade. Then figured out a way to semi-perminately mount the e-Cig unit. I wanted clips so the it would be held in place but could also be removed if needed. I knew these found clips would come in handy, result! Cut some MDF to a size and screwed the clips on.

Test held the unit inside the dome and its position and it all fits and works.
E-Cig smoke R5D4E-Cig smoke R5D4


Cut some foam leftover from the transmitter Scanner Case (link) and cable tied it to the pump.......

Next will be actually fitting the unit and the pump system.

October 13, 2014

Motivator Pie Hole - wood filler time again

Small update:
The weekened I bought some more 'multipurpose filler'. This stuff is great and have used it on different parts of R5's build, body, legs, foot shells etc and it does the job well.

Removed the Motivator from the Dome and got to work filling in the sides that were left after removing the original wood side's.

Just need to sand smooth.

October 03, 2014

'Bad Motivator' - upgrade to power lift 'Blown' status 1.2

Tuesday 30th Sept.
Almost finished making the frame/support bracket to hold the door look actuator (solenoid) with. The unit will be secured with two screws to the inside of the dome.

Some thought went into this build (the very basic idea of what I wanted) and some bits weren't lol. As this build was mostly guessed on the fly, I kid you not lol. As I need to figure out if I'll be able to screw in one of the mounting screws, as its partially obscured by the actuator (solenoid) lol. I had to move the actuator over as the top angles securing bolt was in the way.

I wanted to make the bracket(s) as light as posible, so I weighed one before I took it into work and machined off excess material.
R5D4 bad motivator
I didn't get the chance to weigh the brackets after machining, but we'll assume they are now lighter lol.

Friday 3rd Oct.
Well here's some pics of what the whole thing looks like installed. Oh yeah, re: how I was going to fix the actuator's bracket in place....I marked and screwed it down first, then screwed the two securing screws for the actuator into place. These were not so difficult to reach, phew... :)
R5D4 Bad Motivator

R5D4 Bad Motivator

R5D4 Bad Motivator

I've jet to wire up to power, but test moving by hand, I think it will work OK.....

September 26, 2014

'Bad Motivator' - upgrade to power lift 'Blown' status 1.1

 Because the original mounting hole position was so close to the pie hole opening, the mounting bracket's hole wouldn't reach it without me having to turn the hole in it into a U cut out, which for location and securing I wasn't happy with. So got to cutting up some aluminium angle and a spacer block.

Bad Motivator R5D4 Bad Motivator R5D4
Motivator in the up position (left pic) & down position (right pic)

Drilled and tapped M5 threads into the spacer block. To be secured through the angle support from the rear face.

Next up was to make the top securing plate. Firstly I realised that I could use the other T-nut location, which meant that the Motivator would actually be the right orientation as in the Film [face-to-palm] lol. This made fitting MUCH easier.

So drilled the hole for the M8 cap head bolt and positioned it in place via the T-nut inside the Dome. Then marked where the best position and fit was for the Motivator to slide up through the pie hole. A second smaller hole was drilled to help secure and keep the top securing place located correctly.


Then, back to the top securing plate. This was trimmed for clearance for the pie hole opening, marked and M5 clearance holes were drilled to secure through into spacer block.
Bad Motivator R5D4
In the above picture you can see I've now mounted the
Motivator to the other side of the pie hole.

And here's the view from the top of the Dome.
Bad Motivator R5D4Bad Motivator R5D4
Left pic is Motivator in down position, right pic is in (max) raised position

Next is sorting out the 'remote lock servo' to lift the Bad Motivator.....

September 24, 2014

'Bad Motivator' - upgrade to power lift 'Blown' status 1.0

Here's my work on building the frame to hold and lift up the 'Bad Motivator' when it 'blows'.

18th September 2014
After doing some measuring, I've worked out the length of a beam and point to act as an off set pivot point. The movement on one end will then be more on the other end. Am hoping this will 'pop-up' the motivator as if it had blown.

I cut a small piece of angle and drilled a 12mm dia hole in it. This will be secured by the motivators main bolt & nut that goes right through it. Next, two M5 threaded hole to bolt onto a main section angle. This has guide blocks with guide rods to ensure the motivator lifts straight up.

Originally I had flats machined onto the rods and tapped out holes for locking screws, but the threads stripped, so I drilled and pinned the rods from the other side.

22nd September 2014
Next was to drill, tap and pin the upper block to the Motovator's angle bracket.

Looking at the Motivator moving up through the pie hole, I could see it was a little tigher than I would be happy with. So I had to prise out the two inside side pie hole panels. This will need to have wood filler applied, smoothed and sprayed up (See last two pics below).

Using a piece of aluminium angle, I cut and bent it into shape to act as a securing bracket to mount the Motivator assembly to the original inside bolt hole.
(This bolt location was what was fitted to secure the static motivator into the pie hole socket)

23rd September 2014
Drilled a hole in the support bracket, this is for securing to the T-nut already installed in the dome. I cut down the guide rods to a more suitable length. Then the run part, adjusting the hole in the support bracket with a file so that the right amount of clearance was achieved for the Motivator to fit/slid/pop up through the Pie Hole!
This little lot took over an hour and it's still not 100% right.....more fine tuning required!


View into the Pie Hole


March 07, 2014

R5-D4's Head 4.7 - clear spray coat

Tuesday night, I stripped R5 of all his eye 'sensors', Dome rods & motivator brackets. This was in preperation for clear coat spraying.

I was planning on doing this Wednesday, but remembered i wasn't going to be in work. Then Thursday I needed to finish off some silver detial work & remove parts from R5's body, ready it also to be clear sprayed up.

So today's the day. I applied masking tape to the inside of the Domes holes and using works spray booth, got to clear coat the Dome.

Photos to follow.......

February 28, 2014

R5-D4's Head 4.6 - Cone spraying white & red

Masked off the lower part of R5's head, to leave the Cone area exposed. We have large waste bin bags [clean lol], and R5's head fits in perfectly. The Cone need's re-spraying as the grooves were cut in to form the Pie Panels.
R5D4 Head
Primer applied, then I rearrange masking for white top coat. I masked off as close to the lower red pin stripe as possible to try to elimiate any visiable 'step' lines in the paint. I then sprayed the cone of the dome with Plasti-Kote Satin White.
R5-D4 

26.02.14
Cone now white.
R5-D4R5-D4

27.02.14
Once dried and after a light sanding, I got to work on masking off the dome, leaving the pie panels and space for the upper pin stripe to be sprayed on.
R5-D4 RedR5-D4 red
28.02.14
The Pie Panels were next, not so critical as the grooves will be painted silver so any over spray will be covered.
R5's pie panels
30 mins masking all the panels and Dome off, for all of 5 mins spraying! lol Also sprayed up the removable Pie Panel for Motivator!

R5-D4 RedR5-D4 Red

And with the masking tape removed......
R5-D4

R5-D4 Red

Next, silver grooves were hand painted in.....on......no, in lol.

January 06, 2014

Motivator Dome Panel 1.1

Over the weekend, i glued up the pieces i had for the panel. It's made so that it's a snug, drop-in fit. PVA watered down glue was applied all over and left to dry. A light sanding then followed.


Here is the almost pre-finished motivator dome panel build.

January 02, 2014

Motivator Dome Panel 1.0

Decided to make a start on a panel to cover the Motivator pie hole, in case I needed a pie panel to cover it, think that explains it lol.

I used cardboard templates first, then cut out side supports. I've also made a piece that will be the fake upper 'groove'.

R5D4 Motivator Pie Hole Dome Panel
This is where the new panel is going to fit.
R5D4 Bad Motivator PanelR5D4 Bad Motivator Panel

These two images show the inside upright supports that the panel will be attached to.

December 05, 2013

Motivator Base Plate - UPGRADE


Used the first plate as a guide, I marked onto a new piece of scrap aluminium,
the same mounting hole positions and drilled through.
These are the two holes furthest apart [top & bottom in pictures]

I then marked the new position for the motivator securing bolt to go through [middle hole],
which is off-centre now to the securing bolt holes, and drilled.
This will allow the Motivator's position to fit better in the Pie Hole opening.
R5-D4, r5-d4, r5d4, R5D4, bad motivator
Motivator Base Plate, 1st attempt on left, UPGRADE version on right.
(which still needs a hole for wires to fit through)

December 02, 2013

R5-D4's Head 4.5 - Pie panels grooved

Tried to use Stanley knife to score out the grooves, then my 'grooving tool',
but this was not going well and would of taken forever!! Lol.

So tried my Dremel with metal milling cutter fitted. (this is not the right cutter, but was all I had, that was flat bottomed and roughly the right width). It worked a treat.
Depth was set using the Dremel router attachment.

An hour later, carefully cutting free hand, seven pie sections finished.

R5-D4 Dome pie panels

R5-D4 Dome pie panels

They just need a little work, but am really happy with how them.

November 29, 2013

R5-D4's head 4.4 - Pie Panels marked out

Got my protractor and rule out and used it to help mark out the positions of the other pie panels.
Then with pencil and rule, I marked them out.


Next is to groove out the panels.

November 25, 2013

R5-D4's Head 4.3 - Pie panel marking's & Motivator position

Using the centre of the dome, the dowel is just still visible, I drew on where the inner and outer diameters are. Gauged against the original pie panel opening. I knew that the centre eye and motivator pie hole were in-line from before I built up the cone, see pic of dome marked out when flat. I then drew on at 90 degree angles, centre lines for these. Next was the other pie holes @ 45 degrees from centre line.

R5-D4 Dome
The plan is to mark and groove the panel 'lids', so watch this space..... Lol.

Motivator position:
I plan on moving the motivator further out, so it sits more central in the opening.
R5-D4 Bad Motivator