Showing posts with label Dome side Rod - R5-D4. Show all posts

July 14, 2020

Funko Pop Astromech - 3D.......complete!

Last Friday, was a long day of working on finishing off the 3D modeling.

  • Body - rads added to corners.
  • Dome - full build, with eye's, sensors, dome rods, pie panels & antenna.
  • Then just for these pictures, some colour added. 
Funko Pop Astromech 3D
R5 colour scheme added, missing pin striping on dome.
A few alterations as they were bugging me....
The antenna, now points forward & I've added a restraining bolt, to match mine and R5.

I'll hopefully get this all printed soon, and then once happy, I'll upload to my Thingiverse page.

May 10, 2016

'R0' dome build - 1.8 'Skin - recessed boxes'

27th April
I checked the off-set needed so that the recessed boxes, wouldn't interfere with the internal verticals. Once happy, I marked the first box.
R0-L0 dome


Cut out the first hole for the recessed boxes (3 off).
R0-L0 dome

Then I measured and marked up the strips that will be the skin recess/step. I roughed up the smooth surface a bit with sandpaper first before I applied wood glue and whilst letting it to set a bit, I grabbed some scrap wood and my G-clamps and glued them in place, one at a time.
R0-L0 dome

R0-L0 dome

R0-L0 dome
Next (pic below) on with the second side.
R0-L0 dome

For the upper and lower pieces, I cut vertical slots in the back face, to help them bend a bit to the dome curve.

Then roughed them up with sandpaper before glue and clamping into place.
R0-L0 dome

These have held really well (I sound surprised, lol) The opening is a lot stronger and once the rear recessed boxes are in, will be super strong.

April 18, 2014

Weathering 1.2 - R5-D4's Head

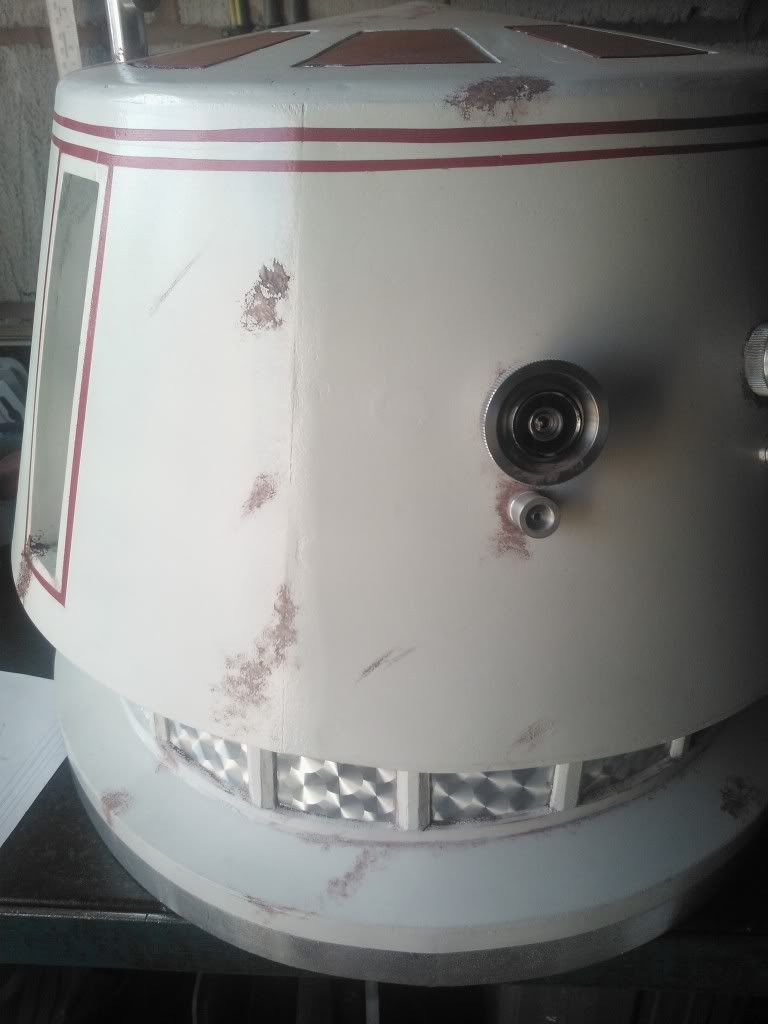
This morning I started on weathering R5's head, by applying Burnt Umber around the neck, side recess, eyes, top pie panel grooves and around the base of the Antenna. This is just the start. One good thing I've noticed is that the woods imperfections help when wiping off the paint as it sinks into them giving a 'pitted' surface finish.
R5-D4R5-D4
These pics were taken right after paint was applied, so its still wet. But looked a lot better once dried. Should look even better once rubbed off a bit and ochre applied.

March 07, 2014

R5-D4's Head 4.7 - clear spray coat

Tuesday night, I stripped R5 of all his eye 'sensors', Dome rods & motivator brackets. This was in preperation for clear coat spraying.

I was planning on doing this Wednesday, but remembered i wasn't going to be in work. Then Thursday I needed to finish off some silver detial work & remove parts from R5's body, ready it also to be clear sprayed up.

So today's the day. I applied masking tape to the inside of the Domes holes and using works spray booth, got to clear coat the Dome.

Photos to follow.......

November 21, 2013

R5-D4's Head 4.2 - Cone prep work & RED paint!

Yesterday morning I used a rather large plastic bag (used for rubbish bins] to place R5's Dome into. I then sealed off round the edge with masking tape. Next I applied some watered down PVA glue to all the exposed sanded wood that had paint removed from sanding the joining edge of the cone to the Dome sides.
Lunchtime, I took R5's Dome into the spray booth (work). And primered up the cone and inside the pie hole.
R5D4 pic of masked off dome for pin stripes
Then that evening, I got on with masking off the dome ready for spraying the red pin stripes around the two recessed side boxes, as R5 has in the film, the rear dome rod recessed box, doesnt have pin stripping. And also the lower of the two circumferance pin stripes to. The upper one will be applied after the dome's cone, has been sprayed up white. So, 1hr later, I'd marked off the edges with red pin stripes and then masking tape holding the plastic sheet.

R5D4, Red Astromech, DomeR5D4, Red Astromech, Dome

For all of two minutes in the spray booth in work lol.
R5D4, Red Astromech, Dome


Am quite pleased with how these have turned out. Using the pin stripe tape reduced the amount of paint bleed. I didn't think to use it on the inside edges of the two recessed areas and the masking tape has allowed the paint to bleed a bit. I'll try to clean this up, but once a bit of dirt is applied it will just add to the old/used look of R5 :-)

July 05, 2013

R5-D4's Head 3.4 - silver tape applied

I was originally planning on spraying the silver dome band. But thought I'd give the silver tape a second chance lol. My last go at using the tape on the leg spacer discs didn't end well.

I first wrapped the tape around and cut to length. Then applied, peeling the backing tape a bit at a time. I then trimmed the width and stuck the excess under the edge. I then used a cloth to smooth any bumps & creases out.
R5-D4

Then I fitted all the dome components back on.
R5-D4

R5-D4

R5-D4

All ready for tomorrows appearance at my children's school summer fair :)

June 14, 2013

R5-D4 Head & Body fitting with all components

As I had all the recessed boxes bonded into place, I wanted to test fit them all :)

I had found a Hex socket counter sunk screw for the single lower dome eye. I fitted the screw through an old 'thingy', that i've had in a tin for years lol. This is all then held with a nut inside the dome. i also fitted all the other components. inside the dome as well.
R5-D4 astromech Droid

I need to make up three spacer pads for the main Eyes. As theres not much holding them on the inside if someone accidently 'grabbed' or' leaned' on them, worse case synario. So that's my lunchtime job for today.

And I had to then test fit everything.......again :)
R5-D4 astromech Droid

R5-D4 astromech Droid


I also started on painting the grooves silver. A very steady hand! Lol.
R5-D4 astromech Droid

And then I test fitted everything together......
R5-D4 astromech Droid

R5-D4 Astromech Droid
Forgot to 'test fit' his Antenna tho lol.

Then It all came off and I finished off a can of primer on the Dome.
R5-D4 Astromech Droid
.......and then started touching up with wood filler.

R5-D4's Head 3.1 - Recessed Boxes

Used dremel with sanding drum to cut/sand out a section on the [internal] lower dome ring, to allow clearance for the recessed box to fit up against the inside of the dome. Then started on cutting out the other two box recess.


I also started applying P40 resin into the joins between the angled skin pieces to strengthen them. So that lifting the dome is able to be done withought worry of cracking of joins & paint etc.

Then got to apply resin to bond the rear recess box to the inside of the dome. Also applied some to cover up the wrong holes. Then finished off by filling in more to the joins etc.

R5-D4
These are not pretty, but here's inside of the dome, side recessed box bonded in place
R5-D4
inside of the dome, rear recess box bonded in place
Dome Rod's issues.......???
How to fix the side rods in their recessed boxes = upgrade. Originally I had the lower section of the side Dome Rods, tapped with M5 threads. These would secure them in place, while the top section would slide up through a hole and then be lowered down to fit onto the lower section. But due to the internal frame now being in the way of locking the Rods in place, Something I hadn't originaly planned on, so it's onto 'Plan B'.

Plan B:
I drilled out the lower hole to be the same size as the lower section, so it will slid into it. I then cut a small piece of wood and glued it to the underside of the box. This acts as a stop for the lower section. This, along with the sides, was covered with resin to bond it all together.

Loads of sanding & top-up areas with more wood filler. Then sprayed all over with primer. This helps to find areas that still need work & also start to build up some undercoat layers.
Then applied MORE filler were it showed it was needed.

May 22, 2013

R5-D4's Head 2.4 - marking/cutting/fitting

So last Friday, I started on bonded the rear dome box pieces together with p40 resin. Cut side pieces for side box no1. Whilst this was setting I did some sanding of the wood filler on the dome rim.

I then decided to take off the upper curve, to be replaced with a longer piece. Then I realised that I had used the lower curve template! The upper curve is larger because the dome has a different angle.
The dome boxes being prepped for bonding
Saturday evening, I marked out on hardboard, using 1:1 scale paper templates, the correct upper curve in two pieces, [not four as before] for the dome itself. Worked out & Marked recess boxes & 'eyes' positions etc.

I positioned the dome top plate onto the hardboard and also the second upper curve. Managed to fit it all onto the one sheet. Then started to cut all the pieces out.

And then fitted the new upper curves into place.....
The curve still wouldn't keep it's shape, so I had to add the extra 'support' pieces.
Pictures below, show the two upper curved pieces fitted and the new upper 'support' pieces fitted where needed to help keep the curve [circled in red]. What I should of done was made up 8 [eight] main support unit's spaced around the main ring, that way I wouldn't of had to bodge these in. Never mind, a lesson to anyone reading and following :).

Before fitting the 'upper' supports, the gaps show the curve is not keeping it's shape 

Wood filler also applied


After reading and following this post over on the Astromech.net forum R5-D4 option for my R2.0 buildI went looking for 'spy holes' for doors. Most were quiet expensive, well the larger ones were, i.e. 180 degree vision x3 off = nearly £15. But eventually I found some on Ebay, total £4.79.
R5-D4's three eyes
R5's Dome Eyes

May 16, 2013

R5-D4's Head 2.3 - curve problem and Dome boxes

Lunchtime yesterday, I only had time to cut out three of the four curve pieces I needed for the Upper section of the Dome. Available material, meant I had to reduced the length of curve, hence four instead of just two. But, I had problems with fixing the first one and restraining it in a curve, whilst the bonding resin set.
This was the result. Not happy with this, so am going to have to get some more board to cut curve to original length and re-do it. I needed to get some more anyway as I don't have enough for the rest of the dome. In the meantime, I started sanding the wood filler I'd applied.

Dome recess boxes:
I have been looking into how I am going to fix my Dome Rods that I made, years ago. These fit into three recessed areas, one either side and one at the dome rear. The side rods are the same the rear is different.

What I've done for the two 'side' rods is drill a hole through the top plate so the rod slides up thro, then they will be secured in place with M5 socket head screws. The centre rod, which goes at the rear of the dome, will have a pin in the top plate, and a screw up from the bottom. Well, that's the plan, watch this space lol.

All three rods were machined in two pieces.This was due to the amount of material protruding out of the Lathe's chuck. Especially when producing the straight knurl, as the material is not cut, but deformed. 

February 15, 2011

Dome Side Rods x2

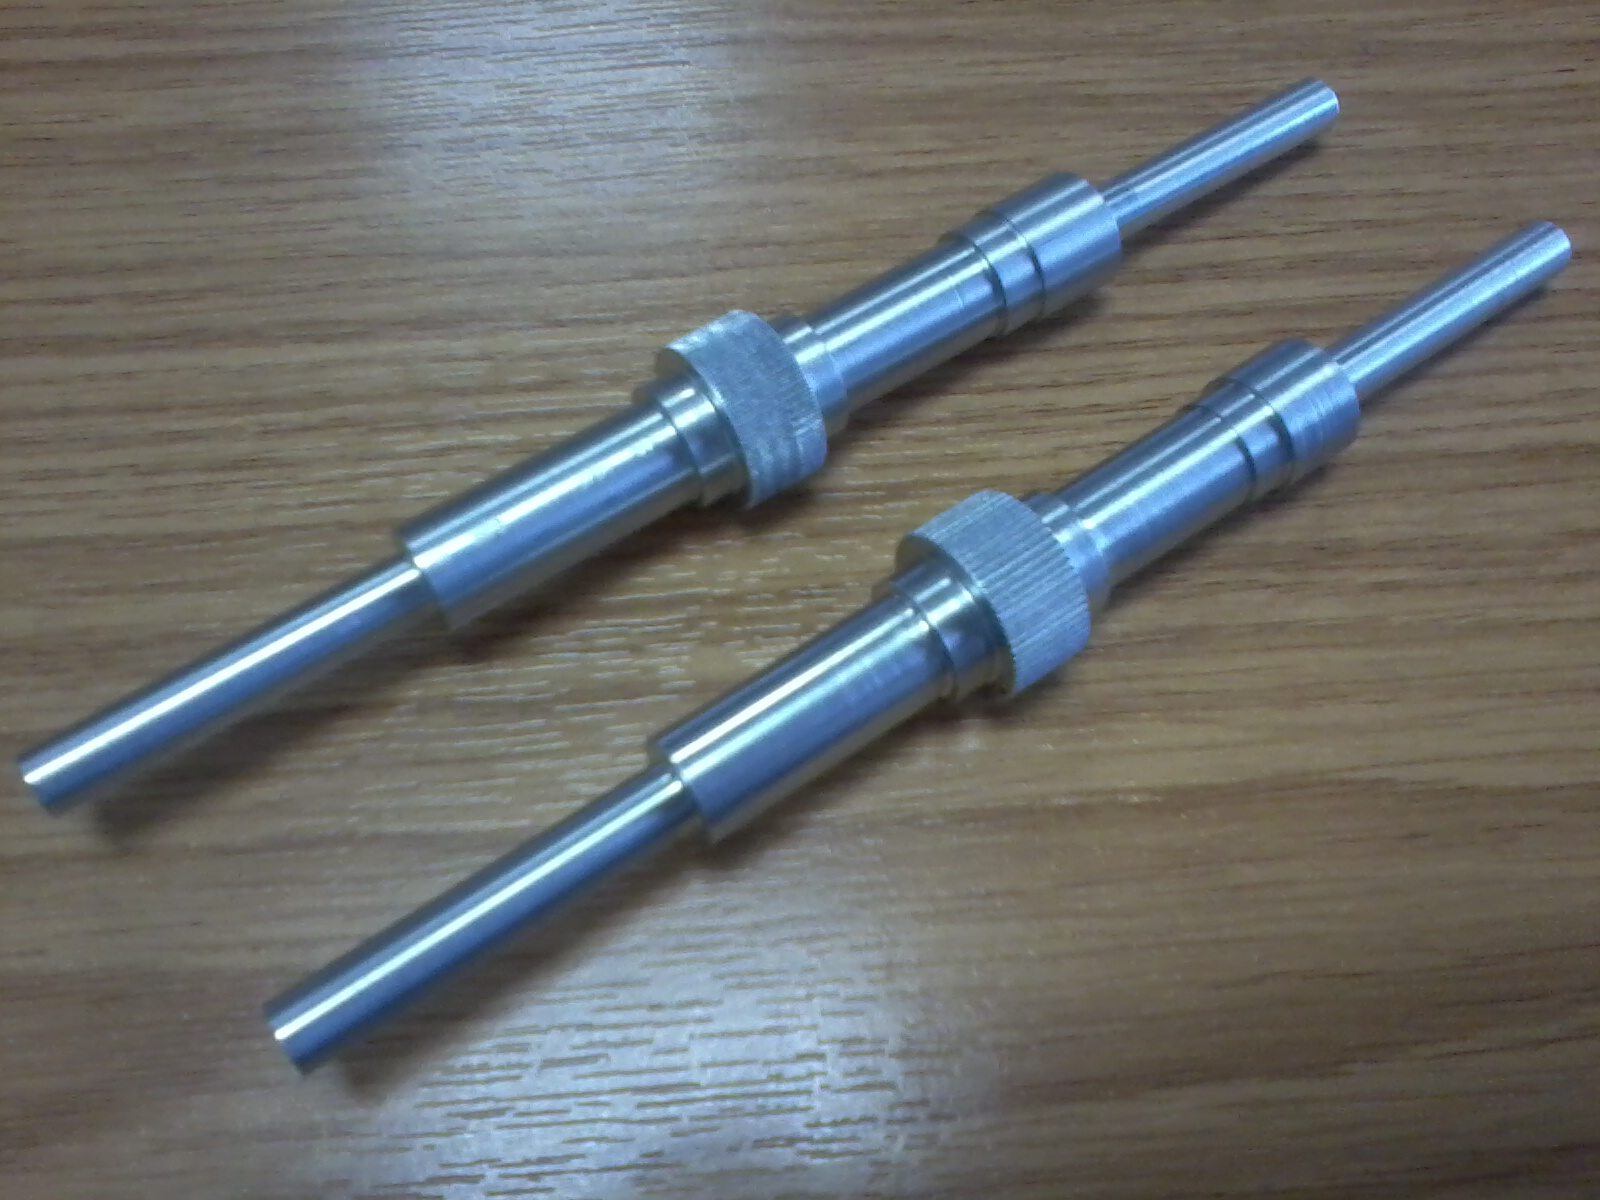
Just finished machining up the second Side Dome Rod. The straight knurl looks better than on my first attempt, but well just say that's it's like that due to wear! lol

February 13, 2011

Dome Side Rod, picture update.....

There will be two of these. Due to material available, I had to make it in two parts. This actually made making it easier.
Side Dome Rod
Just need to finish the top half of the second Rod.