Showing posts with label R5-D4's Antenna. Show all posts

April 03, 2023

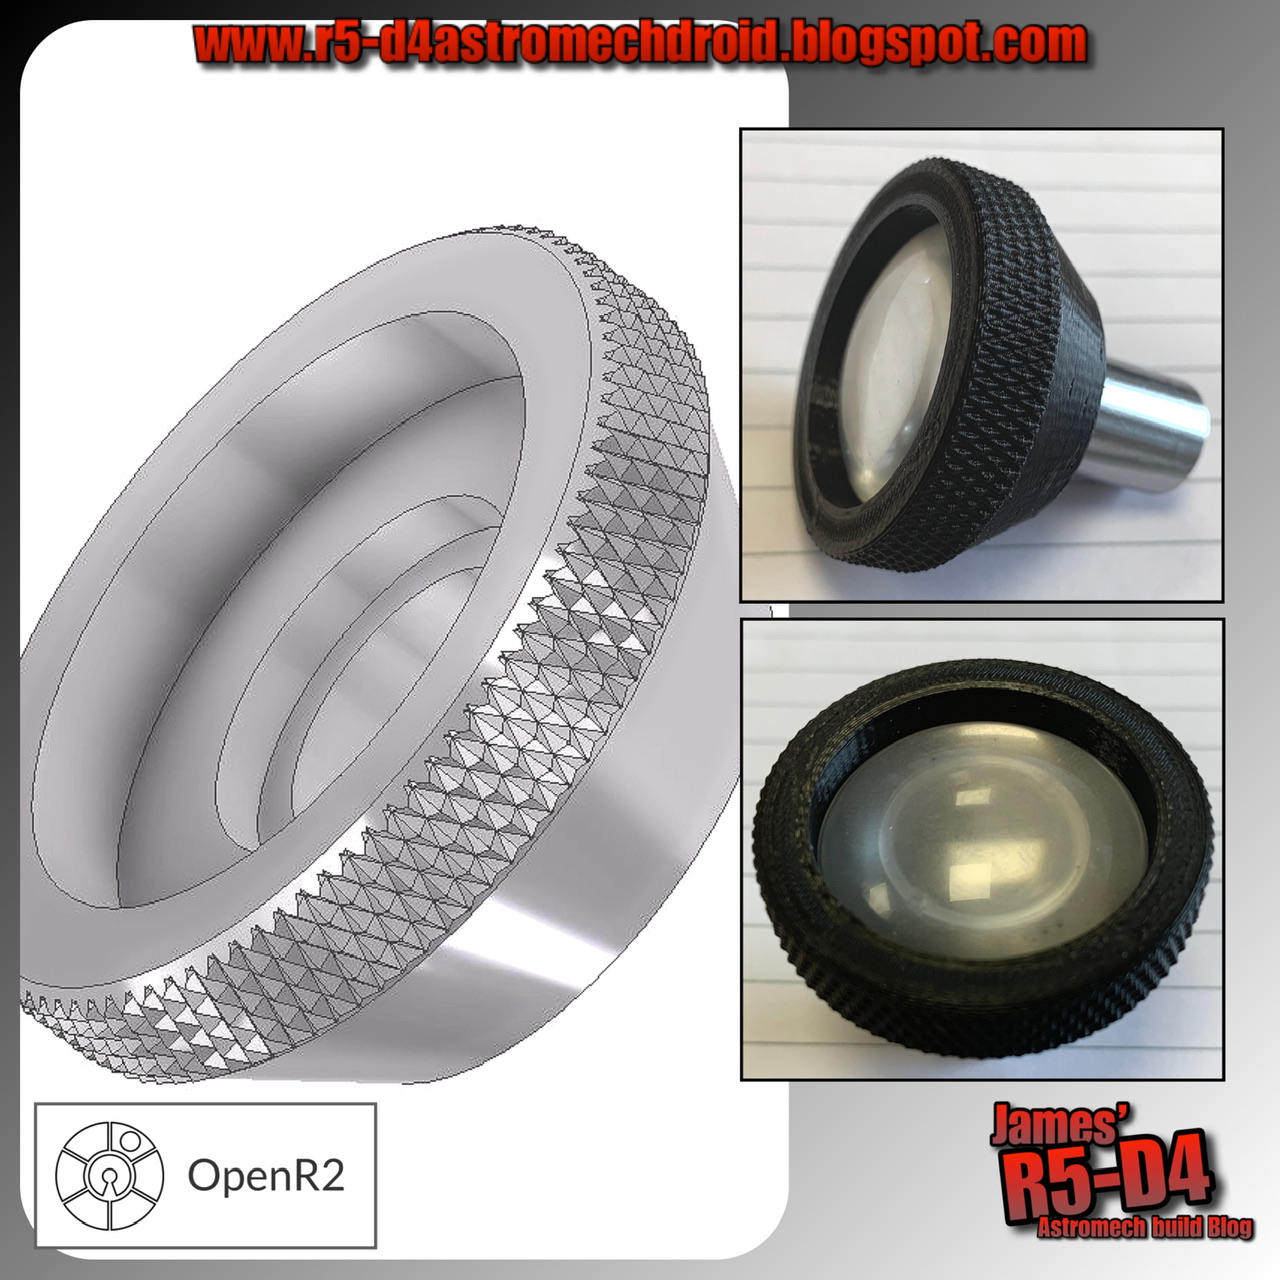
Screen accurate R5 eyes - found part by OpenR2

Over on the R2 Discord chat, OpenR2 member raised the question about R5’s eye sensor not being like the ‘club spec standard’ design but actually being conical.
As with lots of items used in the original trilogy, unusual looking things from everyday items were used in different ways. OpenR2 showed a high resolution image of R5’s eye and the shape/shadows showed it to be conical and not the stepped look us club members have been using all these years. As stated above, a lot of the droid greeblies & even Boba Fett's costume and jet pack, in fact came off  vinyl record decks, specifically a Transcriptor Hydraulic Reference Turntable .
He posted up the high res pictures and the turntable, similar to the one below.

Items also (possibly) used that match is the vinyl sweep brush which resembles R5’s antenna.

I have always found the search for these found items to be of great interest, so this was something that I had to follow up on. Online searches revealed the record deck's history and more [see Transcriptor link above].

So using the 3D CAD model I had already drawn up years ago, I started on modifying a version to match that of the image supplied by OpenR2.


Creating a 3D Knurl:

I also had to find out how to draw up a knurled effect. Previous jobs have only required the superimposed image of a knurl, but I needed the actual knurl for 3D printing. I found a quick tutorial on YouTube which helped put me in the right direction as to which creative option to use, 'coil'. Once one groove was created, I then copied in 'circular' to multiply around the diameter. Next was to create a new 'work plane', and offset it half the distance of the knurled with. I then mirrored the original 'circular' grouping and this created the opposite grooves to create the knurled effect.

The above image was version (attempt) 'd' or 'e' lol.
Eventually settled on version 'F'


Throwback to 2013:
Wow…..10 years ago I had finished machining up two of the three eye pieces that would have the spy holes lens units fitted.

Here’s the link: R5-D4’s Eyes - update

Back to 2023 and here are the new more realistic eye pieces.


And here they are being painted.


Next up was to cut out some opaque plastic that I had salvaged from a flat screen monitor. This was placed in the recess after the rear part of the original eye piece was fitted through from the front. Then I pushed in a cabochon into each one.

These were then re-fitted back into the dome, and secured in place. I then hot glued the original LED’s back behind them.


Really happy with the new look.
Check these out at #celebrationeurope2023 next week 😎👍🏽

July 14, 2020

Funko Pop Astromech - 3D.......complete!

Last Friday, was a long day of working on finishing off the 3D modeling.

  • Body - rads added to corners.
  • Dome - full build, with eye's, sensors, dome rods, pie panels & antenna.
  • Then just for these pictures, some colour added. 
Funko Pop Astromech 3D
R5 colour scheme added, missing pin striping on dome.
A few alterations as they were bugging me....
The antenna, now points forward & I've added a restraining bolt, to match mine and R5.

I'll hopefully get this all printed soon, and then once happy, I'll upload to my Thingiverse page.

September 24, 2019

Vintage Futaba Antenna - Ribbon indicator 1.1

Way back in January of this year I posted up my search and 3D printed design for the antenna ribbon indicator clip. There are two types, but this was the first one I found and so drew it up. See link below for previous post on this topic.
Vintage Futaba transmitter - R5D4

Click these link's to Vintage Futaba Antenna - Ribbon indicator 1.0 and also this link to my Thingiverse account & the ribbon clip.

I've been searching online over these months looking for an authentic blue ribbon, as seen in the above picture. I found one but the price was a bit much! So I picked up some blue ribbon off eBay, that matched as close as possible, to tide me over till I actual find a vintage one at a reasonable price.
reproduction vintage Futaba transmitter ribbon
I just need to cut it to a suitable length for the display unit.

April 18, 2014

Weathering 1.2 - R5-D4's Head

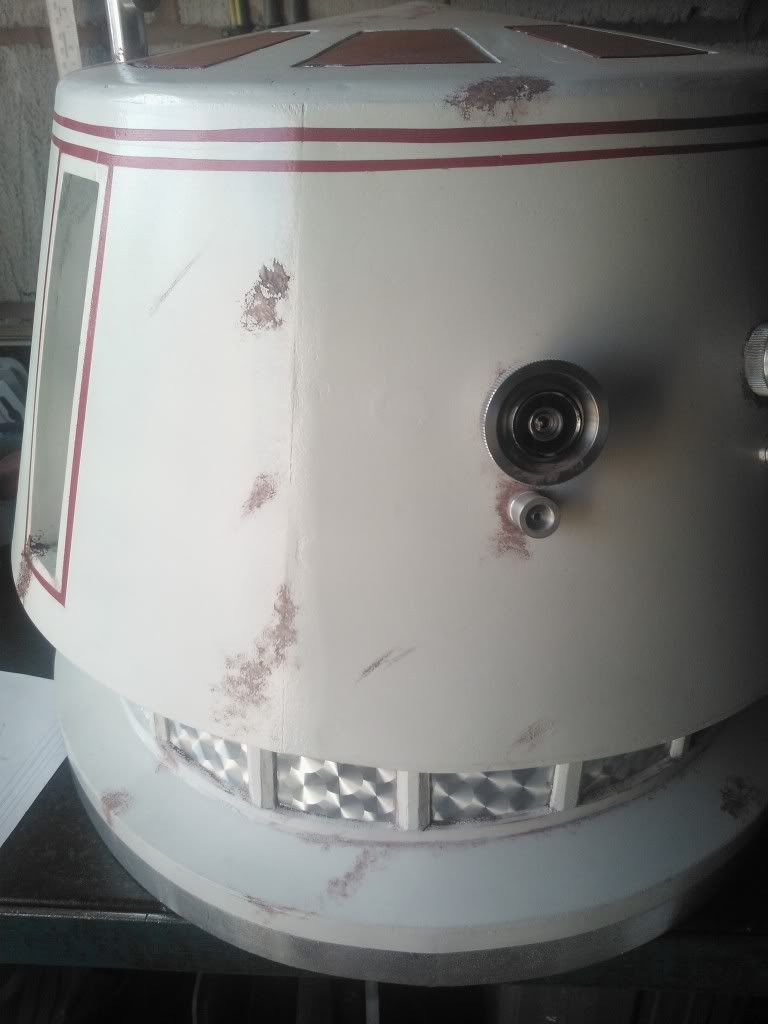
This morning I started on weathering R5's head, by applying Burnt Umber around the neck, side recess, eyes, top pie panel grooves and around the base of the Antenna. This is just the start. One good thing I've noticed is that the woods imperfections help when wiping off the paint as it sinks into them giving a 'pitted' surface finish.
R5-D4R5-D4
These pics were taken right after paint was applied, so its still wet. But looked a lot better once dried. Should look even better once rubbed off a bit and ochre applied.

November 22, 2013

R5's Dome lights & 'smouldering' Motivator

Last night I fitted the motivator, bolted it into place and then hot glued into a suitable position, its battery holder and switch. Bolted into place the Antenna. Then a test of all the lights.
I will be looking at re-wireing all these to run off the 9.6 volt battery pack installed. This will require someone to do some thinking for me regarding voltages etc lol. Will be easier and simplier. Fingers crossed for how long they all work for on Saturday! :D

November 05, 2013

R5-D4's Head 3.8 - Cone takes shape

So late last night, I got round to starting to apply P38 car body filler to the fibre glass resin already in place on R5's dome.

R5D4 Astromech Dome

R5D4 Astromech Dome

R5D4 Astromech Dome

R5D4 Astromech Dome

Now to start on smooooothing this little lot out!

July 05, 2013

R5-D4's Head 3.4 - silver tape applied

I was originally planning on spraying the silver dome band. But thought I'd give the silver tape a second chance lol. My last go at using the tape on the leg spacer discs didn't end well.

I first wrapped the tape around and cut to length. Then applied, peeling the backing tape a bit at a time. I then trimmed the width and stuck the excess under the edge. I then used a cloth to smooth any bumps & creases out.
R5-D4

Then I fitted all the dome components back on.
R5-D4

R5-D4

R5-D4

All ready for tomorrows appearance at my children's school summer fair :)

June 10, 2013

R5-D4's Eye Location issues = SORTED

Friday straight after work, I got down to comparing the Eye locations.


Marked the dome with a vertical line up from the width ends of the large data port up to the eyes & yes, the original position is too far over! Re-drill new holes & test eyes fitting.

I then drilled hole for antenna. This is roughly in the right position, but it can be repositioned when dome angle top is added, at a later date.

February 11, 2011

Photo's of work so far.....

As promised, here's work done so far:

Shoulder Buttons, (4 off)

Antenna
I had to make this in sections, the bolt will help secure from below.


The finished Antenna
The front 'sensor' is a push fit into the lower body section.
All made in several of my lunchtimes lol.