Back in October 2021
Whilst flicking through my saved images, I came across one that I knew I had to try to recreate. I just needed to figure out how to design it so that it could be fitted onto the Schumacher's frame.
As the item has already been produced, and unfortunately, simplified..... I wanted to go with the original design of the image that I had seen.
That image was created by Jeff Allison designs.
So I made some measurements of the chassis and started to draw up this new shell. I then sliced it up:
- So that, test assembling is easier, if parts need modifying or re-printing, saves having to RE-print the whole shell (which was required).
- For ease of printing, available time, but also so that it could be printed off on a small bed like mine.
I had already drawn up and printed off three parts, one had to have changes made to it to be able for it to fit, see point 1 above, the model has been changed to accommodate.
September 6th - 10th, 2021
So over the course of a week, I drew up, 3D printed and assembled the pieces, checking the assembly in AutoCAD Inventor, fit of faces to be glued and that the shell will fit over the cars chassis. I also found another ref picture of the actual model, which meant I had to modify a few parts and also draw up some others. Glued and applied filler, sanded smooth, draw up some more extra pieces for this project version.
I got this…..
Next up was the main body, which I printed in two parts to save on support wastage, rear wheel arches and side panels.
Rear arches fitted.
Test fitted on the chassis.
September 13th - 17th,
Small progress this week, as I wanted to draw and print off a few extra pieces to cover over the exposed battery and also fill in the gap on the opposite side to the battery. These are now printed and glued in place ready for filler. See below picture.
I then applied filler.
Next, I printed the ‘dome’ and ‘lid’ (R5’s head parts). I was thinking of going with transparent PLA, but decided that my ideas for ‘more’ where going a bit to far with my imagination :-D
Once these were printed and sanded, they were glued together and filler applied, later to be sanded again.
The original plan was to glue these onto the main body, but decided to wait till after painting to save on masking off parts.
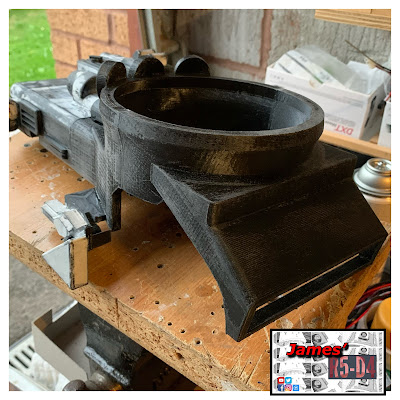
Designing the side exit exhaust pipes required some thinking. AutoCAD inventor isn’t the easiest program for creating curvy profiles in complex directions, if you don’t know how to :D . So after a few attempts, I decided to create two parts to then be glued together. In order for them to then fit, I had to cut away some of the previously fitted side covers.
October:
It was October before I was able to spray the shell with filler primer. A few coats with sanding in between. Then it was shelved whilst other parts of the build went on with GOUD-4’s sound system.
It wasn’t till December before I was able to pickup paint and get on with spraying up.
Allowed the paint to dry for a day or so, not as long as it should of had, but time was running out for it to be all ready for the Builders meet lol.
Next up was to mask off the areas that needed to be sprayed red.
I didn’t think to mask off the dome pie panels, but then I remembered that I didn’t want to so I’d be able to stand the shell upside down.
Once happy the red had dried sufficiently, it was time to mask off the pie panels and dome pin strip.
I didn’t do a very good job of masking off. So there were a few runs. I had to wait for everything to dry throughly before I could correct this by painting over with white.
Next was the silver paint. I took more care to ensure no runs this time. This silver is actually puiter . But is the best looking ‘silver’ finish I’ve ever used.
This stuff takes ages to harden off. And even then, I managed to get the odd finger print mark. Once happy it was all cured, I could move onto the final part. The holographic neck tape squares. I cut these to size and then stuck them face up onto tape. I then peeled off the holo’s sticky and carefully placed the strip onto the neck area. This worked better than I’d hoped.
I then sprayed the whole shell with clear spray to seal.
I had make some design changes to be able to create this and some I’m not 100% happy with lol


No comments:
Post a Comment