Showing posts with label Coin Returns. Show all posts

September 17, 2015

April 22, 2014

Weathering 1.3 - Body, Leg, Outer Foot and Battery Box

My attempt at weathing R5's body. Started next to the fitted rear hatch and worked my way round. The Leg got in the way so moved onto this lol. This then led down to the Battery Box. I then turned him round and carried on with the Body, working down to his skirt (no pics yet).
R5D4


I got round as far as the Centre Vent's but didn't take pictures, will do for next post.
This is by no means perfect, not that it's supposed to be, just my interpretation.

January 07, 2013

Body Skin 4.5 - Silver Panel work

Finished of cutting out the two remaining slots on the Side Vent.

I fitted the 'Pocket' that goes in the Pocketed Front Vent. This along with the Front Coin return and also the rear Octagon Port, were secured with P40 resin.
Any gaps were later filled with wood filler.

Front Coin Return & Pocket Vent bonded into place with P40 resin.
I also glue in place a piece of wood to locate the rear screen for the Pocket Vent.

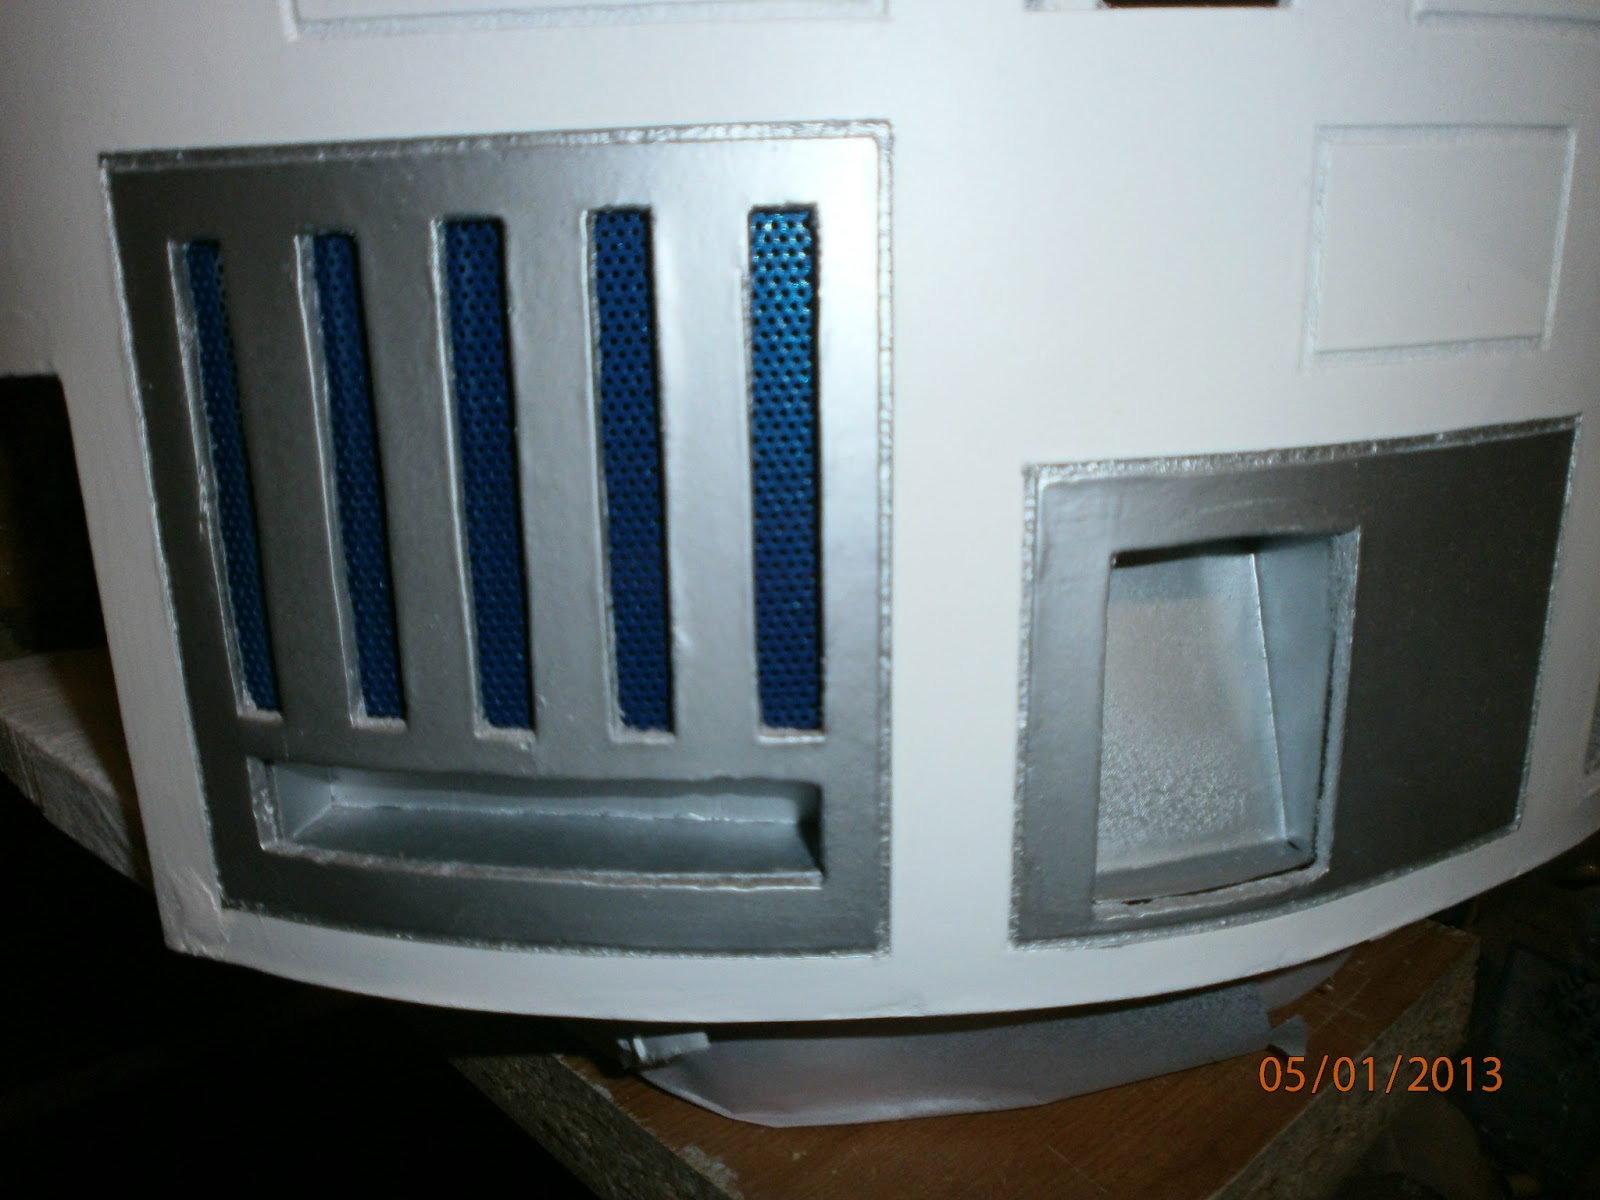
Decided that R5's body needed some colour, so masked off the skin and sprayed up the front Pocket Vent, the front Coin Return & the newly prepped Side Vent, with silver.

Side Vent sprayed silver
Side Vent, Pocket Vent & Front Coin Return

R2D2
Pocket Vent & Front Coin Return
I then masked off the front Vent Panel, where the two central vents will be fitted, and sprayed this up with metalic blue.
Central Vent Area
Central Vent Area

July 07, 2012

Body Skin 3.6 - Rear Hatch 2nd Coin Return in place

I bonded on the second rear Coin Return, using P40 resin.
And then once dried, filled the remaining gaps with wood filler.
coin return on right, bonded in place
wood filler in gaps

Once dried and sanded, I'll paint the filler with silver paint to blend in.

July 02, 2012

Body Skin 3.5 Body work, all over

The other day I started cutting out the slot's in the side vent.
You can just see them on the right of the picture.
Next I marked up and cut out some more perforated metal sheet,
that will be used behind these side vents as these are very weak by themselves.

SHOULDER HOLES

I applied watered down PVA glue to the cut hole edges, then used some more P40 resin in the gap around the shoulder disc (shoulder disc has been removed in these pictures). Then later I started to add wood filer.
Used the left over resin by applying it to the back of the vent 'pocket' back.

Whilst all that was drying off, I cut out the second hole for the shoulder disc.
No mistakes this time!!
I cut well inside the line, then repeatedly offered up the disc, locating it on the bolts, till it fitted and the clearance around it looked right.
Other work done:
I sanded the wood filler on the recessed panels again.
Primed and blue sprayed up the second pocket vent backing plate (this one will go on the rear of the body). 

R5D4'S BAD MOTIVATOR

Bought a new silver spray can so sprayd up the second rear Coin Return & the components that make up the Motivator.
Motivator bits [top of picture], rear Coin Return No2 [bottom of picture]

PANEL WORK

Lastly, I had time to recess the panel next to where the Coin Slots go.
 
The left picture shows the panel scored ready to be carved out. the right pictue shows job done, and with watered down PVA glue applied, to seal. This also helps to stop the wood soaking up the spray paint :)
Yellow shows work done

June 22, 2012

Body Skin 3.1

Sprayed pocket parts white , then glued top part and bottom/sides together.

Marked up side vent slots.

Masked off the shoulder hole, to be filled in with P40 and then sanded smooth.

Sanded the filler around the rear Coin Return.
And then painted over it with silver to blend in.


Grooved and recessed one panel [pic below].
Then a lot of sanding and PVA glue to smooth and seal the cut wood.
Next, to apply some wood filler.


Positioned restraining bolt on body. There is a washer on the hex side of the bolt, but made up a restraining plate bracket and fitted it behind the skin, just to make sure it stays there lol.

This is to prevent the bolt from being pulled out/through the skin!

June 20, 2012

Body Skin 3.0 - Pocket recess & Coin Return No3

Marked, then cut out pieces for vent pocket recess.

Glued together bottom, sides and back.

Test fit in position


cut out coin return No3, bent it into shape.


Next, I primer sprayed up all these bits.

June 19, 2012

Body Skin 2.9 - Rear Coin Return

I've used P40 resin to bond the first of the Rear Coin Returns in place.
R2D2 Coin Return

R2D2 Coin Return
The visible inside join line edges, will be filled, sanded and then hand painted to blend in.
Next is to build the other Coin Return.

June 07, 2012

Body Skin 2.4 - Rear Hatch in white & Silver

Have sprayed up the rear hatch now in a few coats of white satin [Plasti-kote].
Lightly sanded between drying to get it nice and smoooooth.
R5-D4 R2-D2

Next was to mask off the grooves, this was done just to prevent any of the silver paint going on my nice white paint.
I masked off a bit at a time and then removed it, to prevent any smudging and transfer onto the white paint.
Masking tape being applied
R5-D4 R2-D2
A steady hand!
R5-D4 R2-D2
Rear Hatch now with silver grooves
R5-D4 R2-D2
Just a close up of the grooves
Next I masked off the whole rear hatch and silver spraying the two Coin Return panels.
Rear Hatch, masked off with yellow paper [colour is optional] and sprayed silver.
R5-D4 R2-D2
Masking removed, Coin Returns now in silver.

May 29, 2012

Body Skin 2.1 Rear Hatch upgrade - GROOVES

Trimmed the Coin Returns with the Dremel & a file to square off the edges.

Then used P40 resin to fill the gaps I'd made for the hinges.
Once dried, I filed them flat and square.
Also filled in a few of the countersunk screw holes with wood filler.


----------------------

Then marked out in pencil, the rest of the rear panels for where the grooves will go.
Then with a steel rule and my trusty Stanley knife, I scored lightly along the lines to create the grooves, next I found a lath tip tool in work with the right width to be able to 'chisel' out the grooves to depth. And carefully scooped them out.


The first attempt is on the Coin Return....... 
This shows the grooves in a poor light 


It just takes off a thin layer of the hardboard to the depth of the score line. The scoreing and 'chiselling' out on these two panels has taken me over half an hour, well, I don't want to rush.
This is going to be a long job lol

May 13, 2012

R5-D4's Body Skin 1.7 [Power Coupler 1.4]

Sprayed coin returns 1 & 2 (of 3) silver. Found the white made the silver appear lighter, better than the grey primer.

Sprayed up the second Power Coupler blue. Masked off the main part and sprayed. The internal parts I again, painted with a small brush. I then 'dirtied' up both with black paint. Which gives the same effect as on my Restraining Bolt. I cut out the lower rear panel, square hole, to accept the rear Power coupler and also the third coin return opening [left of picture].
Rear Power Coupler
Front Power Coupler

I sprayed a few clear coats on the first lower side flat panel.