Showing posts with label Rear Hatch. Show all posts

May 18, 2019

Flashback 2012 - R5's Rear Hatch

Here's a flashback to this day back in 2012.

R5-D4's Body Skin 1.8 Rear Hatch upgrade
I had an idea to create a two part rear hatch for accessing inside R5, but once the wood was cut out, it wasn't strong enough, so had to create a one piece hatch.
R5-D4, woodwork, rear hatch

Click on this link to view the Blog entry.

April 04, 2017

R5's dome rotation upgrade 1.5

Had no free time the other weekend, so I had to wait till Monday back at work.

Due to more limited time, I was only able to work on clearance hole clearance & using my dremel, to grind down the washers that were overhanging the bearing inner diameter.

This is just to make sure that the dome motor wheel has a flat surface.

-----

This upgrade work involves a lot of multi-mini-projects lol. The electric upgrade, dome work, rotation/position of the lazy susan & next, the actual dome motor location and fixing.

I had thought about moving the motor to the front area of the body, so the wheel was at the top. But as I had already cut out an area, years ago in the build, for this position, I decided that here was just as good as anywhere else.

Next was how to mount it.....

I have a rear door stop on one of the vertical body struts, and it's in just the right position to mount the new motor spacer block. It will replace the original door stop at the same time. So I had to make up a new bracket for the motor/door stop, much more sturdier than the last bracket.
There was some thought in how to attach the bracket to the body frame, once the motor was attached to it, which prevented fixing it on afterwards.....lol, I don't make things easy for myself do I :D. The aluminium bracket fits to one side of the vertical internal frame, with a countersunk bolt and then a wing nut. This was the only way to secure, which was actually genius, as the wings stopped the nut from turning when the bolt was screwed into place!
Motor & bracket bolted into place.

Powered up the motor and the lazy susan ring spins great.


Update on the new lower dome metal ring to follow......

September 17, 2015

October 08, 2014

Rear Hatch Alarm

With R5's first mobile event getting closer and fiddeling with bits & pieces. It got me thinking about, what if's? One thing I thought of was the rear hatch. It is held on securley via two spring loaded clips, but what if it come loose or someone opens it up if/when I'm not around R5.

So I dug out my soldering iron, a piezo buzzer (the first one I got when developing my Droid Caller) & used one of the new micro switches I'd planned to use for the dome control unit & soldered them all up.

R5D4 rear HatchR5-D4R5-D4

The micro switch is wired in the NC (normally closed) position.
The buzzer is wired in-line. I was going to install a swith to turn off the buzzer when working inside, but re-thought this as a possible 'forgot to turn on' so left it as I just have to remember to place the batter back in, hence, installing it fight in front of me.

Installed the micro switch inside the rear hatch opening, in a place even better than the one I had originally intended.....bacically because where I wasnted it to originally go, it wouldn't of fitted lol. I then routed the cable through some flexible tubing round to the inside front of R5. I then screwed the piezo buzzer onto the frame. And secured the mini 12v battery holder in place.

July 16, 2014

Electrical Board......to mount the electronics onto......eventually = 1.0

A board or 'electronics board' is needed to mount R5's electrical components onto. I found a piece of 5mm thick plywood, but then found some clear acrylic in work. So using this instead, I measured across R5's two internal vertical panels and cut it to a suitable size.

I had already cut up some 'U' section aluminium and then cut off one of the sides to
form 'L' shaped brackets. These will be screwed to the frame and then the clear panel will
be bolted ont the 'L' brackets.

electronics panel
It's that small thing just below the bolts, lol

I've also bought some servo leads, to link up the reciever to the speed controller, when I get it. And in the meantime, I also bought a servo to use as a test unit &
a power pack to run temporaly run the Radio Reciever unit
[it will eventually be powered by the Duel Foot Motor Controller]

electronics panel

R5D4 electrical
It's only on two of the angle brackets as I'm still thinking about position of the panel once batteries are installed below it. Also it can pivot at the moment, which might come in handy.

I kind of know what will go on the board, standard items are speed controllers (feet and dome), junction block, radio reciever and maybe a sound card......small steps people.....small steps lol.

April 17, 2014

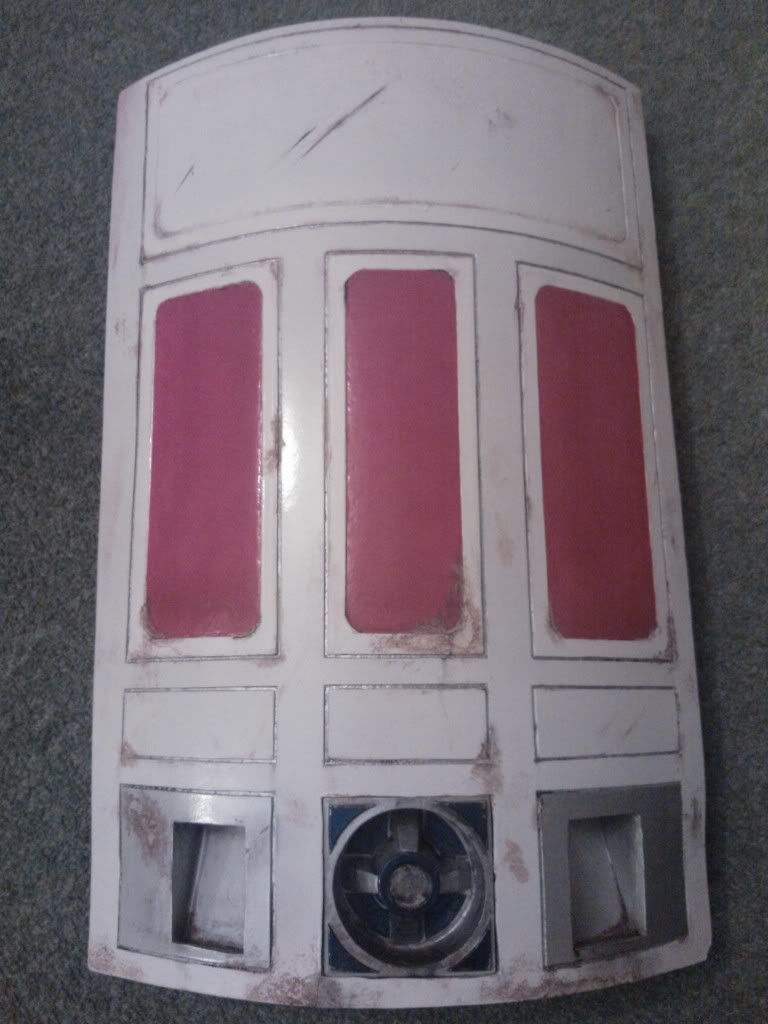
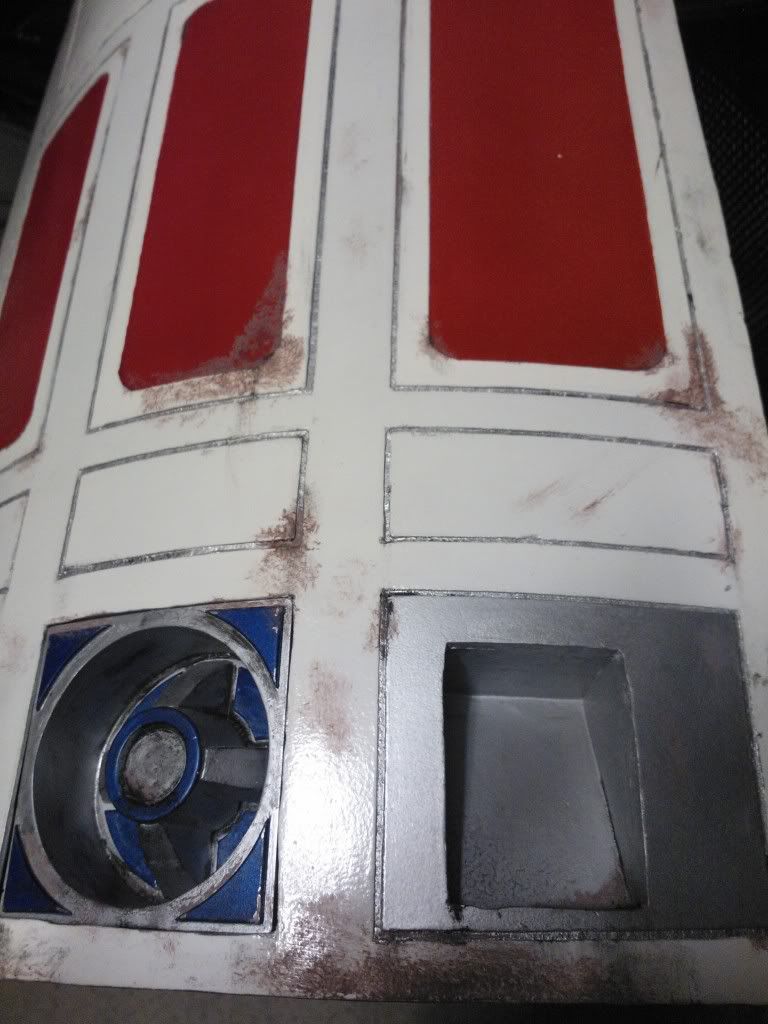
Weathering 1.1 Rear Hatch

After a very long day, I was exhausted, but wanted to try the Yellow Ochre on the rear hatch.
On applying it, very sparingly, it didn't seam to be visible. Blending & mixing in with the Burnt Umber. Still i carried on applying it in the places I wanted it.

Then it started to dry.......and was then a lot more noticeable lol. So using my finger, I gently rubbed it in to the Umber and the grooves and this helped to blend it all in and rub off the excess.

I didn't want to over do the weathering at the moment, but its a start and am happy so far.
R5-D4 Astromech Droid

R5 gets dirty - weathering 1.0

R5's paint job had included some black paint in the grooves, legs, body and feet areas. This was to give him a dirty/oily appearance. Now its time for him to get his main 'used' colours of sand and dirt.

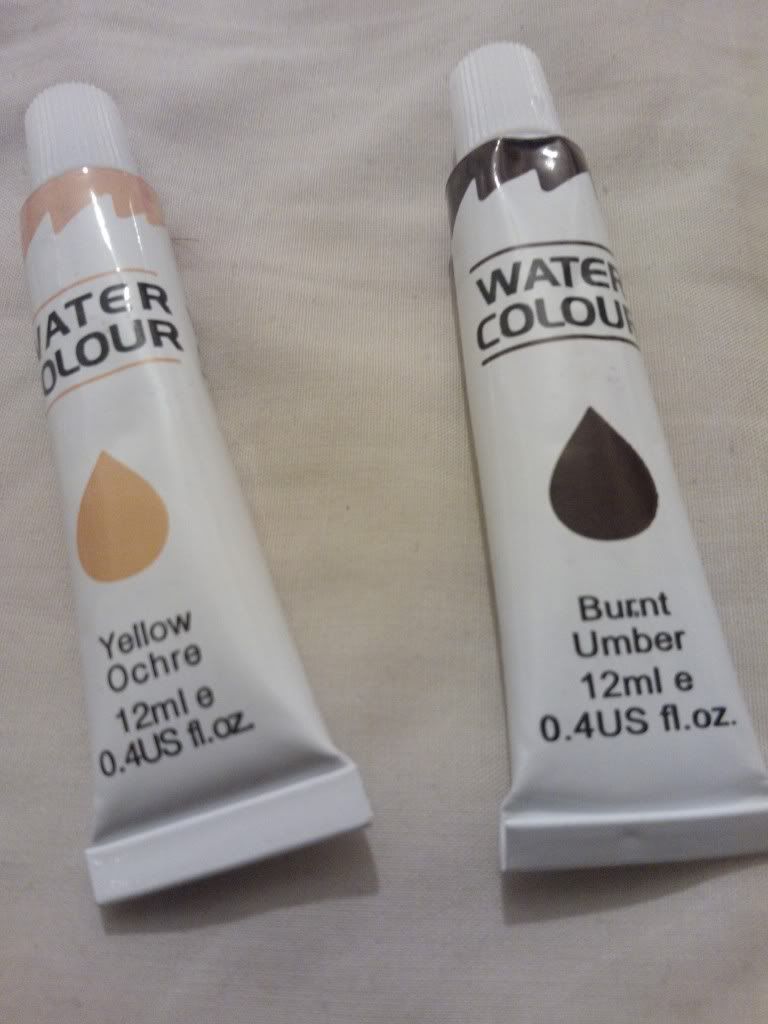
Two of the colours I've bought, are Yellow Ochre and Burnt Umber (a dark brown). These came Wednesday via eBay.

Weathering paint for R5

Had to give it a go, so off came the rear hatch and dabbed on the Burnt Umber to start with.

R5D4
Start of weathering

April 20, 2013

I give you........R5-D4

So, this morning, the kids were out doing 'activities' and the wife was out too, and to top it all the SUN was out shining and the wind was still.

Didn't take two seconds to realise, now was my chance to 'do' some work on R5.

So I assembled R5, legs, feet, 'aluminium' strip to feet channels, battery box on to check for clearance etc.

Whilst assembling, a gentlman walking his dog, by himself, said [to himself or his dog], 'Look, it's R2-D2!' So I was chuffed it was recognisable, then a bit miffed he got it wrong! hahaha :D.

Outer foot R5D4
Test fitting of outer foot internal to leg

Then on with the rest of the legs and feet.
R5-D4


And the pictures you and I have been waiting for............

R5-D4 standing on his own three feet.
This shot show's Foot No.2 is still a W.I.P.
I didn't fit the booster cover etc or the horseshoe.
This shot shows R5-D4's rear, rear hatch, opening into his outer foot
And back round to the side.
Close up of the Battery box fitted.


I also fitted the fake aluminium strips to the channels of the feet. They are screwed in place and these will need a spot of paint on them.
R5-D4

And here is the 'trimming' I had to do so the legs would fit into the channel of the internal foot channel.

This leg still needed trimming, but this time along the thick part of it. As it was touching the shell. Found this out when the leg and foot were assembled and the wheels weren't sitting flat on the floor.

July 16, 2012

Body Skin 3.7 - Rear Hatch **COMPLETE** & some more front panel grooving

Sanded the wood filler filling the gaps between the skin and second coin return. Then used small paint brush to 'touch-up' the filler. Next was to touch up the red panels around the edges. I added black paint ot the grooves and oter places as 'oil/dirt' marks.
The whole rear hatch was then sprayed with clear sealer & once dried, the Power Coulper was fitted and secured in place with it's bolt.
Grooved out and recessed the panel which will have the Restraining Bolt fitted to it. Also the Front Vent surround groove and also the Utility arms grooved surround.
Then sealed it with watered down PVA glue.


Before I finished up for the night, I bent some perforated metal that was just the right size.
This will be used for fixing the Coin Slots [front view] to it from behind & fixing to the frame.

July 07, 2012

Body Skin 3.6 - Rear Hatch 2nd Coin Return in place

I bonded on the second rear Coin Return, using P40 resin.
And then once dried, filled the remaining gaps with wood filler.
coin return on right, bonded in place
wood filler in gaps

Once dried and sanded, I'll paint the filler with silver paint to blend in.

June 27, 2012

Body & Centre Leg assembly

It was getting late, as usual, but wanted to see what R5 looked like now that the skin was starting to take shape. So here are a few pics :)
Sorry, this pic's not in focus.
Also note that the foot is not locked yet, hence it's position.
As you can see, I don't have the luxury of space in my garage :D lol

June 25, 2012

Body Skin 3.2 more grooving :)

Wood filler applied to recessed panel and sanding started.
Managed to groove seven more panels out over the weekend, then sanded smooth and sealed them too with PVA glue, watered down.


Here's what panels have been done so far, the grey areas.

June 19, 2012

Body Skin 2.9 - Rear Coin Return

I've used P40 resin to bond the first of the Rear Coin Returns in place.
R2D2 Coin Return

R2D2 Coin Return
The visible inside join line edges, will be filled, sanded and then hand painted to blend in.
Next is to build the other Coin Return.

Body Skin 2.8 - R5D4's Red Painted Panels


Red spray paint, just like R2D2's blue, there is no specific choice for R5's distinctive red colour. R2 has different 'shades' of blue throughout the films and even scenes!
The closest match favoured by other R5 builders I've read about, is
As used on this R5D4 unit built by Victor Franco's No2 'convertible' R2 Unit.

Another colour choice suggested is Rust-Oleum's Cardinal Red suggested by another builder on the UK R2D2 Builders Club forum.

Well, before I committed to my original choice, I bought a small can of Plasti-Kotes metallic Red spray paint to try out.

~~~~~~~~~~~~~~~~~~~~~~~~~~~~~~~~~~~~
Re-masked area off for spraying with red.


Not to bad a colour shade. I just need to tidy up the edges, and then cover it all over with dirt! :D

June 18, 2012

Body Skin 2.6 - Rear Hatch recessed panels


The top panel tock over an hour and a half alone to do, more aching fingers :(
R2D2
Applied PVA glue to seal the recess edges
(The dark/shiny areas in the recessed panels)


Applied some wood filler and then did some light sanding.
Next, masked of the areas, ready for spraying with grey primer.


I didn't mask off right up to the edge as these needed re-spraying up as well.


Applied some more wood filler in places.
Then some more primer.

Next, masked it all up again for it to be sprayed white again.
******* What a nightmare!!! The whites a different shade ?!?!?!? *******
Had to feather the edges, once dried, and then re-mask the panels off AGAIN, right on the edge of the panel grooves. Once dried, you can still see there is a difference, but now only on the panels themselves. This makes them look like individually assembled panels ;)

June 11, 2012

Body Skin 2.5 - Rear Hatch recessed panels


Marked the three vertical panels out that will be sprayed red.


And marked out the recess in the top panel. I then scored the lines and used my groove tool around the edges to start and get a depth. Next I started to slice thin layers with a Stanley blade.


The centre panel took just over half an hour.

The reason why I've done this after spraying up the hatch is simple. I wasn't sure how I was going to do this or if it would work on the wood! I was thinking of paint the panel recess to give the illusion of depth. But I wasn't really happy with this, so thats why it's all a bit mixed up :)