Showing posts with label Plasti-Kote Metalic Blue. Show all posts

November 11, 2020

The Mandalorian - R5D4 Holoprojector - 1.2

Yesterday I masked off the silver ready to spray up with blue.

masked up ready for painting

It’s been a while since I’ve used this silver, and I wasn’t happy with how it was looking applying the blue over it caused the silver to come off when I wiped it.

blue paint applied, not happy with it though

wiped the silver off with the blue

Resprayed the blue over the black & this time it stuck. Removing the old masking tape, took off some of the silver paint, but I’d weather it anyway and this just adds to the effect. Lastly I applied a clear coat.
finished test spraying with clear coat applied

As can be seen in the above picture, I had printed off the lower arm & glued it on. This was part of the test fitting. Decided to just add the arm to the 3D holoprojector and print in two halves. More in next post.

August 31, 2017

3D Printed tags - 1.1

These didn't take to long to print off and they came out cleaner than what I was expecting. Well it is my first time 'printing' text.

The rounded corners needed to be filed and made larger, as I had only roughly measured the recesses, but this wasn't to big a thing to sort.

Next up was painting. I dug out my metallic red spray paint & paint brush. And sprayed some into the can lid. I then hand painted onto the tags.
The blue wasn't the same metallic I'd used as the can was empty. So had to use a Humbro mini tin I had from years ago when painting my Stormtrooper's Ab buttons. It doesn't look to bad and was only to highlight the raised club name.

Next up was fitting.

Used thick glue (doesn't look so thick in the pic lol) But one corner had lifted up when it was being printed, so the back wasn't perfectly flat.
I then got the drill out, see....no pre planning lol....and drilled to corner holes and fitted to cut down mini screws I had in my odds box.
I prefer the two opposing screws rather than the over kill of four.....but we'll see how it holds. The glue had actually started to cure and was already holding the tag in place, so I think this should work, plus being recessed it shouldn't get knocked etc.

August 30, 2017

3D Printed tags - 1.0

The other week I bought a fold-able cart to lug R5's batteries, Transmitter, tools etc.

It only cost £13 (GBP) and will definitely help reduce trips from the car lol.
I wanted to 'tag' it up so people knew who it belongs to at events etc,
so measured up the recesses and drew up some tags.


These are printed white, and the lettering will be painted accordingly.
(being printed as I'm typing)

November 14, 2014

Custom box for radio transmitter - 1.6 Almost Completed

#R5-D4
After the last post, and the previous coat of paint had dried, I applied another coat of metallic blue all over the box. This improved it a bit more, making it more darker and more blue lol. Once this had dried, I gave the box faces a light sand all over, then I applied clear sealer all over and left to dry. Now the box is almost complete. I applied the handles and feet, and finally, in went the foam.

Scanning Crew Star Wars ANH
The last touch that I was to spray up the lid with the orange blocks. As I didn't have orange spray, I used brass/gold colour that I used on R5's hoses. Looks good and am happy with it. The colour could be an indicator as to what the box contains. Orange for Scanning equipment, Gold for RC Transmitters lol.

November 12, 2014

Custom box for radio transmitter - 1.5

Had a long drive to pick up two small cans of metallic blue paint last night, through rush hour traffic to get there before the store closed.

RC transmitter storage boxRC transmitter storage box
Left picture's with 'flash' right picture without, so you can see the depth of the foam insert
RC transmitter storage boxRC transmitter storage box

Next was cutting the middle 3" thick piece of foam to accept the radio transmitter unit. Happy with I am. I then used the thinner piece of foam (the original thicker piece wouldn't compress enough, plus the transmitter is a snug fit so the top piece is just in case it does move.....which it won't of course lol.

I sprayed up the box this morning in work.
Scanning crew container boxScanning crew container box
Left picture's with 'flash' right picture without.

Box sprayed blue, little disappointed with the finish. Think the PVA was watered down a bit TO much. So the blue hasn't taken to the primer, which has also soaked in to much. Only really visible now tho on the wood filler area's. Will give it another coat at lunchtime and see if there's any improvement. Otherwise this 'worn' look will have to start to grow on me lol.

November 11, 2014

Custom box for radio transmitter - 1.5

Didn't get chance over the weekend to do much work. Though I did apply some wood filler and some sanding. Monday I was able to apply more primer spray then some sanding, and a few more coat's of primer.

Monday night, I stopped off to buy some more blue spray, only to be told that they don't stock it any more!!! And the other store that did was the other side of town, from where I had just driven past on way home from my Son's football training! Not happy!

So I decided that with what paint was left in the can I would spray up the lid, metallic blue.


Yesterday also saw my foam arrive!! Sooner than it was expected.
So I got cutting with a blade and started fitting into the box.

Top picture is 1.5" thick, then the second left picture is 3" thick. And third picture right, shows it in place. This piece will be cut to accept the transmitter. The third layer will fit on top of the transmitter and then the lid will close off the box.

March 12, 2014

Battery Straps - set no2

Started 22.01.14

Drilled out and pinned, along with Araldite, the top and bottom pieces of the Battery Straps.
R2D2 Battery Box

Next was primer, then some wood filler and sanding. Then silver. These haven't come out as well as the first set, but once 'dirtied up' they should be OK.

Lastly, the blue pads were HOT glued in place. Once dried, wood filler was applied to fill in the gaps. Lightly sanded and then touched up with Metalic Blue paint. They were then hot glued onto the Battery Box.

January 07, 2013

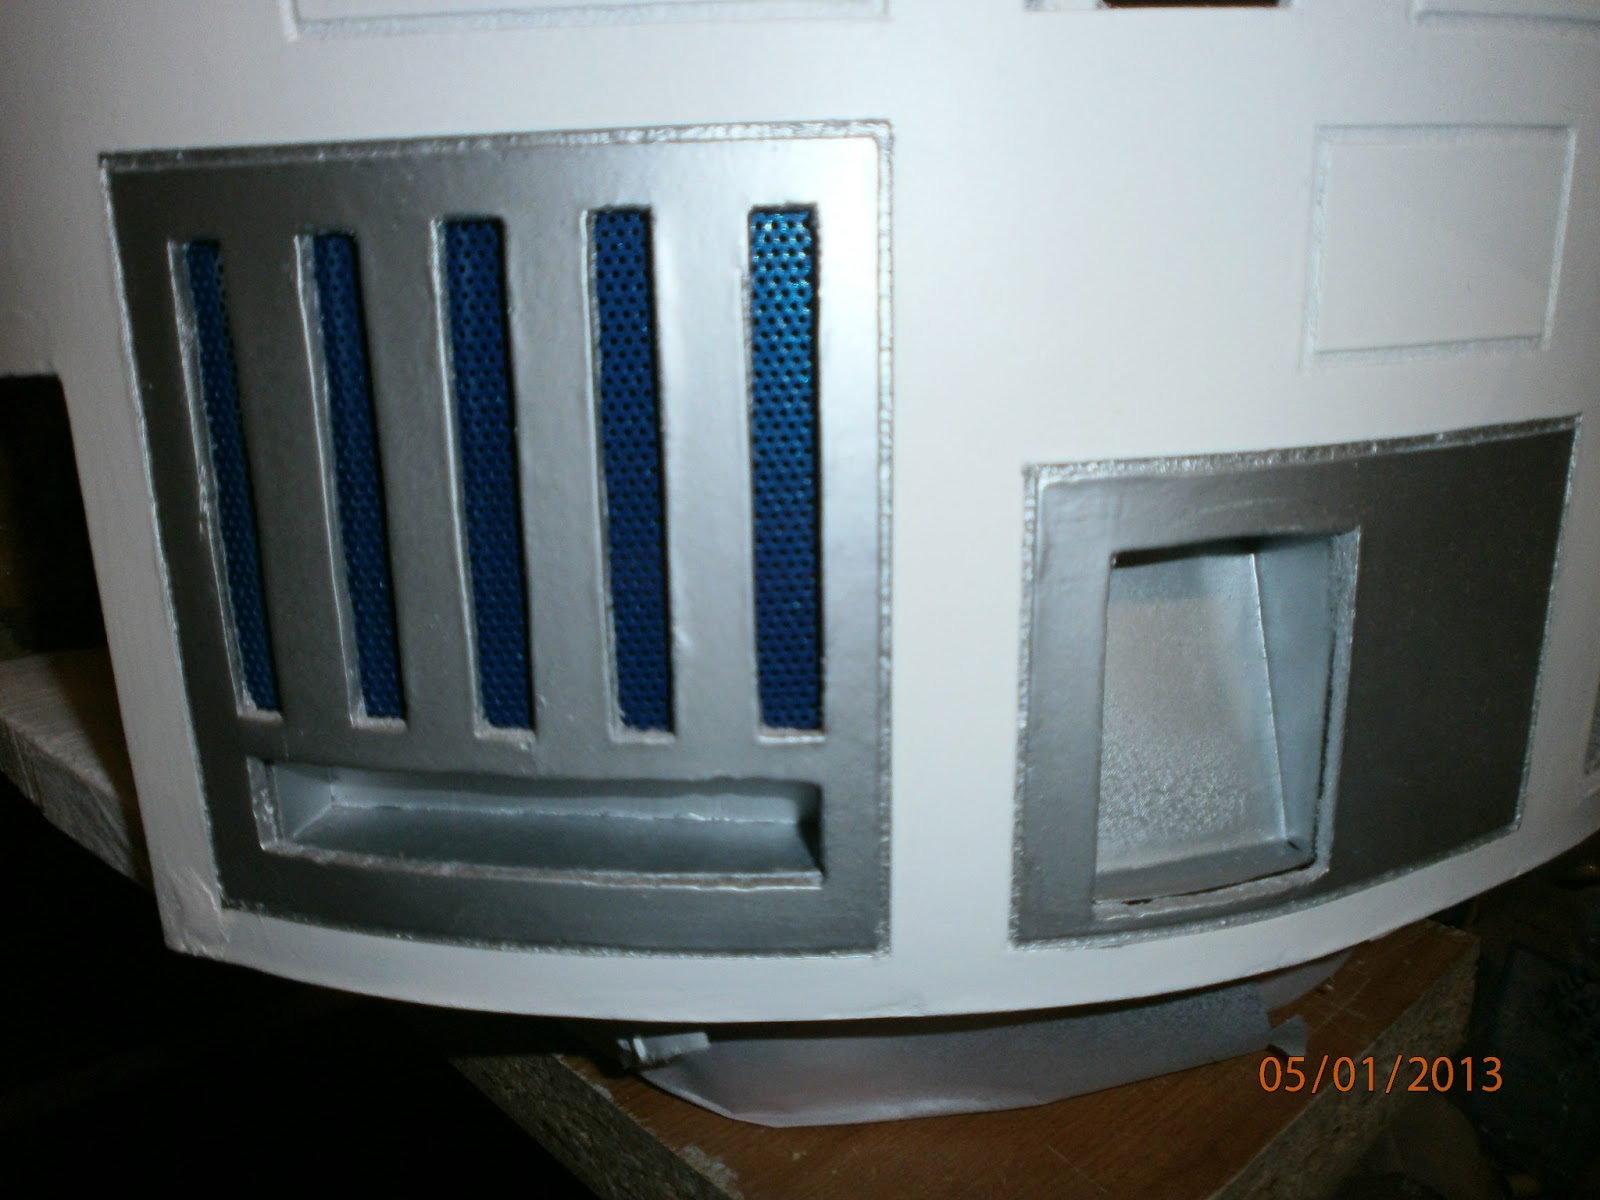
Body Skin 4.5 - Silver Panel work

Finished of cutting out the two remaining slots on the Side Vent.

I fitted the 'Pocket' that goes in the Pocketed Front Vent. This along with the Front Coin return and also the rear Octagon Port, were secured with P40 resin.
Any gaps were later filled with wood filler.

Front Coin Return & Pocket Vent bonded into place with P40 resin.
I also glue in place a piece of wood to locate the rear screen for the Pocket Vent.

Decided that R5's body needed some colour, so masked off the skin and sprayed up the front Pocket Vent, the front Coin Return & the newly prepped Side Vent, with silver.

Side Vent sprayed silver
Side Vent, Pocket Vent & Front Coin Return

R2D2
Pocket Vent & Front Coin Return
I then masked off the front Vent Panel, where the two central vents will be fitted, and sprayed this up with metalic blue.
Central Vent Area
Central Vent Area

Ankle Cylinder for Main Leg No.2 - 2.2

I've eventually got round to taking some photos, don't really like to post without them, as it's a bit boring and a picture makes things easier to understand :)
Well I drilled, out the two wood pieces and then PVA glued in the two 'dowels'.
Next I lightly sanded over the wood filler around the end caps and all over the plastic tube to help key it for primer.

Followed by silver, masked off areas, and once dried and re-masked off, blue :)
Here it is in bits, again.
R2D2 Ankle Cylinder, Wedge & holder