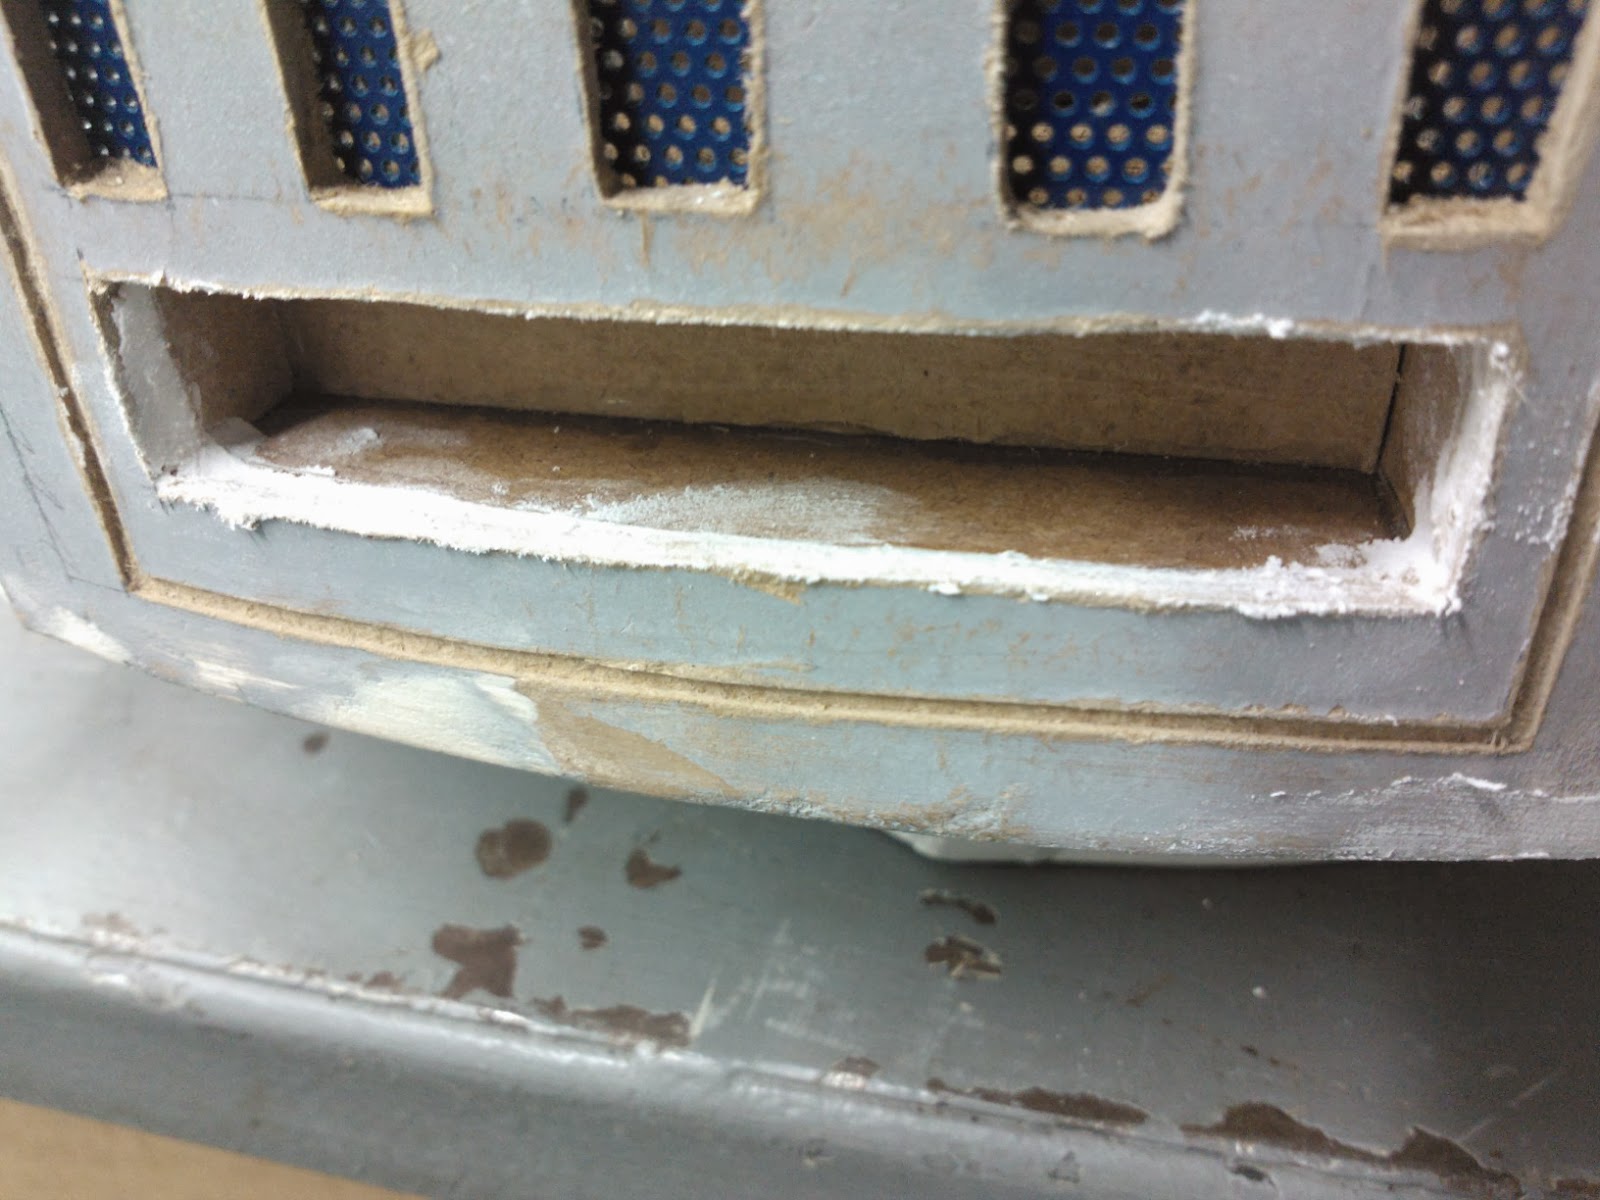
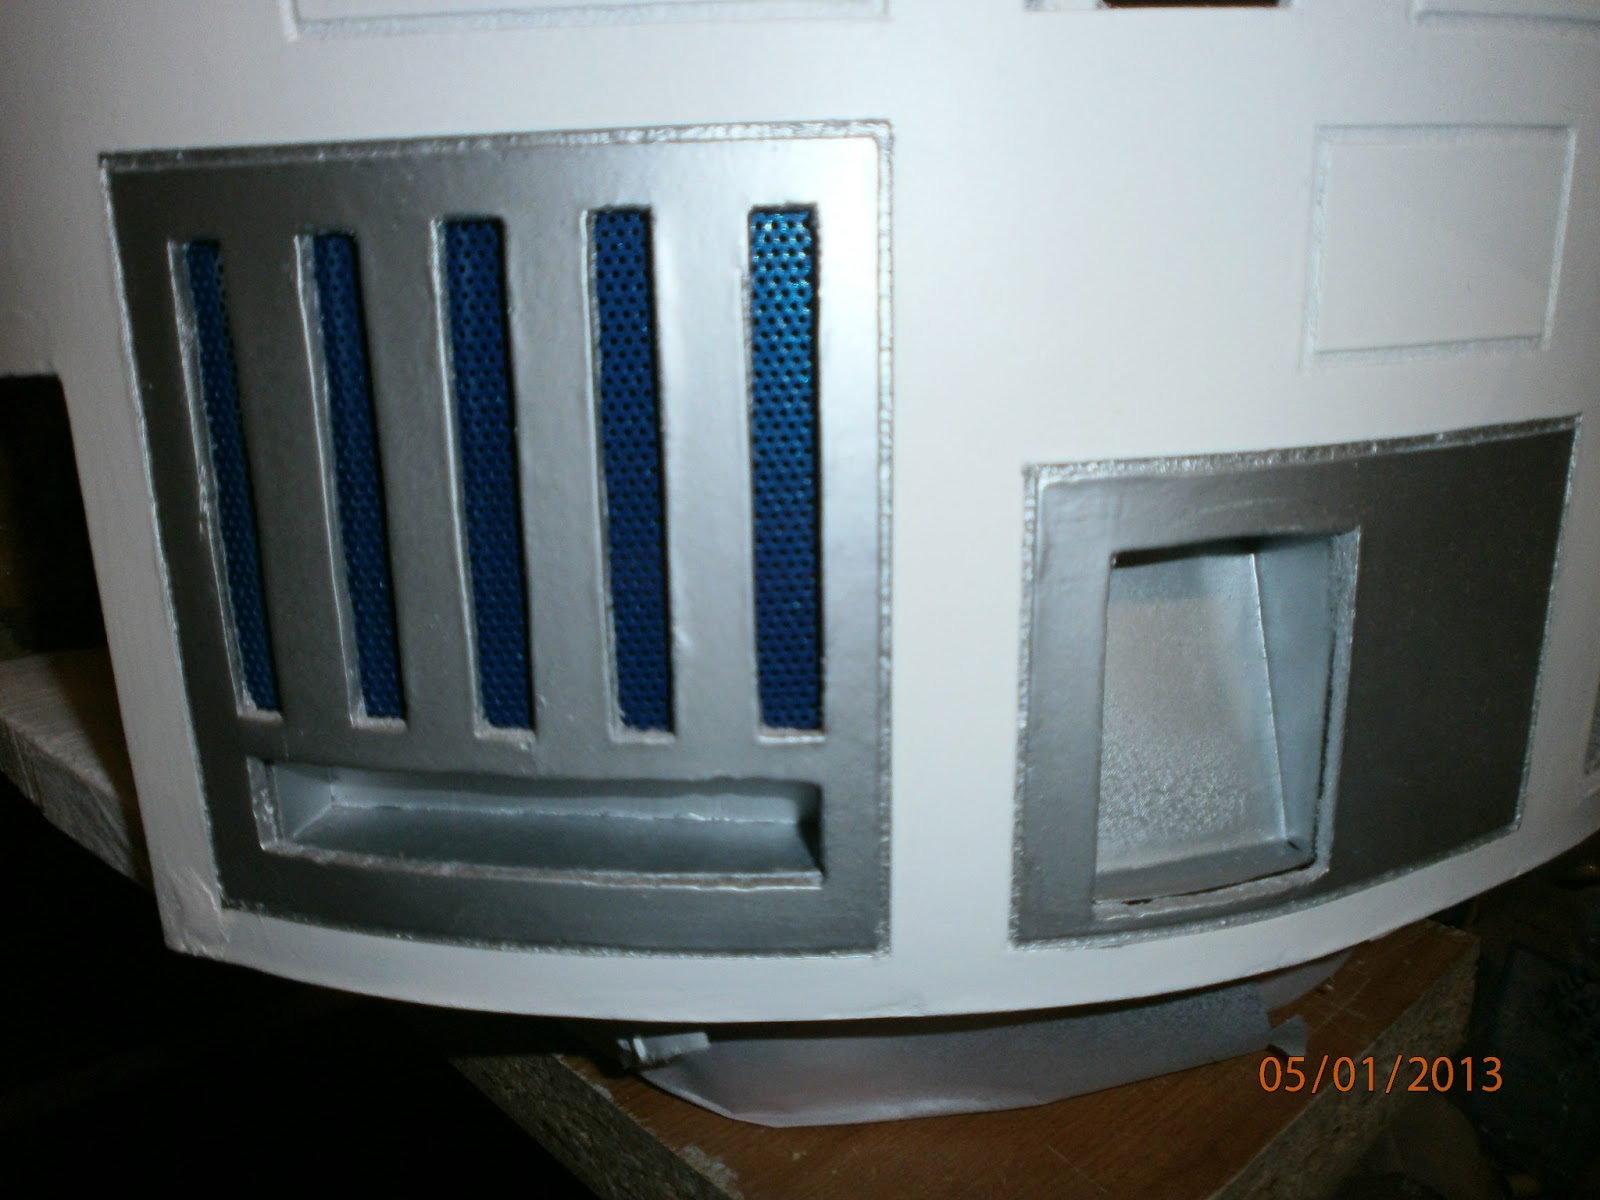
So here is the final painting stage of R5's body.
Primer applied, left a day before lightly sanded.
Next came the white spray paint, using Plasti-Kote Satin White. Re-positioned mask off area before spraying up. Underside of body also needed touching up with white.
Wasn't 100% happy with the surface of the recessed panel, so after more sanding, I applied some more wood filler to smooth the surface. Once dried, this was re-sanded.
Then I re-re-masked off the body, this time along the edges of the front panel and Octagon Port. And sprayed white, one last time. Not the best pic.
Next I masked off the vents to be sprayed up with Plasti-Kote Silver.
Half hour later, silver vents complete......well, till I fit the grills.
Droid Builder
Extra Projects & Event Page's
- Home
- Event: Droids @Mshed Bristol 2026
- Event: Droids @Mshed Bristol 2025
- Event: Droids @Mshed Bristol 2024
- Trading Card Dispenser (version 2) - TCD [2020/2022]
- Trading Cards
- R5-D4's ....Bad Motivator development
- R5-D4 - silver neck details
- R4-D4 - Dome [wood build]
- R0-D4 Dome [wood build]
- 3D Printing - Star Wars stuff
- *** Star Wars Shoes ***
- Event's 2018
- Event's 2017
- Celebration Europe 2016
- Celebration Europe 2023
- Event's 2015
- Event 2014 - Chippenham Sci-Fi
- R5-D4 - events page - The beginning (2013)
- ** R5-D4 patch **
- R5-D4 Photos
- Costume for my Son - Han Solo -
- Costume for my Son - Boba Fett
- Droid Caller - Han Solo style
- Scanning Crew Container - Transmitter Storage Box
- Stormtrooper - me
- Rogue One - trading card storage box
- Rogue One
- GOUD-4 Messenger Droid - Solo ASWS
- Jabba’s gate prop for Celebration 2023
- Treadwell Droid - WED-15-77
Showing posts with label Pocket Vent. Show all posts
March 05, 2014
March 01, 2014
Body electrics......LED work to Pocket Vents 1.0
The Real R5 & mine lol, doesn't have a lot to look at. No periscope, flashing lights, charge bay indicator lights etc. So he looks a bit boring when out and about. So I thought I'd join the rest of the builders who add a little bit extra with some LED lighting.
I was thinking of rear illuminating the coin slots. This has been done and is something i may do later on. The plan is to use the two remaining blue LED'S, to light up the two Pocket Vent grills.
So I spent an hour wire stripping, cutting, trimming cable
to terminal blocks. Then I got to wiring the cable up to the battery and see how it looks.......
..............well, I was a bit disapointed to say the least! The LED light needs to be diffused as it was to focused.
Moving on, i found my stash of computer mother boards and one in particular section caught my eye. My idea was to mount this behind the grill and shine the LED in between it and the grill mesh??
This would concentrate the LED's light, and if looked inside you would only see the circuit board :)
..............well, I was a bit disapointed to say the least! The LED light needs to be diffused as it was to focused.
Moving on, i found my stash of computer mother boards and one in particular section caught my eye. My idea was to mount this behind the grill and shine the LED in between it and the grill mesh??
This would concentrate the LED's light, and if looked inside you would only see the circuit board :)
February 20, 2014
Body Skin 5.1 - Side Vent work No.2 & Rear Pocket Vent
Started cutting out the side vent slats yesterday and finished after work today. using a Stanley knife
to score then a hacksaw blade to cut carefully along the lines.
Next was watered down PVA glue to the cut edges to seal. Grill supports are cut up scrap pieces of wood, these will be for fixing the side grills inside the body.
Rear Pocket Vent
I glued the pocket part of the Rear Vent into place.
Applied wood filler....
Next was watered down PVA glue to the cut edges to seal. Grill supports are cut up scrap pieces of wood, these will be for fixing the side grills inside the body.
Rear Pocket Vent
I glued the pocket part of the Rear Vent into place.
Applied wood filler....
......................once dried, sanding is required.
February 06, 2014
Body Skin 5.0 - Rear Pocket Vent build
I found the rear perforated metal plate I had cut and
sprayed, from when I made the front one. I then positioned the grill, behind the Vent slots. Next I cut a strip off an off-cut piece of hardboard and PVA glued it onto the wood frame to hold the grill in place.
The guides are glued in place, one vertical strip on the left hand side frame upright, the other on the top piece of the Pocket Vent itself. Mock up pics 2 & 3 of grill in place, from inside and outside.
I then marked up the main body's 2nd side vent, ready for cutting out. Again, I already have the grill cut and painted from when I did the first ones.
February 04, 2014
Body Skin 4.9 - Rear Pocket Vent build
Friday night I got some more work done on the last three panels & vents.
I finished off recessing the long rear panel. This took almost half an hour! Then a sanding all over the exposed wood, to flatten the now exposed fibres.
Rear Pocket Vent
As I already had the pocket hole, I used a piece of cardboard and inserted it through the opening. I then used a pencil to mark the curve of the skin on the inside. This was then transferred onto some hardboard and lengths extended to allow for the internal pocket walls to be fitted.
I then cut out two pieces the same, top and bottom, here they are glued together.
Next came the side pieces.
Applied watered down PVA glue on all the cut wood.
Ok, so here are the vertical slots in the Vent, being cut out. I've used a combination of Stanley knife Dremel.
Just one more slot to cut out tomorrow.
I finished off recessing the long rear panel. This took almost half an hour! Then a sanding all over the exposed wood, to flatten the now exposed fibres.
Rear Pocket Vent
As I already had the pocket hole, I used a piece of cardboard and inserted it through the opening. I then used a pencil to mark the curve of the skin on the inside. This was then transferred onto some hardboard and lengths extended to allow for the internal pocket walls to be fitted.
I then cut out two pieces the same, top and bottom, here they are glued together.
Next came the side pieces.
Applied watered down PVA glue on all the cut wood.
Ok, so here are the vertical slots in the Vent, being cut out. I've used a combination of Stanley knife Dremel.
January 29, 2014
Body Skin 4.8 - The last area of R5 get's it's groove on.....
I decided to not put off any longer the work that needed doing on R5's last remaining area of his body.
Brief HIstory of work:
When I first started marking out and grooving his skin, see pics below, it was all new to me. So I gradually worked my way through the build, learning as I went. I only got so far round his body, then fitting his skirt to the frame and then primer applied and before I knew it I was spraying him up white.....just to see how it would look :D.
So last night I disassembled R5 of his Dome and Legs and started work on the last panel work. With the use of a Stanley knife and my own special tool, I started to carfully score and then groove out the last 'recessed' panel. The grooving is fun, the recessing is NOT fun!
The vertical slot's I'll do later on.
Next, I started to score out the grooves.....
Then comes the fun bit.......grooving.
As the hardboard is made of fibers, when you score to a shallow depth, you break them and create an edge. Then when you use the 'Groove' tool, the hardboard peals off in strips. I then used a fine grade of sandpaper to smooth out the groove. Once all this work has been done, I'll apply watered down PVA glue to seal, and then another light sanding.
Then I started on the LEAST fav part of the panel work.....which is probably why I stopped at this point, my fingers were hurting! lol. I scored the inside recessed area and then used a second Stanley blade [not in handle*] to shave out the recessed area.
*caution when using blades not the way they were intended to be used!
And this is as far as I got before I......my fingers.....called it a night lol.
January 07, 2013
Body Skin 4.5 - Silver Panel work
Finished of cutting out the two remaining slots on the Side Vent.
I fitted the 'Pocket' that goes in the Pocketed Front Vent. This along with the Front Coin return and also the rear Octagon Port, were secured with P40 resin.
Any gaps were later filled with wood filler.
I fitted the 'Pocket' that goes in the Pocketed Front Vent. This along with the Front Coin return and also the rear Octagon Port, were secured with P40 resin.
Any gaps were later filled with wood filler.
| Front Coin Return & Pocket Vent bonded into place with P40 resin. |
| I also glue in place a piece of wood to locate the rear screen for the Pocket Vent. |
Decided that R5's body needed some colour, so masked off the skin and sprayed up the front Pocket Vent, the front Coin Return & the newly prepped Side Vent, with silver.
I then masked off the front Vent Panel, where the two central vents will be fitted, and sprayed this up with metalic blue.
Subscribe to:
Posts (Atom)


![Grooved panel detail - WIP [1] R5D4 Body skin](https://blogger.googleusercontent.com/img/b/R29vZ2xl/AVvXsEjPo08JyWFyTMeqgbVznQPsf5vXoiUWqaNBfyTtY2gRs3qADp1SpwXLlCDdqGXW2s_U4jpqRFljlGukt6aiQJyOuKqHUhs9wOuWZ7esi5zFFLd1Pcv7syaYQrXBA4slmYmspH1i5fCXWsE/s1600/WP_001002.jpg)
![Grooved panel detail - WIP [2] R2D2 body skin panel](https://blogger.googleusercontent.com/img/b/R29vZ2xl/AVvXsEgbdjfOK3Af-7e4SD9oKIFpvYUgGd7h7jkkL5WahRy297avpcSD9AEJQQVeLEaDz61A69_4ZPevBoOcQNx6XLtk76Kni0IcHNKRWdOSFAmcauuWQDJs6seQABr6UkUwwJDxHuEw3W1cHZw/s1600/WP_001004.jpg)
![Grooved panel detail - WIP [3] R2D2 body skin panel](https://blogger.googleusercontent.com/img/b/R29vZ2xl/AVvXsEjfC2iLDFCUfaG_LFDAA-V2g9eVpyDhkX4dMHEc6leOAMLFc4hQ0-7oU4bwMJpAzolGZHTHHTAvJ-5ZRW1HVPBHd8sAWXTzFLjymdsVGOGp_zurD8YfOggYt-1xlKe97ONYNmNAhbUEi7k/s1600/WP_001006.jpg)
![Grooved panel detail - WIP [4] R5D4 body](https://blogger.googleusercontent.com/img/b/R29vZ2xl/AVvXsEg2k8-pb0lQuIzIPZhAcW0MkQLXPkRns56wu0rA0l_UtzTcQxDoOATGR3V4M5XlD7QuTD_hJRSvX2GqHv2qm2DgNEz0q5jOnF50WdJz875dRg7hGHgIvp_wWVtx0LWvTq4j_Z-VFqpXJLk/s1600/WP_001008.jpg)