Showing posts with label Braided Hose. Show all posts

March 12, 2014

Horseshoe No2 - Hydraulic & Buttons fitted

To make space in the bedroom [keeping the wife happy] I took the Horseshoe back out to the garage and fitted [bolted] the Hydraulic & the two Buttons back on. Then fitted the spacer and finally, pushed the location pegs into the holes on the Leg.

Leg No2, is now complete :)
R5-D4

Braided Hose's set No.2

With everything else I'd forgotten about my second set of Braided Hose's. I'd test fitted the securing screw into the hose ends to keep them in place in the Knurled Hose Fittings and then put them away in a storage box. So here they are masked up and ready for 'Brass' spraying.


Brass????? ....................Yes, brass.
Technically they should be a 'copper' colour, but I liked the colour and it will help to be one of the 'key items' to look out for when people see an R5 in picture on the internet lol.

R5-D4 Braided Hose

And sprayed up.

R5-D4 Braided Hose
The camera flash make's it look like the ends haven't been sprayed, but they have.
I then clear coated the hose and the Knurled end fittings.

January 20, 2014

Assembly - Battery Box No2 with Braided Hose & Outer Foot Shell

Thought I'd share a mock up of the battery box, hose fitted, battery straps & Outer foot shell no2.

Still working on the battery straps, as can be seen, the blue panels are not fixed on yet. And of course it all needs spraying up.

January 17, 2014

Battery Box No2 - 1.2 & Braided Hose

So grey primer is on. This helps hi-lights all the work still needed to be done :D
More filler where needed along with sanding.
R5D4 Battery Box.

I also got on with finishing off the set of battery straps I started making, last year, when I made the first set for box no.1. The idea being to keep the 'flow' going.......yeah, that worked didn't it!?! lol.
R5D4 R2D2 battery strapsBattery Straps for R5D4

These are simply made up of small pieces of hardboard over lengths of wood strip. Filed pieces and then wood filler inbetween the gaps. The top pieces are seperate, that are pinned & glued to the main strap.

Braided Hose
Cut ends off hose, taped up and fitted wall plugs & screws (test fitting) as still need to be sprayed.
R2D2 Braided Battery Box Hose

April 20, 2013

I give you........R5-D4

So, this morning, the kids were out doing 'activities' and the wife was out too, and to top it all the SUN was out shining and the wind was still.

Didn't take two seconds to realise, now was my chance to 'do' some work on R5.

So I assembled R5, legs, feet, 'aluminium' strip to feet channels, battery box on to check for clearance etc.

Whilst assembling, a gentlman walking his dog, by himself, said [to himself or his dog], 'Look, it's R2-D2!' So I was chuffed it was recognisable, then a bit miffed he got it wrong! hahaha :D.

Outer foot R5D4
Test fitting of outer foot internal to leg

Then on with the rest of the legs and feet.
R5-D4


And the pictures you and I have been waiting for............

R5-D4 standing on his own three feet.
This shot show's Foot No.2 is still a W.I.P.
I didn't fit the booster cover etc or the horseshoe.
This shot shows R5-D4's rear, rear hatch, opening into his outer foot
And back round to the side.
Close up of the Battery box fitted.


I also fitted the fake aluminium strips to the channels of the feet. They are screwed in place and these will need a spot of paint on them.
R5-D4

And here is the 'trimming' I had to do so the legs would fit into the channel of the internal foot channel.

This leg still needed trimming, but this time along the thick part of it. As it was touching the shell. Found this out when the leg and foot were assembled and the wheels weren't sitting flat on the floor.

April 04, 2013

Braided Hose - the SAGA continues

Wasn't 100% happy with the fit of my first attempt with the 'real copper' braided hose. As the gap around the hose and the hole in the knurled fitting was to large for my liking.

So saw these the other day and thought I'd try them, (sprayed up, of course).
R2D2 Braided hose
 
R2D2 Braided Hose
 
Well, I wasn't to happy with the colour, 'Brass', it was the only colour they had in the shop, less so of the fact the paint leaked out all over the can & my hand!
First i had to cut off the ends. Then trimmed the plastic tube inside. Although this didn't work, so I drilled out the Knurled fittings so the hose would fit properly inside.

Drilled out the second set of Knurled hose fittings to accept the braided hose. Used a drill bit to line them up in the small vice, before counter drilling them with a drill bit suitable to accept the hose. I'll fix the hose into the knurled fittings later.

Finished spraying the first pipe with brass spray, although it does look more gold than brass lol, this will get weathered down......a lot!

For the second hose I crushed the ends in the vice, this time, to release the hose end fittings.
Taped them up to prevent the braid from fraying and then started spraying them up in erm....brass.


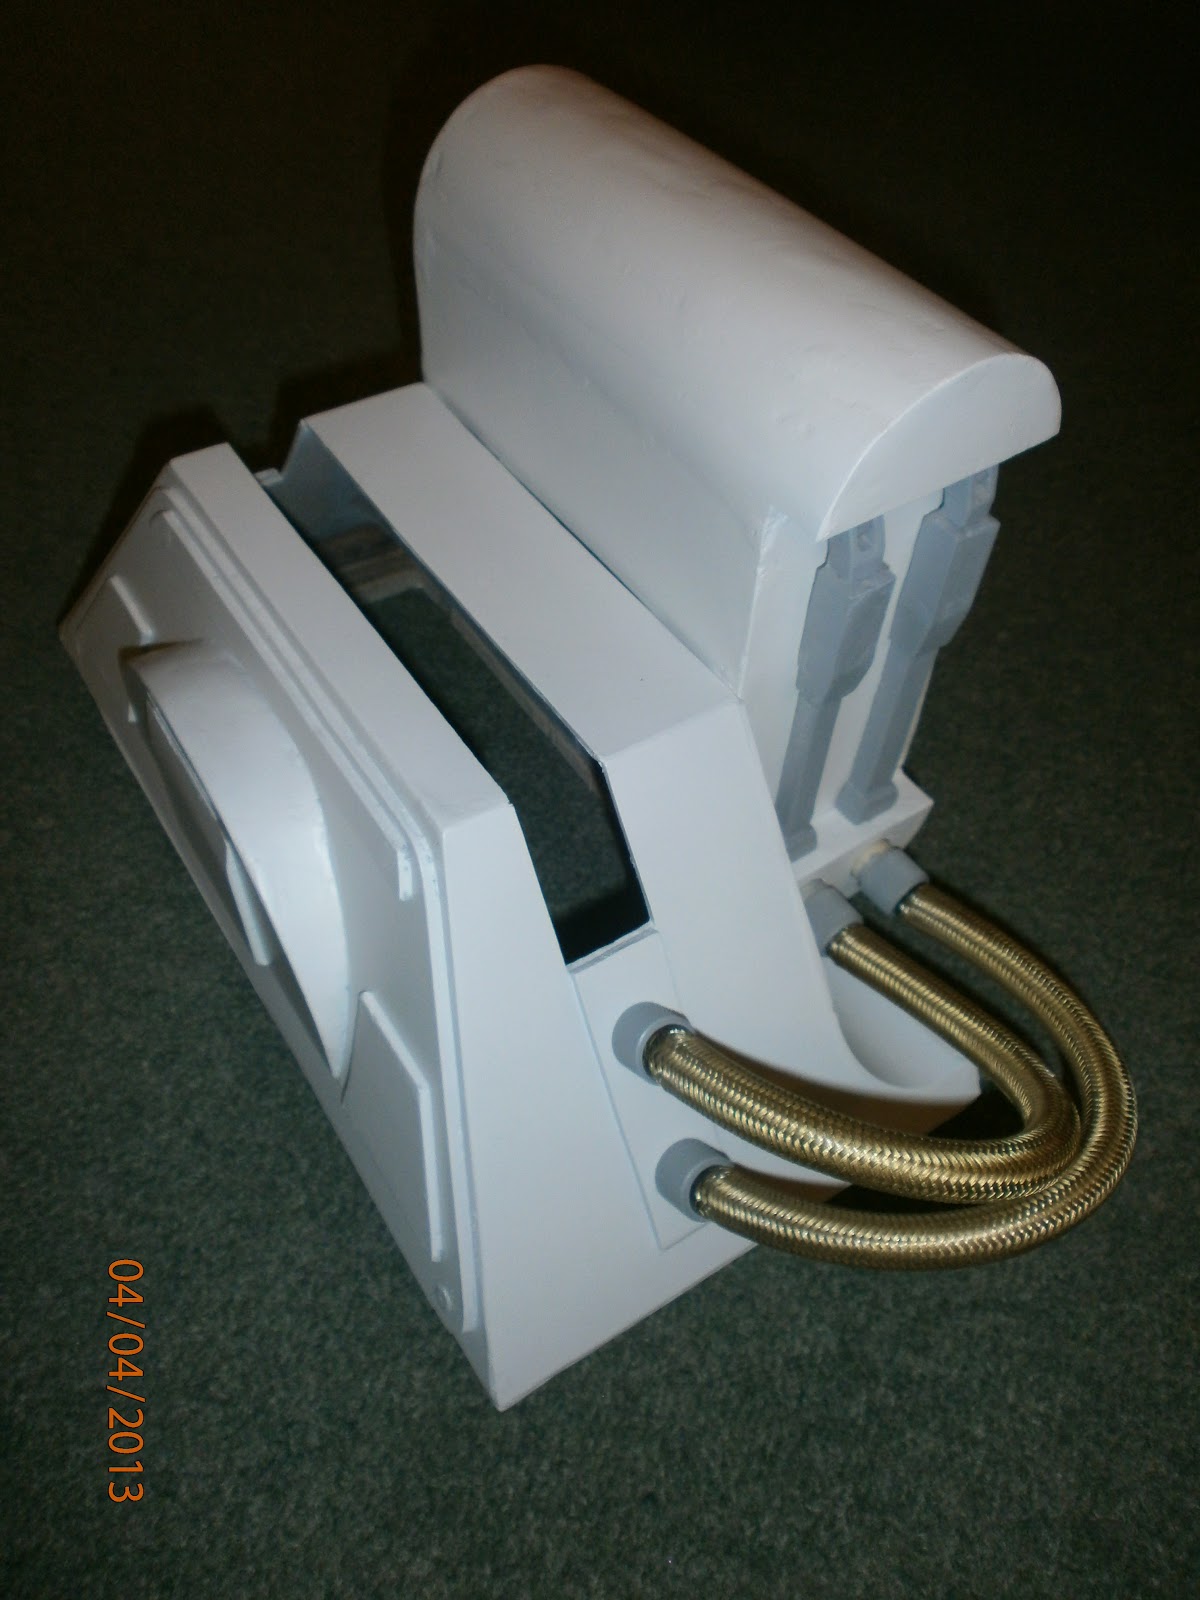
Outer Foot No1 & Battery Box No1 - now in white

Finished Sanding the battery box.
 
Then on test fitting the braided hose & Knurled fittings, I found that the flex in hose (the rubber hose inside the braid) was causing the box to tip away from the outer foot shell at the bottom. The pivot point was the two catches at the top!
 
So drilled a pilot hole, then through into the battery box, then hammered a spiral pin through into place in the Outer Foot. The hole in the battery box was made slightly bigger for clearance. The battery box now slides over the two catches and locates onto the pin.
R2D2 outer foot, location pin for battery box
The spiral pin can just be seen sticking out of the curved section.
This is not a new idea, has been used in similar forms before.

Then this morning, out came the white spray can and got to spraying up the outer foot shell & battery box.
R2D2 Outer Foot & Battery Box, Braided hoseR2D2 Outer Foot & Battery Box, Braided hose

Also sprayed up the knurled hose fittings and battery harness straps with primer.

March 12, 2013

Knurled fittings for Battery Box Hose's - 1:1

I've bought a set of Knurled hose fittings off e-bay from Don Jarr. This will save me some time rather than make a set. Available access to a free lathe in work has been limited, due to them being used for work :-( lol :-D

So here they are after I did a bit of filling of holes etc.

Drilled and pinned & using Araldite to complete the bond, the two parts of the Battery Harness straps, together. Test fitted here in the pic.

March 08, 2013

Braided Hose - the making of :D

Yesterday when I got home my 'copper braid' had arrived..... well the computer cable it insulated did lol. Following the idea from a fellow builder Astromecheadaches . I carefully cut the plastic tubing along it's length and then removed the cables. I then cut it to length 304.8mm and then taped it up and fed it back through the copper hose. The tape is to stop the tube from catching on the copper braid......which on my first attempt it did!

The hose was just the right length. The diameter isn't 12mm (1/2") but its a small price to pay.
Just need to buy 3 more!

March 02, 2013

Braided Hose

Of all the bits to find, make or buy...... these are as hard to find as.......well........copper braided hose! lol. There are 'part runs' but alas, are out of my budget. So next we turn to the alternative's.

If you look hard enough, you can find stainless steel braided hose. And we are not talking about your shower type hose either lol :D. These would obviously have to be painted to suit.

Then a fellow builder Astromecheadaches found these and with a bit of modification, made himself a set of hose's. I have been looking at these, below.
click image to go to ebay page


February 24, 2011

R5's Head frame, Ankle Cylinder's, Motivator and Braided Hose.....

Looked to day at how to construct R5's head. There are loads of ideas from Aluminium spun to Styrene constructions. Not 100% sure my route, but thought I'd start planning it out. Found an idea to create a skeleton frame that the outside walls would wrap around. As this project is going to be budget orientated, it looks like a sound idea.

Converted imperial dims to metric for the Ankle Cylinders today. Looked at what material to make them from. Plastic tube with plywood ends or aluminium ones. Or just make them all out of aluminium bar, from the scrap bin in work ??? I think I'll go with this as I feel then like I'm doing something instead of just 'thinking' what to do next lol.

Have also been thinking about R5's 'bad motivator'. Searching for pics info on what it looks like, but both are very limited.....

Also found some Braided Hose in a Wickes catalogue. These might just be suitable, but will have to see them in the flesh first.