Showing posts with label slip ring. Show all posts

October 26, 2020

Sounds for Droid 2020 - 1.8 installation

Made up a new bracket for holding one speaker, out of some MDF wood. The prev one was perspex and was attached to the old sound board.

new speaker position

I may mount the second speakers in a rear position.

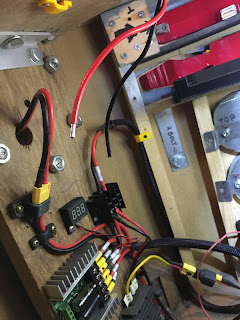
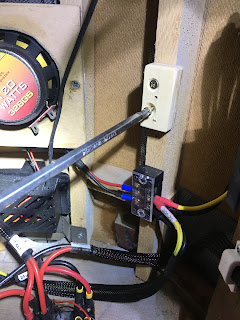
Continuing on with organising the wires, the slip ring underside wires are always annoyed me as they are stiffer due to less strands. This makes it awkward reaching inside as they get in the way. So I decided to cut them short and connect new, more flexible cable. This will also be yellow to match up with identification of the voltages, yellow being 12v positive.

slip ring cable modification

Next up was to install the sound board. I changed my mind about which side to mount it on. Decided that it would be better over on the right hand side. I needed a spacer block, so cut a small piece of wood, marked the boards fixing hole position on it, then drilled clearance holes and screwed the spacer block to the frame.

spacer block

Next up was to then mount the sound board to the spacer block.

Sound board fitted to spacer block

I de-soldered the red power cable on the sound board and replaced it with a yellow one. I had some yellow heat shrink to cover the red wire for the Trading Card Dispenser electronics box.

Next up then is to connect the speaker, route the servo lead which operates the relay switch and test out the amp/speaker. Also need to look at where best to fit the volume control knob.

October 05, 2020

Teeces LED work for Mike's dome [August 2020]

27th August 2020


     A few weeks back I was asked to help wire up a set of Teeces LED light and add some LED's to illuminate the Holo Projectors x3.

R2 type dome getting some lights fitted

I fitted a voltage regulator to drop the volts down to 5v.

Teeces lights lite up
These are the main lights for the dome illumination.

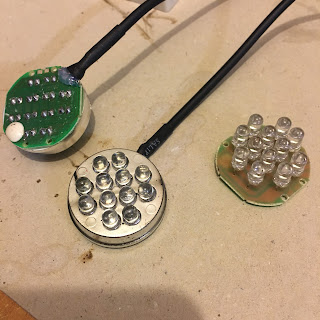
Mike also supplied some torch LED panels, which I managed to solder up wire connections to after figuring out why they all didn't light up with just one ground wire connected.
Torch LED units

After soldering these up, I had a thought about how to fit these into the Holo Projectors, without the dreaded 'Holo wire twist & break'. So I dug out my Holo Light units I made years back for my R4-D4 dome.

I did some updates to the LED holder, now that the 3D printer is better than the previous one lol and also upgraded the bearing holder.

Holo Projector LED holder

The bearing holder, is designed to be shaped with a file to be a tight fit into the rear opening of the Holo Projectors eye. The whole unit acts as a slip-ring arrangement, allowing the LED's to be connected and lite, but also allowing the Holo Projector to fully 360 degree free movement, without worry of 'Holo wire twist & break'!

Short video demo of new holo slip-ring

No more 'Holo wire twist & break'

Mike's dome only has two moving Holo Projector's, so these received these units. The third Holo is static. Nect up was installing them into his dome.

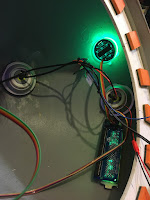
Panoramic view of inside the dome - LED's

Next up is to finish installing the power cables, the Teeces units & connecting up the power switches.......

wiring up the switcheswiring up the switches

And some pics of LED's illuminated.

illuminated LED'silluminated LED's

illuminated LED's from the inside of the domeilluminated LED's

Mike was kind enough to make this new tool storage box sticker, nothing wrong with the original lol, but hay....everyone should have their name on their tool box.

tool box stickertool box sticker


Interested in sign's etc, check out his website...

Click this link to his website ->>> Vinyl Designs

May 09, 2016

Bad Motivator - electronics/electrical work UPDATE 2

So Saturday I set up the electrics so I could easily work on them outside of R5's body.
excuse the hanging regulator, [mid left] this was just a wired up to test
I tested the new regulator and the bad motivator board worked.

Then I connected up the slip ring into the circuit, all good still.

Next, I connected up the door actuator ......and it didn't work properly!

Then realised I was using the old one.....so swapped it for the new one and, YES, it works. No fluttering! So I now know the old actuator is broke, cause tho??? We'll see how long this new one lasts.

~~~

Sunday I fitted R5's dome onto his body and re-tested everything.

Test one, motivator and smoke system work perfectly.
Test two, again, all works.
Test three......smoke yes, actuator not so great!?!?!

It activated and moved a little, but then stopped, not completing it's full travel.
And it also felt warm, need to look into this further.....

April 18, 2016

R5's Slip Ring Upgrade 1.0

I wasn't happy with my original slip rings thin wires! For low level electrical signals they were fine for, but when my Bad Motivator door motor actuator operates.....it doesn't????

Bench testing connected directly to a 12V battery, it all works fine???

I thought it could possibly be the remote part of the circuit, but this is part of the same circuit that's connected to the 12V battery when bench testing, so I can assume this is not a problem.

These are the now 'old' wiring loom etc.
R5D4
 View up through dome base.

R5D4
Pin connection, wires to remote (upper right) & R5's eye sensors (left)

A fellow builder on the UK forum, was selling off unwanted parts, so I bagged me the slip ring he was selling. I then bought some XT60 connectors to connect up to the dome wiring.

Next, is out with the old connection and in with the new.

October 07, 2015

Electronics & Automation upgrade time..... 1.1

Servo's &  brackets & leads arrived at the weekend.

The servo's I'd ordered were cheap budget Tower Pro ones. Only because I wanted to test that I could get the transmitter to work them. I'd also bout some brackets to be able to fit them. These didn't fit over the servo's location lugs, so I had to file them down a bit to fit. No big problem and they now fit a lot better.

So got to playing with the Transmitter settings in the hope I can actually control the Utility arm's once connected up. See next update on Utility Arm movement Blog post.....

Result!

Thought I'd have to have both arms servo's running off a Y-splitter, but I must of set both 'switches' A & B the same, and the knobs too. This means I can dial the servo's to OPEN position, and then flip the switch and the action is cancelled and the arms will 'CLOSE'..... well, that's the thinking, tho may need to swap this round.

LED's & Fibre optic cable came too. More on this later on......

On order was a new 12 Channel remote control, for sound activation........hope this one works properly!

.......well, this came a LOT sooner than I expected, minus a mini battery [no big deal].... But it arrived the day after I actually got my old one working properly!?!?!

Thought I'd try to sort old 12 Channel remote, one last time. Noticed that the remote's LED was dimming, so swapped it over....... All the channels relays 'switch', they all work and they all play their connected sounds.....What the.....?!?!? Am not 100% sure that this was the cause of the problem, but can't believe that this could of been the whole problem?
But I don't really care, am to happy that it all works lol, even the 'NEXT' function settings work, so I have multipule sounds from clicking one button!

Wired up one of the leads from the slip ring to activate R5's bad motivator sound from the second remote, but couldn't get it to work. Not going to worry to much as it will just have to be operated from the main remote control and be a two finger button pressing operation lol

June 03, 2015

Slip-ring system 1.1

Slip-ring work, I paired up the wires and soldered them onto a 9 pin plug. Not used all the pins though. I figured by doubling up the wires it could/would help with current flow [what do I know though lol]. Thankfully my soldering skills held out and all went well. Finished off with heat shrink sleeving. Only took a few hours, of twisting and soldering up lol.
R5-D4 Dome power

R5D4 dome power

Next was soldering some wire to the Dome socket. Electrical cable was used, as I've used on the rest of R5's electrical system. The plugs were chosen as can only be plugged in one way, so can be done 'blind' if needed from inside the Dome. Obviously I'll be adding labels to everything, to help with remembering what wire does what.

The fixing bracket was made from some scrap computer 
insides bracket, this was screwed to the inside frame.

And here's the slip ring installed in R5.
R5D4

May 30, 2015

R5 work planned & work in progress - May/June 2015

Planned work:
woke up early......to early......buzzing with an idea and eager to crack on with it!

I've had this 'would it work' idea for a few weeks now, but a recent comment (said in jest), on Astromech.net in someone elses build thread, about R5 not being 'technically cannon' has spurred me into thinking, he's right!! So out have come my build plans to see if I can build a new......... Ah yes..........what is it I'm on about??? ......well.......I'lll post up again soon.

Progress work:
Have been away this half term, so frustratingly not had any time to finish off the slip ring wiring I started the prev week. I just need to wire up R5's head connector socket and the wires to the main power board.........more to follow.

May 20, 2015

Slip-ring system 1.0

March 2015:
Slip-ring arrived, was a bit disappointed about the size of its wires. Assumed they would of been thicker, my bad. Still to work out how many wires I'll need or if need to double them up.......or to just buy another slip-ring lol.

May 2015:
With everything else going on, this next step had taken a back seat. So now am moving forward to see if the original unit will be up to the job.

Stripped the wire ends and tinned them.
Drilled a dia 22mm hole in the centre of the bodies top cross section.
Ordered some male & female connectors for the dome connection and from body to the slip ring.

The idea is to run a 12v power for the dome lights. A 12v power the will run the bad motivator unit. And a reduced down 6v power supply for the smoke system activation unit.

Drilled out a 22mm dia hole which the slip ring fits in snugly. I then fixed it with 3 screw's.
Test fitting pictures.

February 17, 2015

Dome electrics - Slip Ring ordered

Ordered a slip ring for powering R5's dome components.

This I hope will allow me to power the motivator unit, smoke & pump and also light up R5's eyes, which at the moment are useing a 9.6v rechargeble battery fitted in his dome.

February 16, 2015

Dome electrics.......upgrade plans......W.I.P.

With plans for electrical extras inside R5's dome, I've had to think about how to power them and control them, what with possibly three different voltages!

I like this challange as its something new to do on R5. It has to be affordable (cheap) and simple for my head to comprehend lol.

I'm thinking of using reciever controlled switch to operate the Bad Motivator 'pop-up' and smoke system, but theres also the 12 channel remote switch unit?? A slip-ring unit will also be needed as the power units are to be in the body (as at the moment, R5's eyes and Motivator LED are battery powered and inside his head).

More updates coming........