Showing posts with label holo projector eye. Show all posts

October 05, 2020

Teeces LED work for Mike's dome [August 2020]

27th August 2020


     A few weeks back I was asked to help wire up a set of Teeces LED light and add some LED's to illuminate the Holo Projectors x3.

R2 type dome getting some lights fitted

I fitted a voltage regulator to drop the volts down to 5v.

Teeces lights lite up
These are the main lights for the dome illumination.

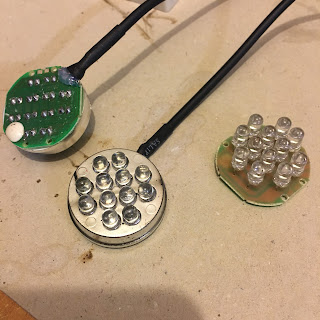
Mike also supplied some torch LED panels, which I managed to solder up wire connections to after figuring out why they all didn't light up with just one ground wire connected.
Torch LED units

After soldering these up, I had a thought about how to fit these into the Holo Projectors, without the dreaded 'Holo wire twist & break'. So I dug out my Holo Light units I made years back for my R4-D4 dome.

I did some updates to the LED holder, now that the 3D printer is better than the previous one lol and also upgraded the bearing holder.

Holo Projector LED holder

The bearing holder, is designed to be shaped with a file to be a tight fit into the rear opening of the Holo Projectors eye. The whole unit acts as a slip-ring arrangement, allowing the LED's to be connected and lite, but also allowing the Holo Projector to fully 360 degree free movement, without worry of 'Holo wire twist & break'!

Short video demo of new holo slip-ring

No more 'Holo wire twist & break'

Mike's dome only has two moving Holo Projector's, so these received these units. The third Holo is static. Nect up was installing them into his dome.

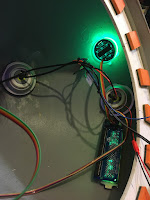
Panoramic view of inside the dome - LED's

Next up is to finish installing the power cables, the Teeces units & connecting up the power switches.......

wiring up the switcheswiring up the switches

And some pics of LED's illuminated.

illuminated LED'silluminated LED's

illuminated LED's from the inside of the domeilluminated LED's

Mike was kind enough to make this new tool storage box sticker, nothing wrong with the original lol, but hay....everyone should have their name on their tool box.

tool box stickertool box sticker


Interested in sign's etc, check out his website...

Click this link to his website ->>> Vinyl Designs

July 09, 2020

Throw Back Thursday - R4-D4's Holoprojector work

This weeks Throw Back Thursday post is back to 2018 and the start of my attempt at motorising and illuminating the holoprojector for R4's dome.

Links to the start of project.
#astromech #r4d4 #3dprinting

April 20, 2020

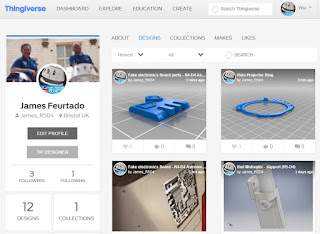
Thingiverse Page - James_R5-D4 = Free downloads


Not done much on R5 these last few days. Have been answering questions about my Adafruit enclosures via my Instagram and Thingiverse pages.

So whilst I was on my Thingiverse page, I thought I'd checkout the views and downloads counts lol.

First up, top 7 Things viewed over the last year:
Thingiverse, R5D4
No.1 top spot, is my Trading card dispenser, lol this is like Top of the Pops 😂.
Next up, top 7 Things downloaded over the last year:
Thingiverse, R5D4

The Fake electronics board parts are what I created to be used for R4-D4's electronic panel on his dome [check out the page at top for the build].

Next up is my Trading Card Dispenser, this one is also No1 in my viewed 'Things'.

In third place are my Frankenstein neck bolts 😄. These I literally drew up and managed to get printed in an afternoon for work college who mentioned he was doing fancy dress the weekend lol.

November 30, 2018

R4-D4 Holoprojector motorised - upgrade 1.4 - new LED's

Been meaning to draw up a new LED holder
for this unit to 'sit' in properly.
Used my standard version and altered it
to accept the lower contacts.
R4-D4 Holoprojector LED

R4-D4 Holoprojector LED

It's bright, so may look at blocking out the centre/front LED.
More work to come.

August 21, 2018

R4-D4 Holoprojector motorised - upgrade 1.3 - new LED's

The new LED's arrived before I went on holiday, so hopefully I'll get time to test them out.
And design up & print off a new holder.

July 27, 2018

R4-D4 Holoprojector motorised - upgrade 1.2

After three 3D printed attempts to get the offset right, the rear holo cowel/servo holder (orange piece in picture) fits nicely. I drew it up to match my previous servo holder, but now to hold two.

It required minimal clean-up and only fixing holes to be drilled.
holoprojector

This picture shows, the assembly of parts I've CAD drawn up and 3D printed. To aid the movement, I use the same as others have which is cutting up a 'Better Breath' anti-snore strip. These work great!
The end tabs (in red box) are the parts I cut off to use.
I also needed to draw up a new bearing holder, the small dark blue splined item in above picture. This just required a slight file around the outside edge to allow it to fit snugly inside the holoprojectors rear opening.
Holoprojector
The slot allows the holder to expand to accept the bearing, and this causes the holder to expand slightly for a tight fit in the holo's rear opening. The outside diameter did get a slight file around it to make it easier to remove from the rear of the holoprojector.

I didn't take any pictures before these test pictures below, but I will later as I have to remove to spray up the new holoprojector.
Holoprojector
 The orientation of the servo arms is not final, this is just how they were when fitted.

Holoprojector

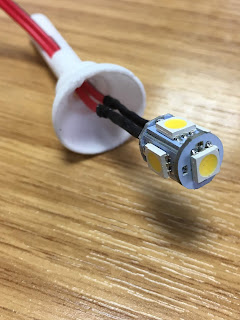
I'm looking at some new LED units, this one below is one I had from before, retesting it's use, which requires me to CAD up a new holder for it.
Holoprojector
The two other LED units will be here in a few days.

July 23, 2018

R4-D4 Holoprojector motorised - upgrade 1.1

Took all the components into work last week, to see what I could do about fitting the REON board up inside my Holoprojector.

After much thinking, I decided that it would be just easier to draw up a new holo which would allow me to fit the circuit board.

Doesn't look much different, it's not, except that the rear hole is now large enough to accept the REON board. Next up was to 3D print it.


After cleaning the holo up, I test fitted it inside the original cowel. With the soft pads inside it was nice and smooth.

I next need to draw up a new bearing holder to fit in the back.


***
Noooooooo, whilst testing the REON unit, the voltage regulator unit failed?' which sent 12volts into the REON unit, releasing the demon of burn circuit smell. Spoke to Paul as thought I may be able to fix the LED, but on further testing....there was no response from it.

Others have had plenty of success with these units, unfortunatly I'm not 100% confident in in using it, no circuit protection, plus I couldn't get the servo to work?? I've decided to go back to my own lighting idea and try to figure out random servo control myself.


***

On a positive note, I made a new lens for the holo, this was because the original tight fitting one.....was just a tad too tight in my new design.

I dug out one of the spare 'fake' cctv plastic domes i had, marked it up and cut it out. A bit of filing the edges and.....one new (not so domed) lens. This will fit on top of the diffuser.

Next up is sanding and filler/primer of the new holo, and drawing up and printing off a new rear, all-in-one /servo holder unit. More on that next week.

July 16, 2018

R4-D4 Holoprojector motorised - upgrade 1.0

My friend Paul posted up that he had now fitted his new REON Holoprojector units.

For Astromech members the link for the REON units is here.

These boards are fitted with a colour changing LED and other circuits that also control random servo movements. When re-told about these, I remember reading the articual....four years ago, but because I didn't have any use for it, building an R5 unit, I forgot about it's usefulness. Forward four years and the lightbulb moment came for using it to control R4's holoprojector unit.
Holoprojector
Servo 1 test fitting
Paul was kind enough to let me have one of his control boards as he was getting another for a new project he’s working on. 
Size DOES matter lol
The board won't fit up inside the Holo.....
What to do......I'll have to think about this.....

I will need to print off the two servo holder unit I designed for him. Image below was early design to allow location holes to be drilled to best suit his holo's.

This will get a few changes to the design, cut outs etc. & possibly a new power mounting board too....

June 12, 2018

My Thingiverse page - for 3D design work - UPDATE

Just a small post to say that I've added some more work to my Thingiverse page.

These include:

  • The 'Fake electronics panel'.
  • And the components I had created that would eventually be combined into it.
  • The Holo Projector ring (not a standard component) I made to cover up the Holo securing screw heads.

All these are free to use. They maybe of use to you or help with other projects.
If you do use, it would be great to see, my Thingiverse page is => here

February 01, 2018

R4-D4 Dome work progress 3.9 - New Holo ring cover

I drew up & 3D printed a new Holo ring.


I then painted it black with silver details. This was to cover the screws retaining the Holo eye in place.
And here it is as a test. This is not a 'film cannon' item, but as there are a few different R4 with different holo projector 'boxes', this isn't a problem for me.

Next up......LED's

December 07, 2017

R4-D4 Dome work progress 2.9

Friday, I fitted everything onto the Dome. Used temporary screws to hold the circuit panels in place & wired up the LED's to mini 12v battery. Ready for Saturday at Leamington Spa Wars event, see event report coming soon.
The radar eye still needs work on it, to get the edge fitting nice and tight. And still one last half panel to groove.

See Event Report Blog for Spa Wars at Leamington Spa.

Sunday afternoon, I test fitted the lower location ring onto the domes spacer blocks.

After aligning it up centrally, I measured the height, and yep, in my infinite wisdom, I'd not taken into account the thickness of the location ring....in my defense I have had a lot going on lol.

So next up was to trim the blocks down.


Once this was done, it was a case of screwing the location ring on.


Next up is the bearing location pin blocks.


Marked there rough position on the location ring. Then marked and drilled a slightly over size 5mm hole in them. Once this was done, I then used PVA wood glue to secure them in position & left to dry overnight.
You can see them circled in red in picture above.

Once dried I then drilled holes and countersunk them for clearance, and screwed the blocks in place.


~~~


Been also working on smoothing out the Radar Eye more.
Primer sprayed it (and the lid) the other day.

And sprayed it up metallic Red.
Wasn't impressed with the usual mat black finish.
I still need to work out a paint scheme for the dome tho....