May 2nd 2023
https://sites.google.com/site/theageofplastic3d/all-about-r5-d4


Items also
(possibly) used that match is the vinyl sweep brush which resembles R5’s
antenna.
I have always found the search for these found items to be of great interest, so this was something that I had to follow up on. Online searches revealed the record deck's history and more [see Transcriptor link above].
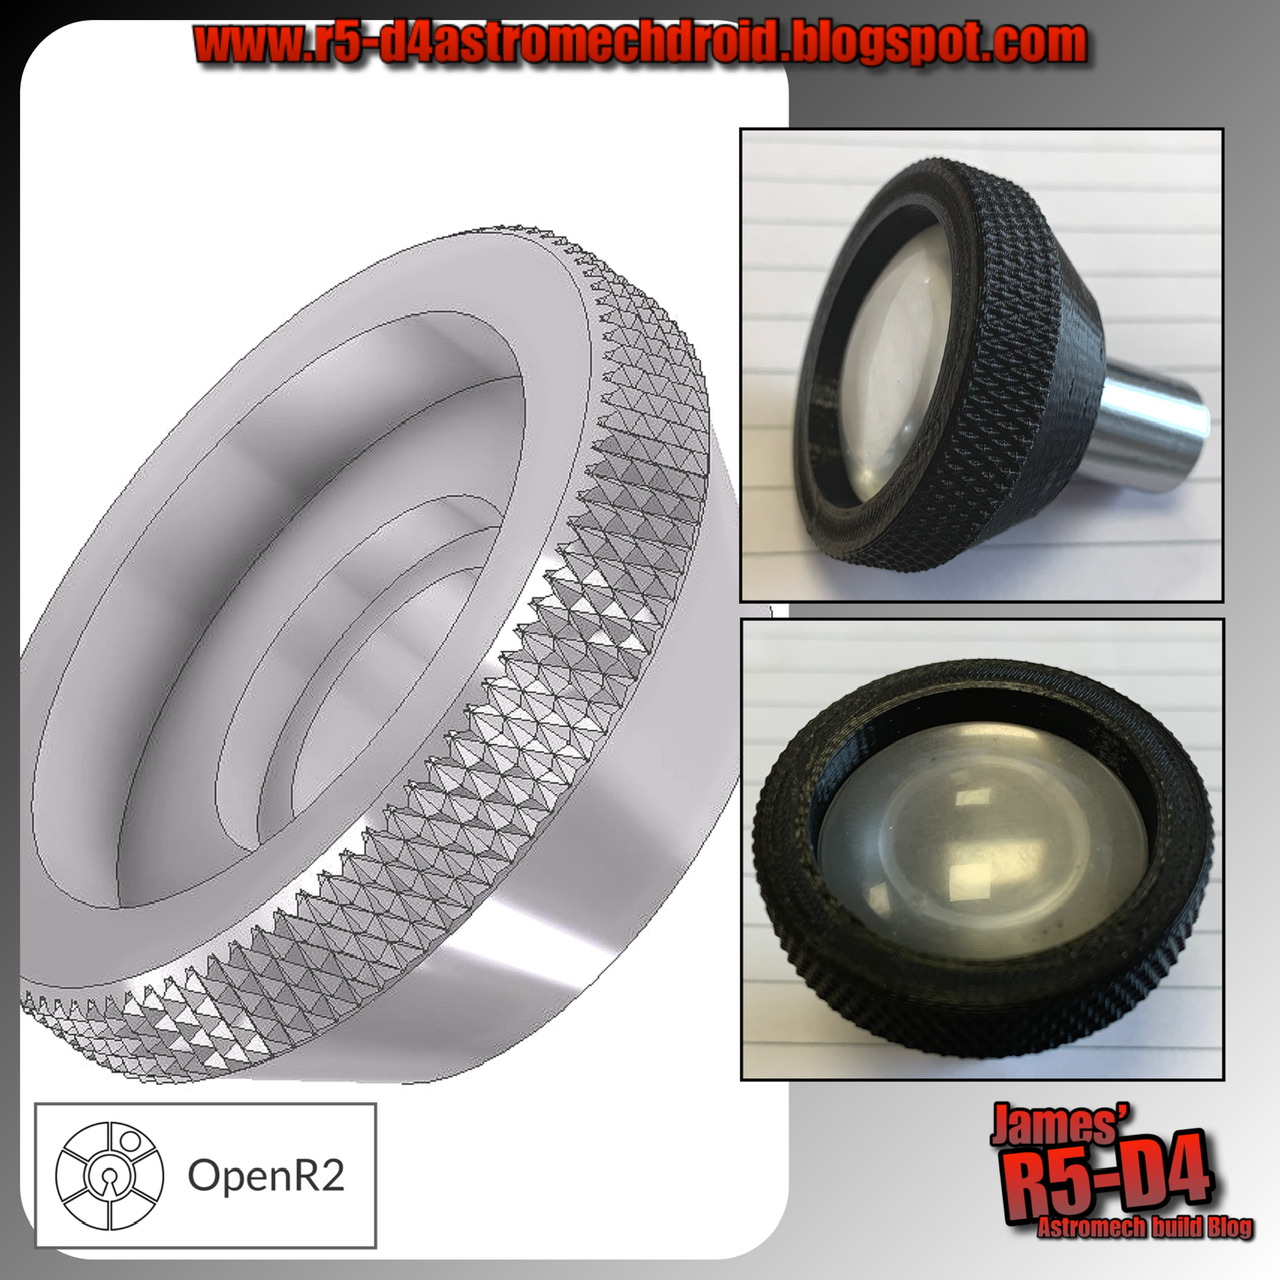
So using the 3D CAD model I had already drawn up years ago, I started on modifying a version to match that of the image supplied by OpenR2.
I also had to find out how to draw up a knurled effect. Previous jobs have only required the superimposed image of a knurl, but I needed the actual knurl for 3D printing. I found a quick tutorial on YouTube which helped put me in the right direction as to which creative option to use, 'coil'. Once one groove was created, I then copied in 'circular' to multiply around the diameter. Next was to create a new 'work plane', and offset it half the distance of the knurled with. I then mirrored the original 'circular' grouping and this created the opposite grooves to create the knurled effect.
Here’s the link: R5-D4’s Eyes - update
Back
to 2023 and here are the new more realistic eye pieces.




When I originally fitted the ankle detail, I hadn’t permanently fix it to the leg. I just used hot glue. It lasted surprisingly well. But as the retaining strap is used in this area for transportation of R5, it eventually got knocked off.
So it was time to fix in place properly. I made a cardboard template to mark suitable hole locations with.

Of course this was after I’d already drilled the ankle detail lol.

I didn’t need to glue in as the holes/dowels were a tight fit.


 |
| R5's Centre foot Outer ankle |


 |
| new all white components |

 |
| silicon applied to fix ankle details in place |
 |
| ankle details taped into place till silicone set |

 |
| The new centre leg & foot shell, pre-weathering |
 |
| Rear ankle detail taped into place |