Showing posts with label Plasti-Kote Satin White. Show all posts

December 31, 2020

R4-D4 dome lid modification - part 1

 I know, I know, I’ve not finished the last two mini projects lol, but it helps me be busy whilst awaiting components.

 Been thinking about fitting the Life-form scanner into R4’s dome, as he doesn’t have any special features.

This tho requires that the lid needs an opening hatch/panel. Firstly I was thinking about making a new lid, either out of wood again or 3D printing one, but apart from being time consuming, I just wanted to get it done. Lol :D

So I’ve roughly marked the underside of the lid to check clearance and it looks like it would fit.

R4-D4 dome lid

Next up is to cut out the red panel.

Not having a dremel anymore, I decided to utilise the drill with the old dremel attachment. This worked out ok lol. It cut through at an angle which actually might help with stopping the new lid from dropping down to far.
R4-D4 lid, opening

Pleased with how it came out. May need to reinforce the underside, but that’s just for my piece of mind. I applied some watered down PVA glue to soak into the cut edges. But they didn’t need much as the top already had a wash before it was painted years ago. So, on to the next stage, hinges.

December 21, 2020

R0-D4 Dome update 2020 (Part 2)

Sprayed up the neck ring with plastic-kote  white paint & left it to dry for a day or so. No pics of this but onto the next colour, Red.

Thankfully I still have the original wood neck ring, so that I could match up the painted stripes.

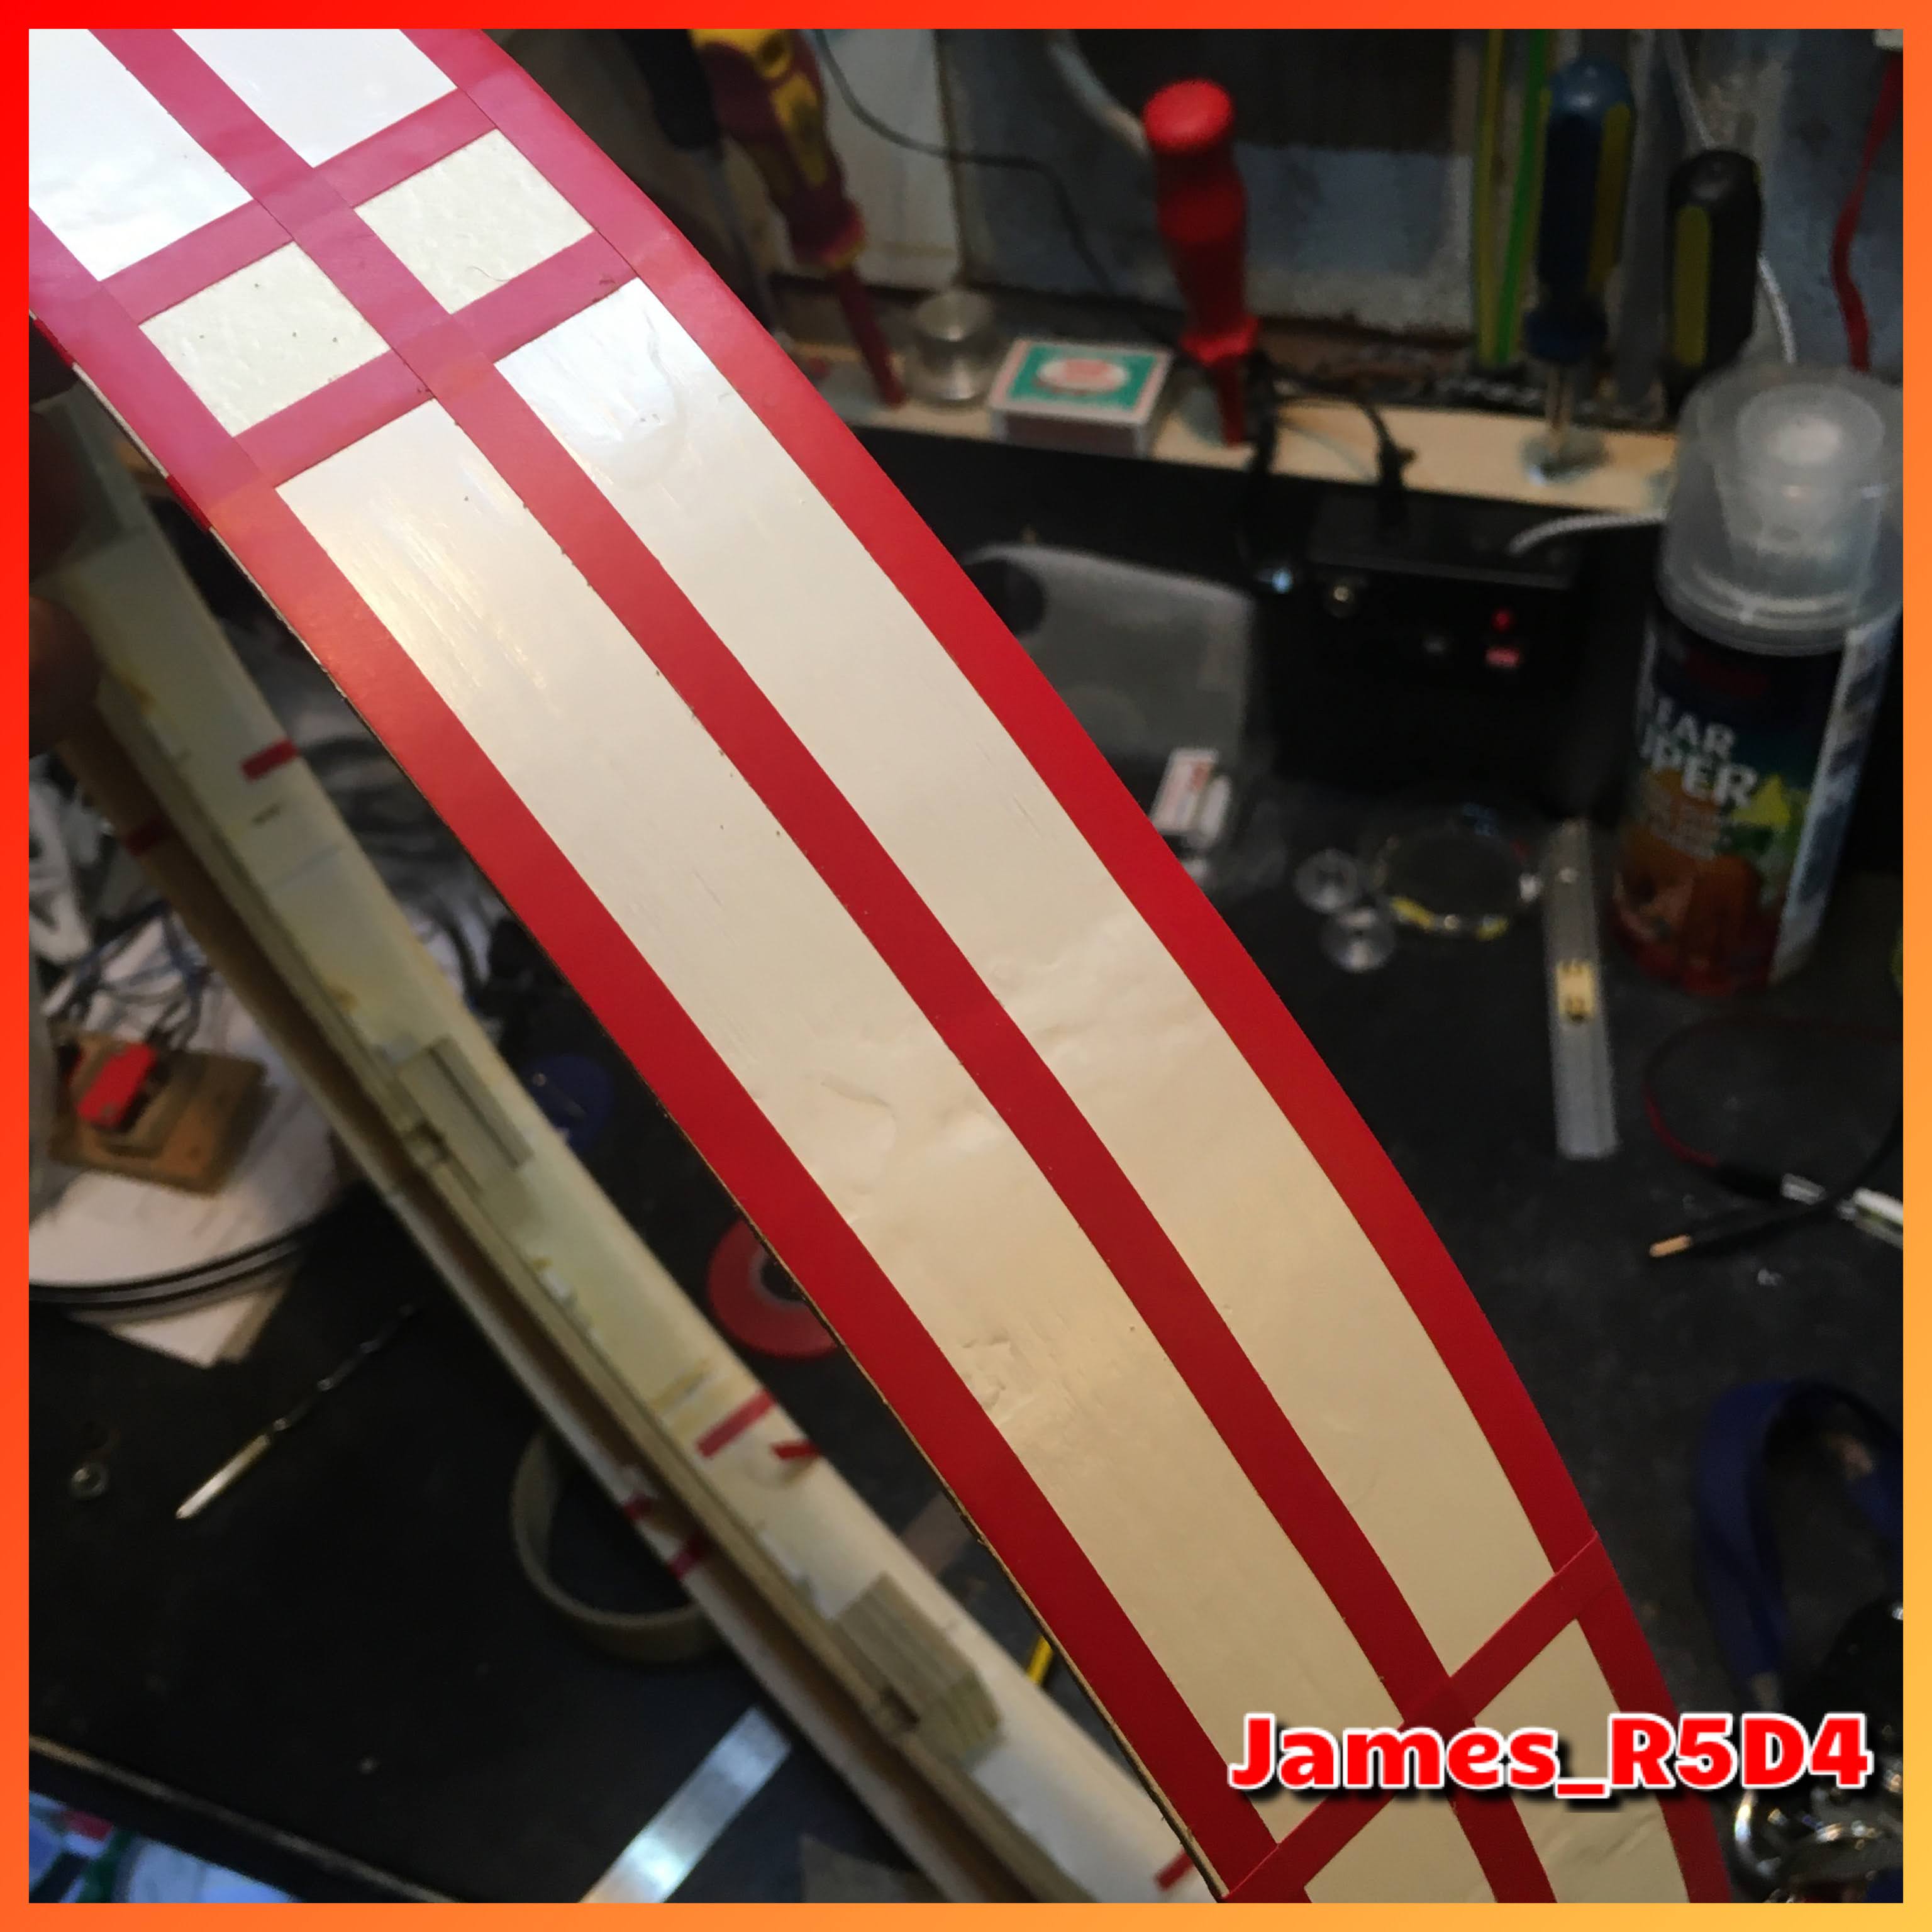
There are four quarters which have thicker vertical bands. These had a stripe of masking tape and the pin strips to prevent paint bleed.

R0-D4’s next ring being masked up

Next came the top and bottom bands, again using the pin stripe tape width, with an additional single thickness vertical line at each centre of the quarters. As can be seen in above picture.

Then the fun bit, spraying with the red metallic’ish paint.

Red paint

Looking good. I left this for about 20mins before starting the messy bit, removing the pin stripe tape.

Tape removal

Removing the tape

I had made sure to corner crease the edges of the over lapping tape, but this isn’t the best way, cutting the tape is. But I didn’t want to damage the paint and it’s not critical. Weathering will cover up and also chipped paint too.

Once all the tape was off, one final picture before being left to fully dry.

R0-D4 red neck paint, waiting to dry


December 16, 2020

Utility arm UPPER socket screen (Part 3)

 Test fitting of the panel identified that a few things needed tweaking.

Utility arm socket screen installation

  • The utility arm wouldn’t close properly.
  • The screen was still a bit tight.
So firstly, the utility arm was not closing properly. This I found was down to the pivot pin not having enough clearance below it. It was being restricted by the lower frame panel. Before fitting the socket screens, there was a bit more space. As the pivot pin had left a rub mark on the new paint, I could see where to make a recess with a 10mm diameter drill bit.

Utility arm socket screen installation


Next was the socket screen itself. I had to clean off over spray paint from the top and bottom faces & trim a bit more off the pivot arm end. This was stopping the screen from going back far enough, which was restricting the utility arm from closing fully.

Really pleased with how this is looking. Just need to weather the screen and finally fit it in place.

December 15, 2020

Utility arm UPPER socket screen (Part 2)

Top utility arm socket screen test fitting

Before spaying up the screen white & then getting to work on weathering it.....see below.

The piece of wood that sits between the two utility arms, needed to be thinned down for the screen to fit. My original measurement was for a snug fit, but the print was just a bit higher than expected, so rather than take a blade to the 3D screen print (loosing details) I decided to trim the wood piece. This then needed some wood filler before repainting. It was black and I did respray it matt black again, but am thinking white so it all blends together.....

Utility arm socket screen.

Filler primer added

Top white coat drying off.

Once all dryer I’ll start weathering this piece and the screen before re-installing.

December 13, 2017

R4-D4 Dome work progress 3.1 - RED

Last week, I stripped down the dome of it's fitted components & started to spray up the dome, white.

Still have the lower ring to sort out etc. Plus colour scheme, which is actually my biggest issue lol.

Weekend, I lightly sanded the dome and then Monday in work, I gave it a second coat of white.

I drew up some colour ideas, but wasn't happy with them. Then I settled on a design that follows a standard'ish style. So, I started the masking off...

One thing I had forgotten was there are grooved panels above the Radar Eye's location. With everything going on, I'd completely forgotten to add these.....

So a quick operational procedure later and......


Two new grooves were in, PVA washed and edges sanded, ready for the morning.
I was working on the grooving and the masking off of the dome for about 3hrs! It was gone 1am when I finished up and went to bed.

Tuesday 12th.
This morning I set up in the works spray booth and got to spraying up the dome.
They only sell the metallic red in small tins.....good job I bought two!
Started spraying up.

Dome and lid sprayed, just waiting for it to dry,

I also sprayed up the two electronics panels in silver. I got them wet with spray which has helped with the blending of the 3D printed ridges.
Once dried these will get dirtied up with black etc.

So lunchtime I peeled off all the masking. Two spots I'd missed with covering, and one slight mist bleed. But am not to bothered at the moment as I can re-do this bit later.
 Radar Eye fitted back on.

'Electronics panel' fitted back on. View also of the lid.
I left one panel be red & included some random split pin strips, for R5 reference :)

Next up is silver groove details.

Metal for the neck ring arrived today from 'Metals4U', here in the UK. You can order strips cut to length, width & thickness etc.

December 08, 2017

R4-D4 Dome work progress 3.0

Finished off the last grooving to the curved panel.
Lightly sanded it and applied a PVA wash over it.

Next up was some silver detailing on the radar eye. I sprayed some into an empty can cap and then using a file paint brush, hand painted the slots on the eye.

Then I used the brush to 'dry brush' over some of the edges.
This helps create the chipped paint effect.
Still a work in progress as need to add darker colour's to add 'dirt' effect.

Next up was to position and glue into place the Radar lens. I used fiber glass resin, marked the position and fixed it in place. I then screwed it back onto the dome so that any resin would be shaped by the dome, before it dried and that would of meant more work.

As I'm not sure about the final colour scheme for the dome, I did decide that regardless, the dome will need a white coat of paint. So I started on the lid.
A few coats and wow, what a finish!
The waves in the reflection near the middle, is the extractor filter, not the surface finish lol

June 05, 2017

Centre Leg - Film version **UPDATE 1.4**

So i got home from work Friday 26th and gave the components a lite sanding over the primer paint.

I then set up my hi tech spray booth........My cardboard box......and set up the components for spraying. After a few coats, I left them to dry. It has been very hot here in the UK the last few days, so it wouldn't take long to dry.
r5d4
new all white components
Saturday again the weather was fair, after a massive thunder storm early hours of the morning.
Out came my spray booth and i got on with clear coating the components. Again, these didn't take long to dry. A few hours later, I started to fit the components onto R5's centre leg and foot shell. They all fitted.
r5d4 centre leg

I dug out a tube of silicone sealant, but it had gone off at the ends. I cut it open to find the inside middle was still okay, so I scooped the good stuff out and used some to fix the front and rear ankle details onto the centre leg. Applied some masking tape to secure in place till it had set.
r5d4 centre leg
silicon applied to fix ankle details in place
r5d4 centre leg
ankle details taped into place till silicone set


r5d4 centre leg

r5d4 centre leg
The new centre leg & foot shell, pre-weathering

r5d4 centre leg
Rear ankle detail taped into place
Just back from a weeks mini-break..... Next up was to weather the new components to better blend in.

May 25, 2017

Centre Leg - Film version **UPDATE - 1.1 - ankle details**

I already had the plans for the ankle details, which are available via www.astromech.net forum, so it was just a case of marking up some wood and cutting them out and shaping them.

detail pics:
Drew up a template and marked out on the wood the 'detail'.
Notice that only one of them has the upper 'tab' marked on it.

Next up was gluing the two pieces together.........then cutting out the details...

And here's the first on.

I sanded the edges and faces, before applying wood filler to the cut sides & faces.
Had to stop for food, then I was back out in the garage, marking up the second 'ankle detail'.

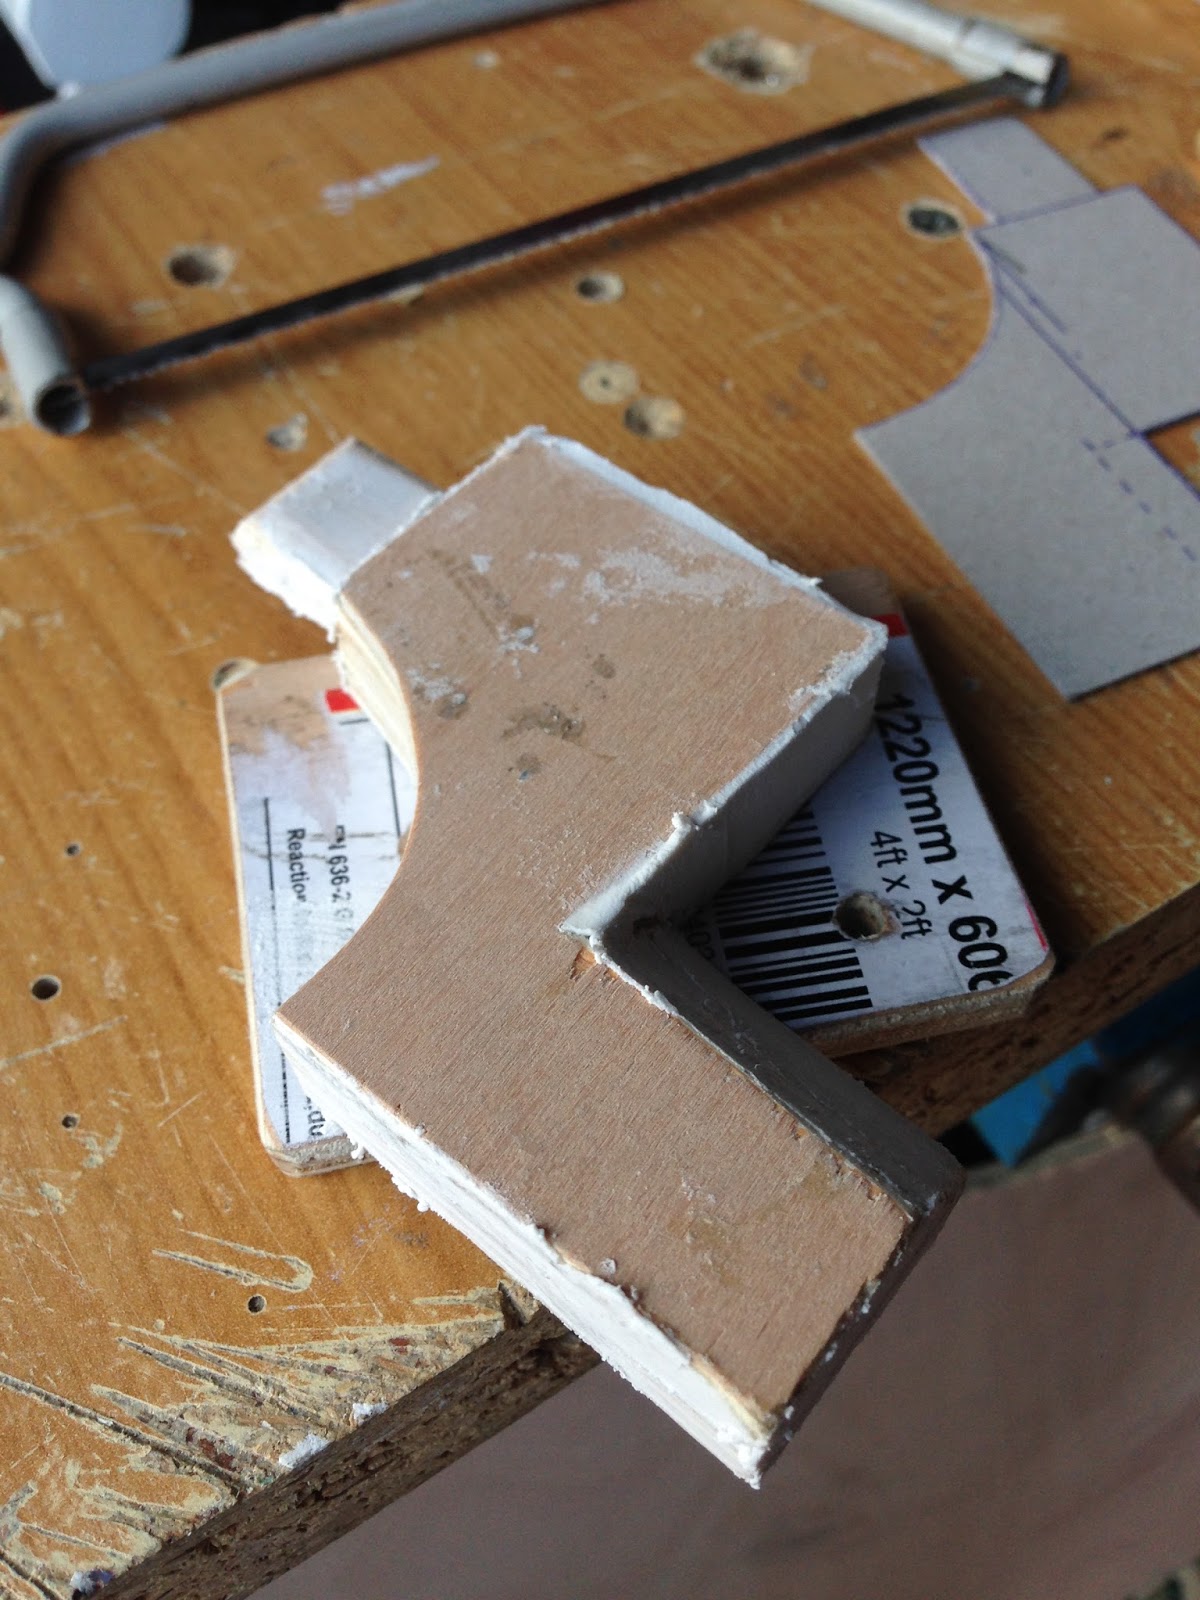
And here they both are, cut out and wood filler applied.
Left to dry over night, before sanding and extra wood filler where needed.

.....these versions as with the ankle cylinders, don't have any blue (that can be seen in the photos), so will be just white. Which is fine as they are going to be weathered to blend in with the centre leg.

The top 'tab' would normally be blue (or dependent on your choice of droid colour) and also there's a small rectangle recess, which would also be coloured accordingly. 

** I uses normal everyday tools, the hand saw as can be seen in the pic .
The most 'hi-tech' tool I have is a borrowed jigsaw,
meaning these projects are not beyond anyone's abilities to try **

Centre Leg - Film version **UPDATE - 1.0 - ankle cylinder**

A long time  ago.......... ;-) I realised that my nagging conscious wasn't going to let me sleep anymore lol.

This (zoomed in) image of R5 rolling away from the droid lineup, shows R5's alternate centre leg/foot shell.

The obvious things you can see is that there are:

  • no side crescents on the foot shells.
  • the ankle cylinder & wedge, are white (no silver or blue, like the outer leg)
But when you look even closer, you can just make out that the 'centre leg' is actually fitted with 'ankle details'. Well it would do wouldn't it, as it was an outer ankle unit.

For more on this, check back on my first blog via this link below:


So, as I already had a spare ankle cylinder.....as my original centre leg was built to the club plans (based on R2 and all Astromech's having a 'standard' build) & before I fully knew about R5's centre leg incident during filming (see the link above for more). I thought I'd do a little bit of upgrade work.

So I dug out the spare cylinder/wedge and checked it would fit the centre leg fixings I already had installed. Yep, me and the plans in perfect synic lol.

Next I sanded the cylinder and then primer sprayed it ready for the next stage.
R5D4

Next I'll spray it up with Satin white from Plasti-Kote, once I've finished the other parts.
This and the primer I bought from The Range (shop in the UK).

April 27, 2017

R5's dome rotation upgrade 1.7 - metal ring

I needed to add some more pads & had Steve add some more tabs to help centralize the metal band. I was considering weight against thickness, but the thicker metal may have been a better choice in helping to reduce flex of the band. The additional pads and tabs should hopefully help with this. Found that these were not actually needed.

Next up was preparing the ring for painting. I'd already lightly sanded the ring and edges to key the surface and deburr the edges. I then used pin stripe tap to line edge & mask off for spraying up.

Using the original skin, I'd measured up about 25mm.

I then wrapped around the pin stripe tape and then masking tape.

~~~

Now Easter break is over, I was able to get back on with sorting out the new neck ring. It's not been easy, lol, with the dome in work sorting neck ring and clearance with the new bearing. Then taking the bearing and un-attached neck home, to check it all works on the body with the motor etc.

Well....... due to my unique skills, lol, the ring needed to be re-worked a bit. Then it was time to screw it all back onto R5's dome.

Glass fiber filler the gap between the metal ring and the wood. This was applied via the inside to also give some extra strength to the wood angled piece.

Wood filler applied:

This was then sanded smooth once dried. This side needed a bit more than the other.

Next up was primer. So I bagged up the dome and masking taped it off at the edge.
Using works spray booth makes life easier and breathable lol.
R5-D4

Due to time, I didn't take any pics of spraying up white, but it was the same as the grey pic lol. This work was done yesterday and left over night, to stink out works workshop.

This mornings little project was applying the neck's silver tape. Now, you can/could use silver spray paint, but this tape matches the other tape used on other parts of R5. Plus it re-matches the original he previously had.
R5D4
Goes on easy'ish, then used a cloth to smooth out all the edges & wrinkles. Next up was to trim off the excess.
Once I'd finished this, it was back into the spray booth to clear coat the new paint and silver tape.
Then once it was dry, it was de-bag time.
R5-D4
The white, is WHITE lol, so will need to be dirtied up a bit before Saturday's Lego Land event! It's amazing to see the colour difference over the time since I'd originally sprayed up R5's dome. Hopefully this should last him a few more years.