Showing posts with label greeble. Show all posts

January 26, 2026

More Star Wars inspired 3D models: Prusa [FREE stl's]

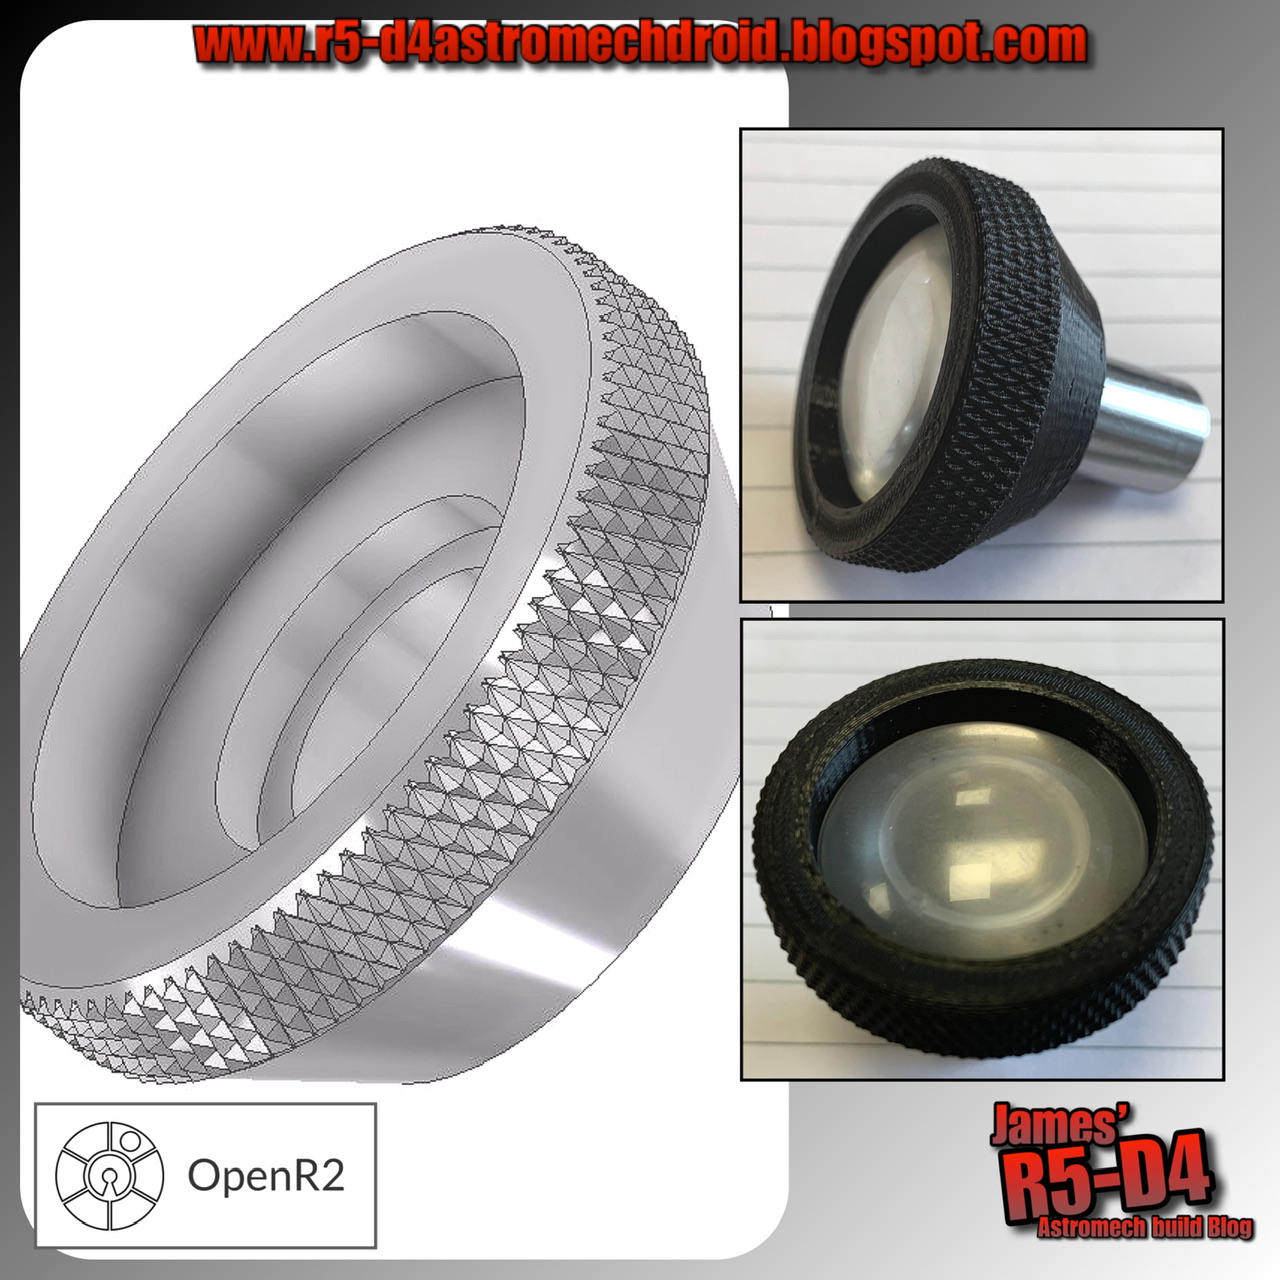
Just before finishing up for Christmas, I had an idea for a 3D model. It's sort of based on a ceiling lamp shade, Star Wars inspired, but could also be used for panels etc. This is version 1 of 3, all slightly different.

3D printable, free stl, greeblie
click on image to linked file

I drew up and then modified the design into three different versions.

💥💥💥💥💥


Next up: Star Wars Andor season 2 TV show, published a promotional magazine, called 'Rebelion an ANDOR zine' [wiki link]

In it was a page of 'micro-props' that I liked the look of so have recreated them to be 3D printable.

3D printable, Prusa, free stl
click on image to linked file

Above image shows original model, insert, and my 3D drawn model. I designed it size wise to fit in palm of a hand. Or course you could scale it up or down to suit your preference.

I included in the design to accept M3 knurled brass inserts to be able to clamp the two halves together. The orange lite lens  part is not included [at the moment] as this was going to be an actual LED.

This one is a communication unit of some sort. The press button in this version is a fixed item, separate parts for ease of printing orientation.

💥💥💥💥💥

Next up was this desktop microphone. Again the sizes are based visually off the original image and the rough size of the microphone. The base resembles a car engines piston, connection rod.

Andor desk microphone

This is still a work in progress, so will link file once completed.

Original design & credit goes to Lucasfilms props department.

July 24, 2024

April 03, 2023

Screen accurate R5 eyes - found part by OpenR2

Over on the R2 Discord chat, OpenR2 member raised the question about R5’s eye sensor not being like the ‘club spec standard’ design but actually being conical.
As with lots of items used in the original trilogy, unusual looking things from everyday items were used in different ways. OpenR2 showed a high resolution image of R5’s eye and the shape/shadows showed it to be conical and not the stepped look us club members have been using all these years. As stated above, a lot of the droid greeblies & even Boba Fett's costume and jet pack, in fact came off  vinyl record decks, specifically a Transcriptor Hydraulic Reference Turntable .
He posted up the high res pictures and the turntable, similar to the one below.

Items also (possibly) used that match is the vinyl sweep brush which resembles R5’s antenna.

I have always found the search for these found items to be of great interest, so this was something that I had to follow up on. Online searches revealed the record deck's history and more [see Transcriptor link above].

So using the 3D CAD model I had already drawn up years ago, I started on modifying a version to match that of the image supplied by OpenR2.


Creating a 3D Knurl:

I also had to find out how to draw up a knurled effect. Previous jobs have only required the superimposed image of a knurl, but I needed the actual knurl for 3D printing. I found a quick tutorial on YouTube which helped put me in the right direction as to which creative option to use, 'coil'. Once one groove was created, I then copied in 'circular' to multiply around the diameter. Next was to create a new 'work plane', and offset it half the distance of the knurled with. I then mirrored the original 'circular' grouping and this created the opposite grooves to create the knurled effect.

The above image was version (attempt) 'd' or 'e' lol.
Eventually settled on version 'F'


Throwback to 2013:
Wow…..10 years ago I had finished machining up two of the three eye pieces that would have the spy holes lens units fitted.

Here’s the link: R5-D4’s Eyes - update

Back to 2023 and here are the new more realistic eye pieces.


And here they are being painted.


Next up was to cut out some opaque plastic that I had salvaged from a flat screen monitor. This was placed in the recess after the rear part of the original eye piece was fitted through from the front. Then I pushed in a cabochon into each one.

These were then re-fitted back into the dome, and secured in place. I then hot glued the original LED’s back behind them.


Really happy with the new look.
Check these out at #celebrationeurope2023 next week 😎👍🏽

March 06, 2022

Solo - a Star Wars story - Irradiator Illumination Bank 3D printing Part 5


Progress so far:
  • Clips printed to hold the ‘windows’ in place.
  • Spacer/washers for the handle pivot points.
  • Handle details.
  • Handle sprayed up.
  • Sourced additional greeblies.
  • Illumination ideas.
Window clips:
These are to be glued in place, probably hot glue, to hold the two half's of the windows in place. They wedge under the windows.

The handle:
This got sprayed up in the silver and I printed out some small greebly details to add to the plain sides. I also printed out some poly washer/spacers for the pivot points.

Additional greeblies:
I went searching for parts to add to the overall appearance. I dug out old 3D printed pieces from previous builds as well as things that have been seen in the ‘SW Universe’ directories.

Illumination:
The unit needs lighting, so have been looking at how best to achieve this.
I’ve come up with a few ideas, but the top window illumination has been sorted.

This LED unit has five really bright LED’s, four of which shine towards the windows.

February 26, 2021

R4-D4 dome - Life-form scanner final design - part 15

 Sooooo...... :D yes, I think this is THE final incarnation of this 'little' project lol.

I suppose this version was inevitable as this project has progressed, but the intention was to just have an independent set-up. So why have multipile components, with possible alignment issues etc. This design now incorporates the Pie hole panel and the life form scanner as a one piece unit.

life form scanner, r4d4, pie hole panel,

The colours show the (modified &) combined components.
  • ORANGE = modified Pie Hole Panel unit.
  • BLUE = upper servo lift bracket
  • RED = upper LFS bracket
  • YELLOW = LFS bracket cover
  • GREEN = additional greebles.
The PHP unit had to have surgery to allow the lower bracket/guide to travel all the up to get the most travel for the LFS. The inside panels also had work done as there was no need for details on some of them due to the face that when the lower bracket is raised, it would block them from view.

The RED upper bracket, was a hacked previous version, but needed something to top it off visually, so the cover was added. This is also one of my old greebles that I copied and modified to suit.

This all still works with a upper 360 deg servo and a length of cord.
life form scanner, 3d printing


I need to increase the length of the carbon fiber rods and shorten the a aluminium main LFS rod.....may switch it over to also being carbon, just to be prepared for possibly being grabbed.....which with it being so thin walled, would easily bend/break!

With the finishing touches done to the design, it was time to print!
3d printing


I've created this short video, link to my YouTube channel.

As you can see, the assembly was installed inside my R4 dome. This is still a test fitting, as the pieces need to be painted and also the electronics/electrical also need to be finalised, but am really happy with how this is turning out.


And viewed through the open lid

Still some minor things to do, like design a cover for the servo which will be visable, also the support rod, this is a 'spring' at the moment, may need to be a bit more substantial. Also looking at repositioning the mini switches that are inside the dome to be mounted on the top face of the inner panel. These only control the LED's.

#3dprinting #3dcad ##tevotarantulapro #3ddesign #r4d4 #astromech #ukr2d2buildersclub #droidbuildersuk