Showing posts with label Ankle. Show all posts

March 21, 2014

Return of The Centre Foot

Right, before I start getting stuck into upgrading the Centre Foot any further, I thought I'd try a brace on the Foot to the Ankle. So cut a strip of metal, filed edges and bent into shape.
Drilled two clearance holes for two M5 hex socket bolts.
R5-D4


This was then going to be positioned onto the centre foot to transfer best position for holes to be drilled.................but in my re-fitting the foot to the centre leg...... this happened.
R5-D4R5-D4

When I altered the internal wood 'plate' to go further up inside the foot shell, I had made it small around the outside edge. As this was what the foot shell rested on.
More repair work!

March 14, 2014

R5 assembled......but centre foot wheel issues......

Got home last night and got to fitting R5's second (first) leg, back on him. No problems. Fitted his foot and battery box, no problem. Then comes the tricky part lol, fitting his centre foot!

Fitted his centre leg & foot, but that's when the tipping issue arose.
From what I can see/figure out, the new wheel has moved the centre balance point up which causes problems with the leg angle to foot pivot point. I only have the ankle bolt to lock in place, but as soon as I tried to move him, the wheel assembly just tilted backwards [right pic].
So I removed the larger wheel and (still having the old one, pictures below) swapped it over.
I was worried about ground clearance, but am still using the new brackets and it's OK, for now.

December 15, 2012

Main Leg 2 - 2.4 - Ankle work [bracelet & wedge]

Ankle
I marked out the curve section needed on the two blocks I'll be using to make up the ankle. I also marked where I need to drill counter sunk holes to fix them to the leg.
Image is from first Leg build

Did this then screwed them on. Next I used my trusty saw to cut chunks off to shape. Then I used a file to smooth over. I then used dowel cut to length to plug the screw holes. The next step was to apply wood filler all over and sand all over....again.
Image is from first Leg build

Had a 'lost item' moment last night. I couldn't find my Ankle Cylinder Holder ????? I'd taken it out of the storage tin to remind myself what needed to be done, if anything, to it. Then........it was gone!?!?! I'd had a bit of a tidy up to make some space and yes, you guessed it, it had fallen into my box of off-cuts! Phew....... :D

Ankle Braclet:
Marked out the Ankle Bracelet for the 2nd leg & cut it out. Then measured my leg and cut the inside of the Ankle Bracelet to fit it. I then marked up and drilled a location hole for the Leg Strut to fit into. Next up I applied watered down PVA glue all over and allowed this to soak in and dry. This hardens the wood and seals the cut edges, which stops the spray paint from being absorbed into the wood and gives a better finish.
Image is from first Leg build. Wood filler to underside of bracelet

I then applied wood filler to the underside of the Ankle Bracelet, that may be visable to anyone on all fours looking up underneath R5, lol. This will smooth over the textured underside of the hardboard :). I then fitted the Booster Strut in place and secured the support angle with a screw. The bottom of the strut fitted into the hole in the Ankle Bracelet. Some wood filler was applied to the gap between the bracelet and the lower ankle area.

Ankle Wedge:
Cut out a piece of 3mm hardboard to make the ankle wedge front panel. I angled the back faces to fit flush up against the angle face of the ankle and the curved part of the cylinder. Next I applied masking tape all over the cylinder & angled face of the ankle and applied p40 resin to fill the gap & build the sides. Once dried, this new piece came away easily and was then ready for trimming of the excess P40 resin and then filling any gaps with wood filler. Once all this was dried, I drilled and screwed the new Ankle Wedge and also the Cylinder holder onto the Ankle Cylinder. Once painted, these become a one piece item which is then held on the leg via the fixing method mentioned in prev post.
Image is from previous wedge build. This image shows sides and P40 resin.
For the last wedge, I didn't use sides.
The weather has been very cold, so build time has been limited, hence lack of photos. I will take some up-to-date ones soon.

November 27, 2012

Main Leg 2 - 2.3

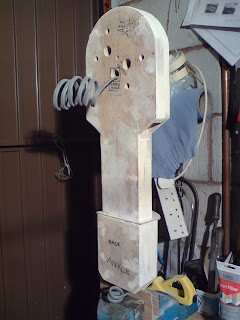
T-nuts are now in place so I test fitted the leg studding through the body, shoulder discs & into the Leg. Thightened up the internal nuts, pulling the studding tight onto the T-Nuts [fitted inside the leg]. Once happy, I fitted all the screws in place, clamping the leg sections together. Next I attached the rear & front ankle plates, that thicken up the ankle. Before I went any further, I opened out the hole in the Leg to accept the Shoulder Hub, as I'd forgot to do this the other day, lol. I then added aluminium strips as guides to the side edge of leg & started to apply wood filler. Also applied to the ankle side edge & edge of shoulder radius. Once dried I started to file flat any high spots.

January 03, 2012

Ankle Cylinder / Wedge No3 - 1.3 - paint

Sanded the wood filler smooth, then sprayed primer all over.
Masked off into sections and then sprayed silver.


Once dried, re-masked off and sprayed with blue metallic paint.


A mishap with the masking tape ment i had to redo one silver side of cylinder :-(
So sanded, re-primed and then silver sprayed again!

Cylinder holder attached with a screw. fitted,looks good. 
Finally finished off with clear lacquer.

Leg Assembly 1.9 - Leg Groove & Ankle Slot

Sanded and added more wood filler to curved ankle faces. Mainly to hide the wood grain!!

I marked out the position of leg 'groove' with a straight edge. Then I clamped it on as a guide for my dremel with router attachment. It produced a realy clean groove. I then moved the guide around onto the other three sides. I used my '9901 tungstan carbide cutter' (for metal use), as it is all I had.

Worked on leg stabiliser holes. Removed excess wood filler. Primer applied to leg groove and rear leg section.


Cut out ankle slot. Scored the outline, then 'chiseled' out, I use this term loosly lol. Next I
cleaned up with my dremel router attachement, then applied wood filler.
see Ankle Cylinder update for explanation of this pic

December 20, 2011

Ankle Cylinder No3 - 1.2 & Ankle Wedge No3 1.1


Sprayed up the cylinder and end caps with grey primer.


I then fitted the end caps into the cylinder and applied P40 inside to fix them in place. I've used P40 this time as these are going to be more 'exposed' so want to make sure they don't pop out etc.


Next I used wood filler to fill in the gaps and smooth things out a bit.


Using previous templates, I marked up and cut out pieces for wedge. Shaped to fit, used P40 to bond the sides to front face. This one only took me all in, half an hour to build.


Once the P40 had set, I sanded all the faces and ensured the curved area fitted over the cylinder. I then drilled and screwed the wedge to the cylinder.
Wood filler applied to gaps on the sides.
cut-out under screw was to help screw in the screw

December 15, 2011

Ankle Bracelet 1.2 - primer & silver paint

Sanded the ankle bracelet and sprayed primer.


Later, added some wood filler to a saw cut to deep.
Sanded flush and then re-primer sprayed, then once dried, sprayed silver.


December 09, 2011

Ankle Cylinder Holder 1.2

Applied some wood filler to spots on the holder and also over the side faces to get rid of the wood grain effect.


Once dried, I'll sand smooth. I'll also use a length of tube with sandpaper on it to achieve the curved cylinder contact surface areas.

December 08, 2011

Ankle Cylinder Holder 1.1


Marked up and cut out of 18mm hardboard, the first, of two, Ankle Cylinder Holders. These pieces sit underneath the cylinders on the Main Legs.


I don't intend to curve the full length of this for the cylinder to sit in, just the ends. The middle part has been cut away completely.


Carved out section
Rear section
I used my dremel with a sanding wheel to create the cylinder curve.

December 02, 2011

Leg Assembly 1.5 & Ankle Bracelet 1.1

Applied more wood filler to the leg, mainly to the wood 'grain' surface. Once dried, this will require more sanding of the leg.


Marked outline onto 3mm hardboard, then cut out what will be an 'ankle bracelet' for the leg.
If this was a metal build, this piece would be made in one piece and fitted between the upper leg and lower ankle section. But as my leg is made in one piece, the bracelet has to be in two pieces to fit.

This is the back face view. Wood filler will be used to fill the gaps on the end of the rear strip.


I used more wood filler to build up the top of the ankle, as can be seen in the previous picture, where the 'ankle bracelet' will sit. As the board has a textured underside, I applied a thin layer of filler, to be sanded smooth.
Am thinking screws to fix in place at the moment, which will be hidden by the booster cover. Not sure how to fix the rear strip ??


Here I test fitted some electrical cable through the leg. I had to feed it up from the ankle to the shoulder hole. This will be connected to the feet motors and batteries.


November 22, 2011

Leg Assembly 1.3


Noticed, after drilling the hole for the Ankle bush, that the wood filler had cracked slightly along the join lines. So drilled some more counter-sunk holes and fixed in screws along the leg section, around the shoulder and two more through the bottom of the ankle. I then applied more wood filler.


picture of back face with extra screws
Time: 1.5hrs


Whilst I was working on the ankle wedge sides, I took the opportunity to drill and press fit the Ankle bush into the centre leg [below].
Bush fitted into centre leg ankle

November 21, 2011

Ankle Wedge build 1.2


The template i had made was the right size, but the trimmed wood ones came out a bit small. The filler needed filing down and the gap left will be filled with more P40 resin.


I made up another template for the wedge sides and this time they should come out a better fit.


Not the best pic, but these side pieces are larger than the first ones.

November 17, 2011

Ankle Wedge building

I decided that now would be a good time to finish off one thing, lol. So lunchtime I cut out the side pieces needed to complete my Centre Leg 'Wedges'.


Using masking tape to hold the sides of the wedge in place. I then us P40 car body resin to secure them to the front plate.


November 16, 2011

Leg Assembly 1.2

After fitting the ankle bush, I started to sand (with a large file) some of the wood filler down.


This is just the start of getting the leg edges running square.

Leg Assembly 1.1

Today I drilled out the Ankle hole in the leg. I used a 12mm dia wood bit.


Leg clamped up ready to be drilled


I then pushed the bush into the hole.
Bush being pressed into leg using the vice
I also cut up some dowel to plug the curved ankle screw holes. These will be filled with wood filler later on.


Wood Plugs

November 15, 2011

Leg Bush's

Yesterday I made these three bush's up for the leg ankles. Made out of Brass.


Today, I'm going to drill the Ankle hole for one of these to fit into.

November 14, 2011

R5 Leg 1 - update


At the weekend, I cut down to size the 2nd block piece needed to form the curved ankle. I  then marked & drilled two counter-sunk holes to screw the block in place.


I also finished the second stabiliser recess (just visible in the picture below). And created the recess for Stabiliser the legs to fit into. I then screwed the leg, back together & started to apply wood filler to leg.


total time: around 2hrs work.