Showing posts with label red pin stripes. Show all posts

December 21, 2020

R0-D4 Dome update 2020 (Part 2)

Sprayed up the neck ring with plastic-kote  white paint & left it to dry for a day or so. No pics of this but onto the next colour, Red.

Thankfully I still have the original wood neck ring, so that I could match up the painted stripes.

There are four quarters which have thicker vertical bands. These had a stripe of masking tape and the pin strips to prevent paint bleed.
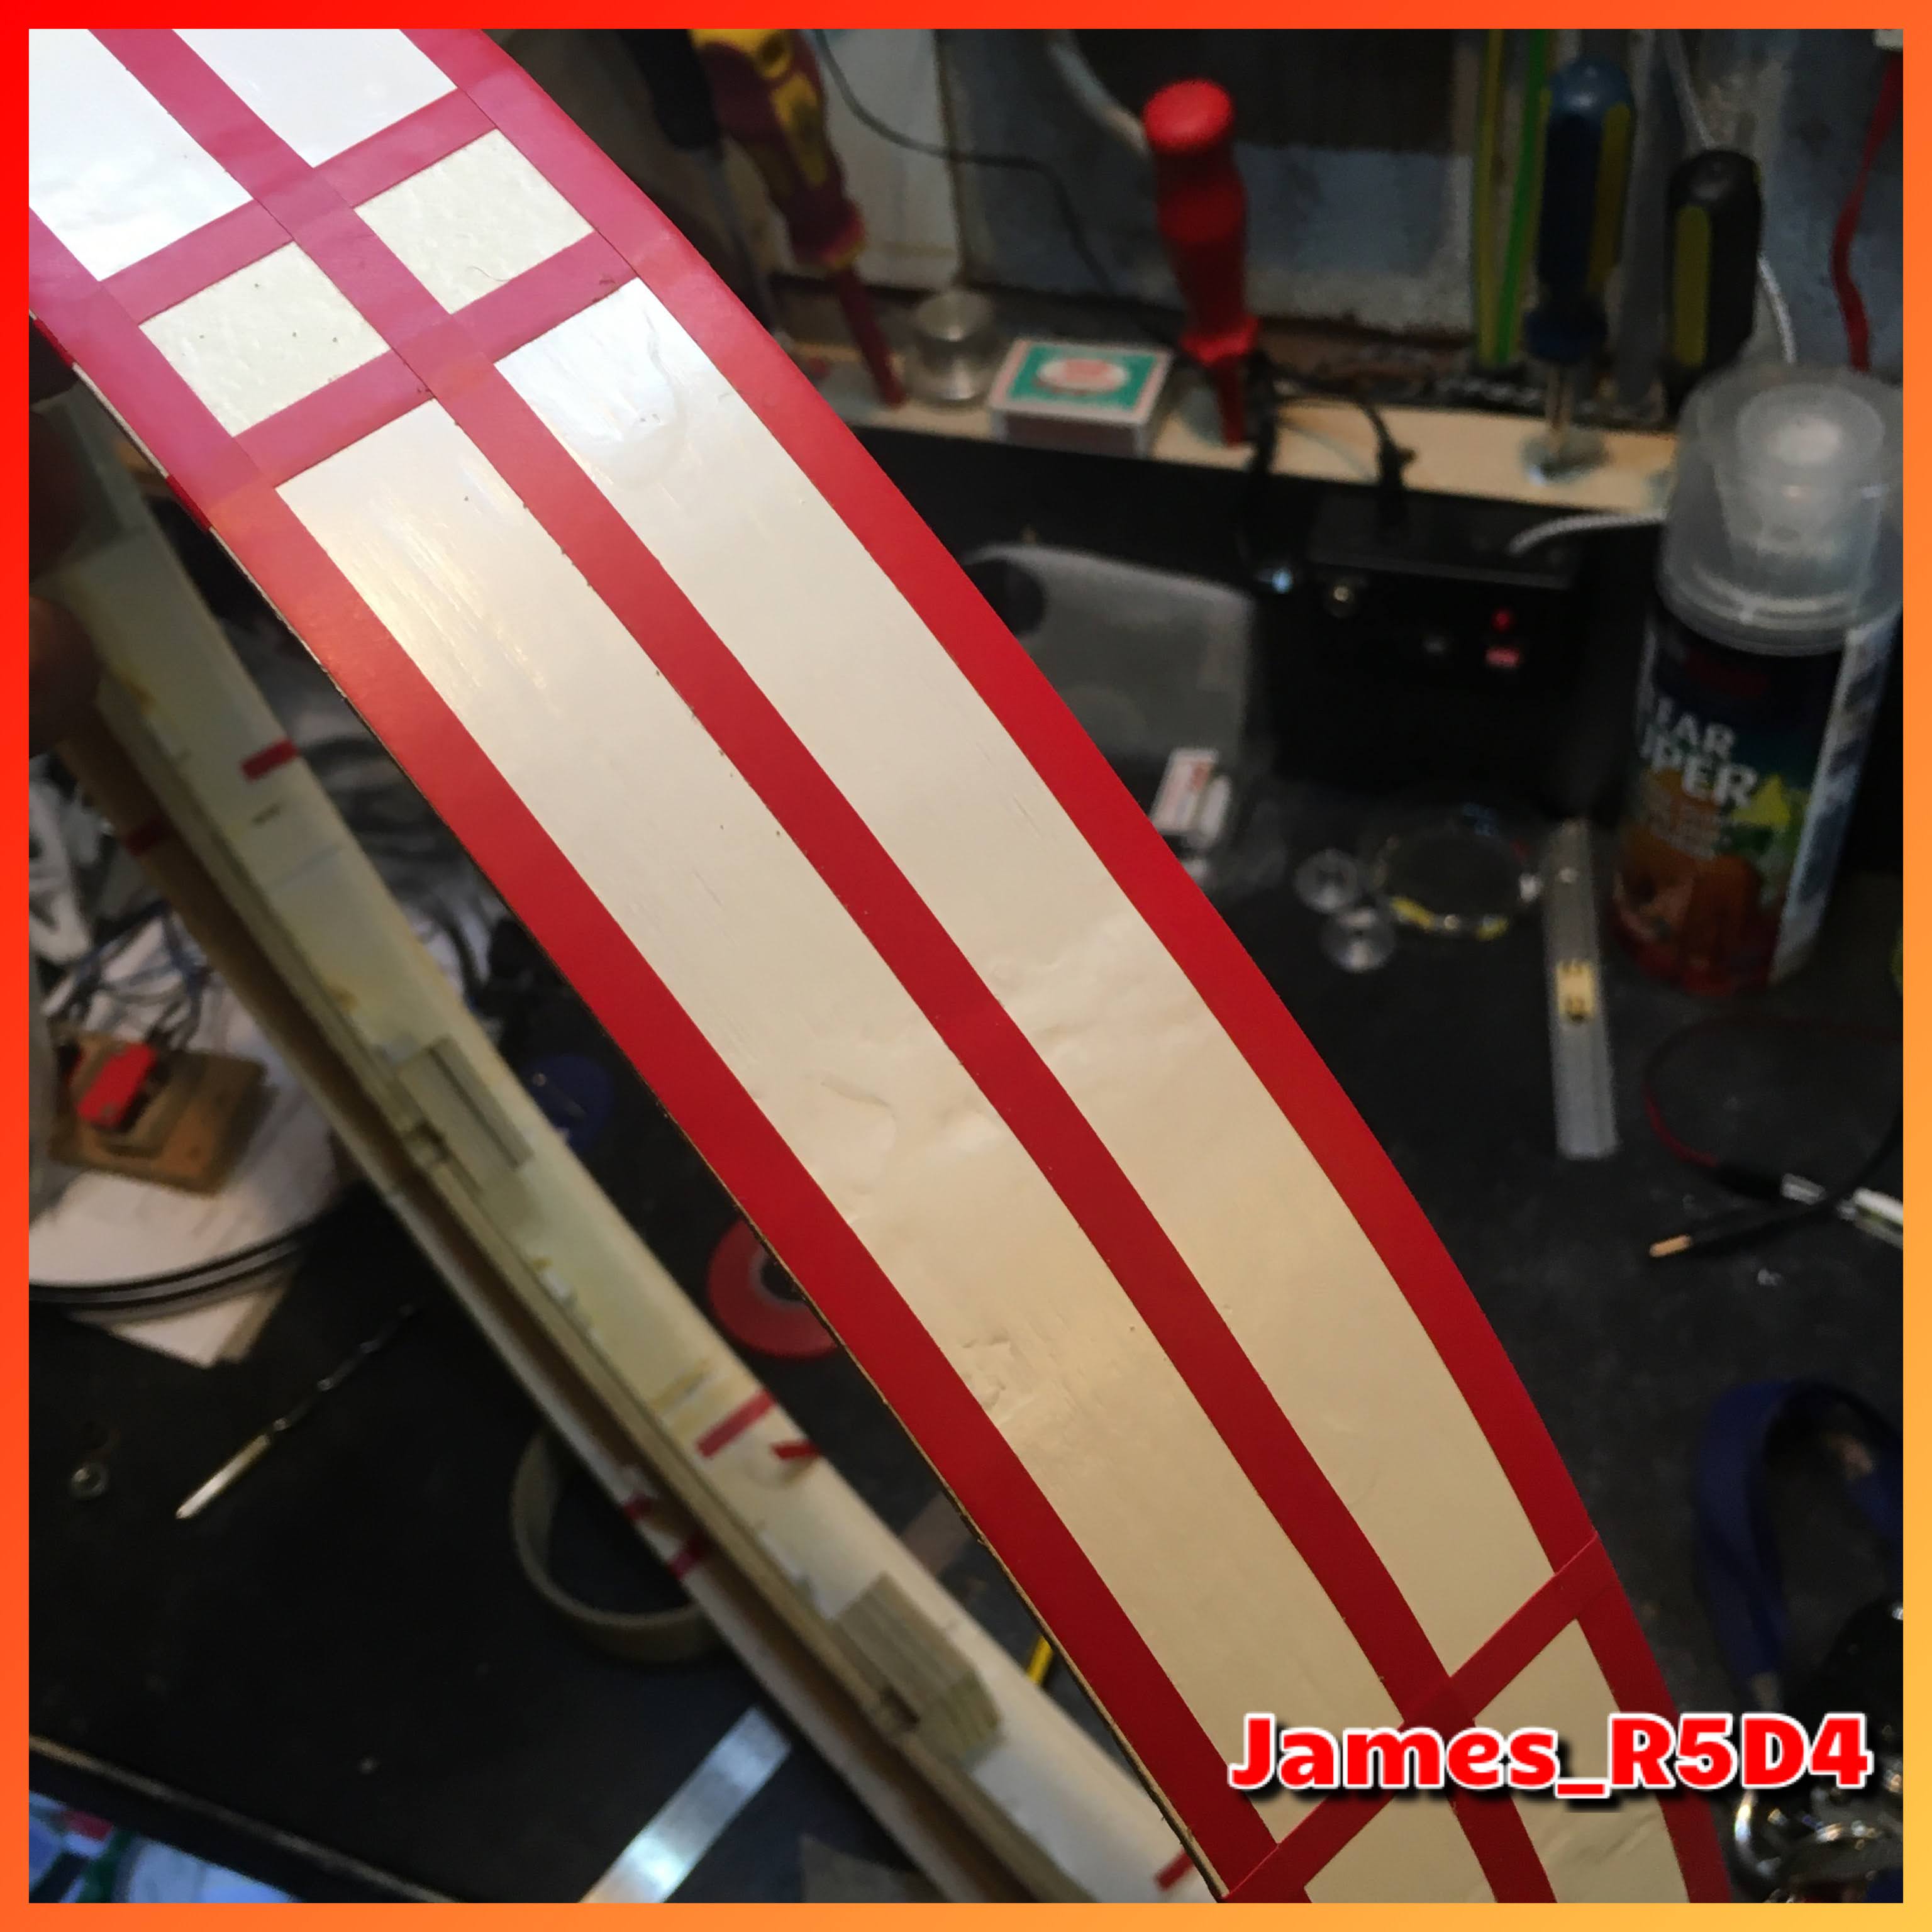
R0-D4’s next ring being masked up

Next came the top and bottom bands, again using the pin stripe tape width, with an additional single thickness vertical line at each centre of the quarters. As can be seen in above picture.

Then the fun bit, spraying with the red metallic’ish paint.

Red paint

Looking good. I left this for about 20mins before starting the messy bit, removing the pin stripe tape.

Tape removal

Removing the tape

I had made sure to corner crease the edges of the over lapping tape, but this isn’t the best way, cutting the tape is. But I didn’t want to damage the paint and it’s not critical. Weathering will cover up and also chipped paint too.

Once all the tape was off, one final picture before being left to fully dry.

R0-D4 red neck paint, waiting to dry


April 27, 2017

R5's dome rotation upgrade 1.7 - metal ring

I needed to add some more pads & had Steve add some more tabs to help centralize the metal band. I was considering weight against thickness, but the thicker metal may have been a better choice in helping to reduce flex of the band. The additional pads and tabs should hopefully help with this. Found that these were not actually needed.

Next up was preparing the ring for painting. I'd already lightly sanded the ring and edges to key the surface and deburr the edges. I then used pin stripe tap to line edge & mask off for spraying up.

Using the original skin, I'd measured up about 25mm.

I then wrapped around the pin stripe tape and then masking tape.

~~~

Now Easter break is over, I was able to get back on with sorting out the new neck ring. It's not been easy, lol, with the dome in work sorting neck ring and clearance with the new bearing. Then taking the bearing and un-attached neck home, to check it all works on the body with the motor etc.

Well....... due to my unique skills, lol, the ring needed to be re-worked a bit. Then it was time to screw it all back onto R5's dome.

Glass fiber filler the gap between the metal ring and the wood. This was applied via the inside to also give some extra strength to the wood angled piece.

Wood filler applied:

This was then sanded smooth once dried. This side needed a bit more than the other.

Next up was primer. So I bagged up the dome and masking taped it off at the edge.
Using works spray booth makes life easier and breathable lol.
R5-D4

Due to time, I didn't take any pics of spraying up white, but it was the same as the grey pic lol. This work was done yesterday and left over night, to stink out works workshop.

This mornings little project was applying the neck's silver tape. Now, you can/could use silver spray paint, but this tape matches the other tape used on other parts of R5. Plus it re-matches the original he previously had.
R5D4
Goes on easy'ish, then used a cloth to smooth out all the edges & wrinkles. Next up was to trim off the excess.
Once I'd finished this, it was back into the spray booth to clear coat the new paint and silver tape.
Then once it was dry, it was de-bag time.
R5-D4
The white, is WHITE lol, so will need to be dirtied up a bit before Saturday's Lego Land event! It's amazing to see the colour difference over the time since I'd originally sprayed up R5's dome. Hopefully this should last him a few more years.

June 21, 2016

'R0 dome build - 4.2 - 'neck painting'

Oh..... I forgot to include the work i did for the neck ring.....

I used detail pin striping to create my design for R0's neck details. I used this technique on R5 for his top stripes.
It's good because it's tacky enough to stick but not enough to pull paint off, lol. Also it stops the dreaded 'paint bleed'!

Next was to cover the rest of the dome, with A3 sheets of paper. Masking tape was applied to it and then onto the pin stripe edge.

And then it was spray time.

Removing paper and pin stripes.......paper/pin stripes rubbish.

And the finished detail...

November 21, 2013

R5-D4's Head 4.2 - Cone prep work & RED paint!

Yesterday morning I used a rather large plastic bag (used for rubbish bins] to place R5's Dome into. I then sealed off round the edge with masking tape. Next I applied some watered down PVA glue to all the exposed sanded wood that had paint removed from sanding the joining edge of the cone to the Dome sides.
Lunchtime, I took R5's Dome into the spray booth (work). And primered up the cone and inside the pie hole.
R5D4 pic of masked off dome for pin stripes
Then that evening, I got on with masking off the dome ready for spraying the red pin stripes around the two recessed side boxes, as R5 has in the film, the rear dome rod recessed box, doesnt have pin stripping. And also the lower of the two circumferance pin stripes to. The upper one will be applied after the dome's cone, has been sprayed up white. So, 1hr later, I'd marked off the edges with red pin stripes and then masking tape holding the plastic sheet.

R5D4, Red Astromech, DomeR5D4, Red Astromech, Dome

For all of two minutes in the spray booth in work lol.
R5D4, Red Astromech, Dome


Am quite pleased with how these have turned out. Using the pin stripe tape reduced the amount of paint bleed. I didn't think to use it on the inside edges of the two recessed areas and the masking tape has allowed the paint to bleed a bit. I'll try to clean this up, but once a bit of dirt is applied it will just add to the old/used look of R5 :-)

November 08, 2013

R5-D4's Head 3.9 - Red pin stripes on Dome.

Bought second tin of P38 body filler and carried on where I left of lol..... So after more filler, sanding, filler and more sanding, the top of R5's head is really starting to take shape.

After fitting the lights last night, it was late, but just wanted to try out the red pin stripe tape I'd bought.

Am so so about how it looks......

For now it will do, but am definatly going to attempt to mask off and spray lines up. The reason for this is two fold.

  1. The colour doesn't match the Red already on the body.
  2. There are gaps between the join lines of the tape.
  3. The lines are raised slightly because they are 'stuck on'.
Hahahahaha, yes, I know I said TWO points, but the third one had to go on the list ;)