Showing posts with label knurled Hose Fitting. Show all posts

March 12, 2014

Braided Hose's set No.2

With everything else I'd forgotten about my second set of Braided Hose's. I'd test fitted the securing screw into the hose ends to keep them in place in the Knurled Hose Fittings and then put them away in a storage box. So here they are masked up and ready for 'Brass' spraying.


Brass????? ....................Yes, brass.
Technically they should be a 'copper' colour, but I liked the colour and it will help to be one of the 'key items' to look out for when people see an R5 in picture on the internet lol.

R5-D4 Braided Hose

And sprayed up.

R5-D4 Braided Hose
The camera flash make's it look like the ends haven't been sprayed, but they have.
I then clear coated the hose and the Knurled end fittings.

January 17, 2014

Battery Box No2 - 1.2 & Braided Hose

So grey primer is on. This helps hi-lights all the work still needed to be done :D
More filler where needed along with sanding.
R5D4 Battery Box.

I also got on with finishing off the set of battery straps I started making, last year, when I made the first set for box no.1. The idea being to keep the 'flow' going.......yeah, that worked didn't it!?! lol.
R5D4 R2D2 battery strapsBattery Straps for R5D4

These are simply made up of small pieces of hardboard over lengths of wood strip. Filed pieces and then wood filler inbetween the gaps. The top pieces are seperate, that are pinned & glued to the main strap.

Braided Hose
Cut ends off hose, taped up and fitted wall plugs & screws (test fitting) as still need to be sprayed.
R2D2 Braided Battery Box Hose

January 15, 2014

Battery Box No2 - 1.1

20.06.13

Cut the plastic guttering into strips, this helped utilise the curve. These were drilled & pinned in place with panel pins.
R5D4 R2D2 Battery BoxR5D4 R2D2 Battery Box


Once all pieces were fitted, P40 resin was used inside to stiffen everything up. Filler applied to smooth outside curves.

This is my attempt with available materials I had. For a proper way to build these, view Adam Strawson's amazing R2-D2 Build here.

~~~
**UPDATE**
05.11.13

Drilled the two holes for Knurled Hose Fittings to fit into.

~~~
**UPDATE**
10.01.14

So, with the foot shell No.2 left to dry. I turn my attention back to battery box No.2.

I was planning on doing the same process as before, but this is time consuming lol. So this time I marked the plastic guttering, cut it to length but kept as much of the curved width as possible. I then clearance drilled through into the wood ends. The plastic was then pinned in place with panel pins. The ends were then trimmed with a sander to length.

Next thing that needs making are the clips that the box hangs on/locates on [picture below]. These are just two sets of thin hardboard. With screws into the inside face of the Foot Shell. The Box hangs over the inside of the box.

There's a lower locating pin for the bottom of the box. I found this was needed as once the hose's are fitted, they 'kick-out' the battery box from the foot shell.
R5D4 Outer Foot Shell

So here's the battery box, so far. It's not a pretty sight, but it will look a lot better once finished.....honest :D

R5D4 wood built Battery BoxR5D4 wood built Battery Box

Wood filler in all the gaps, grooves etc. once dried, sanding & primer time.

April 04, 2013

Braided Hose - the SAGA continues

Wasn't 100% happy with the fit of my first attempt with the 'real copper' braided hose. As the gap around the hose and the hole in the knurled fitting was to large for my liking.

So saw these the other day and thought I'd try them, (sprayed up, of course).
R2D2 Braided hose
 
R2D2 Braided Hose
 
Well, I wasn't to happy with the colour, 'Brass', it was the only colour they had in the shop, less so of the fact the paint leaked out all over the can & my hand!
First i had to cut off the ends. Then trimmed the plastic tube inside. Although this didn't work, so I drilled out the Knurled fittings so the hose would fit properly inside.

Drilled out the second set of Knurled hose fittings to accept the braided hose. Used a drill bit to line them up in the small vice, before counter drilling them with a drill bit suitable to accept the hose. I'll fix the hose into the knurled fittings later.

Finished spraying the first pipe with brass spray, although it does look more gold than brass lol, this will get weathered down......a lot!

For the second hose I crushed the ends in the vice, this time, to release the hose end fittings.
Taped them up to prevent the braid from fraying and then started spraying them up in erm....brass.


Outer Foot No1 & Battery Box No1 - now in white

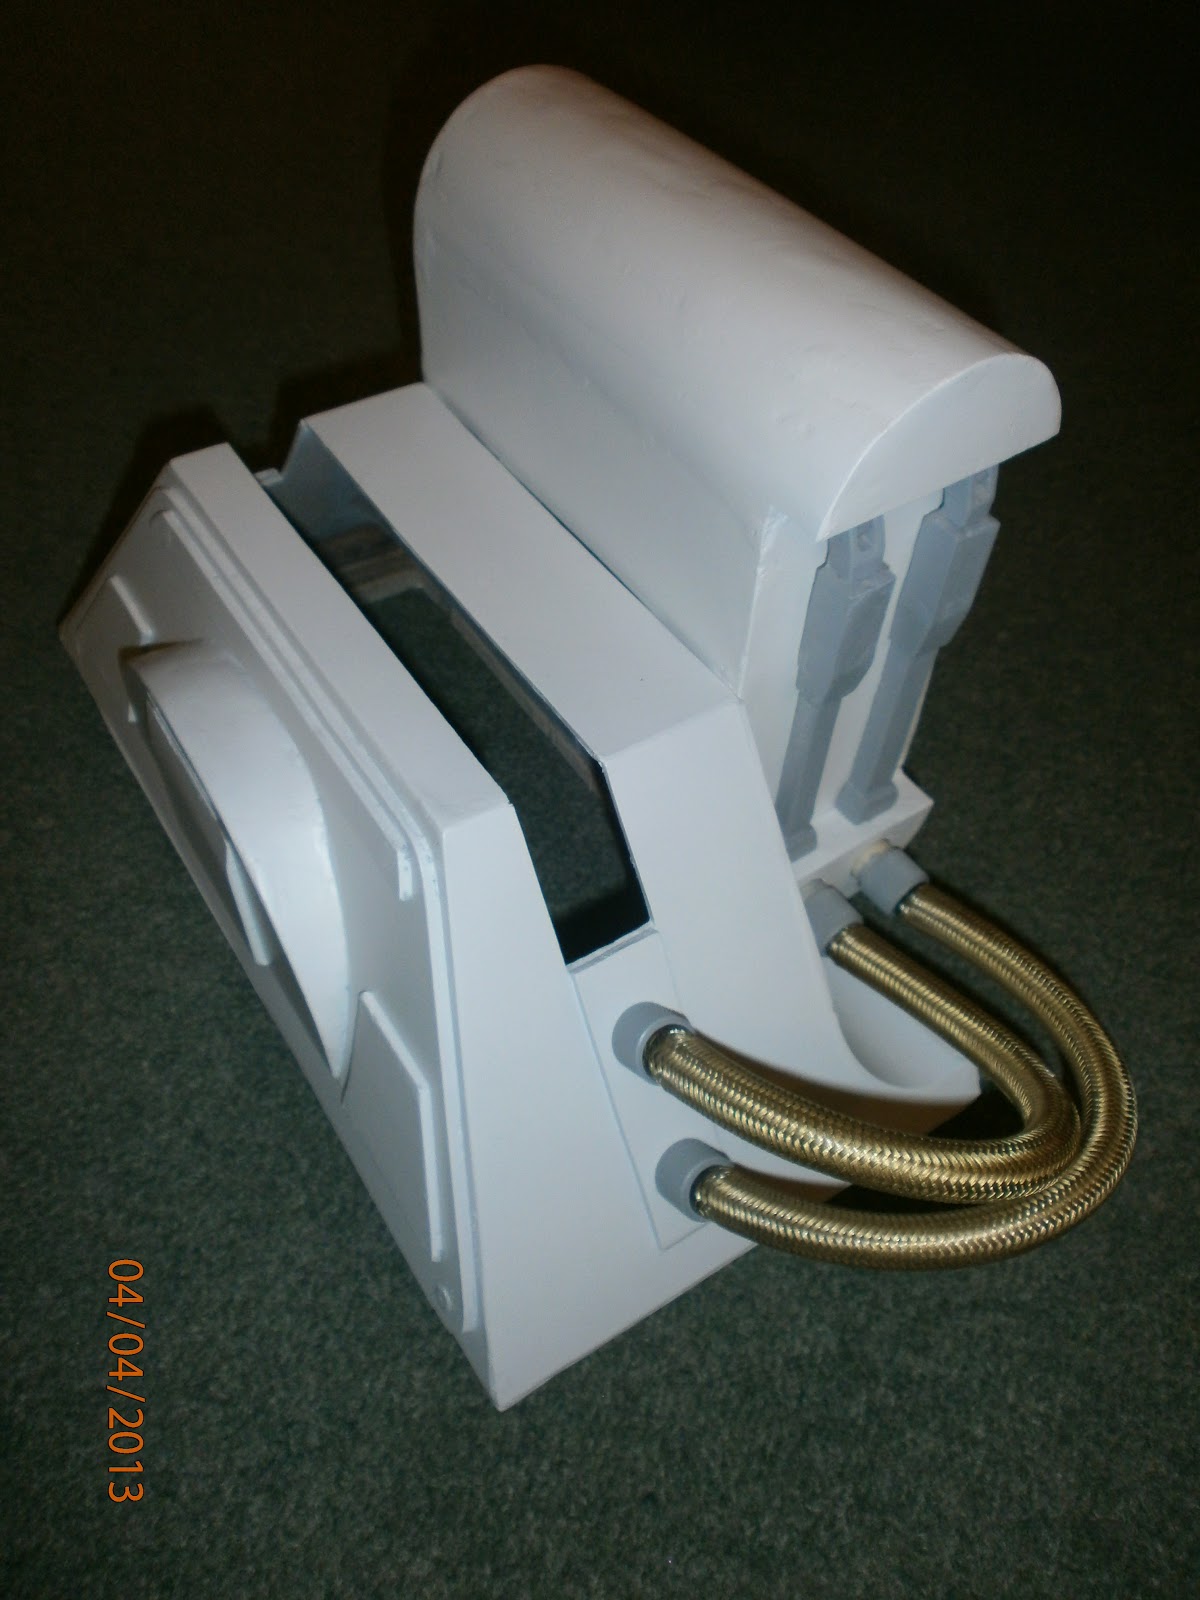
Finished Sanding the battery box.
 
Then on test fitting the braided hose & Knurled fittings, I found that the flex in hose (the rubber hose inside the braid) was causing the box to tip away from the outer foot shell at the bottom. The pivot point was the two catches at the top!
 
So drilled a pilot hole, then through into the battery box, then hammered a spiral pin through into place in the Outer Foot. The hole in the battery box was made slightly bigger for clearance. The battery box now slides over the two catches and locates onto the pin.
R2D2 outer foot, location pin for battery box
The spiral pin can just be seen sticking out of the curved section.
This is not a new idea, has been used in similar forms before.

Then this morning, out came the white spray can and got to spraying up the outer foot shell & battery box.
R2D2 Outer Foot & Battery Box, Braided hoseR2D2 Outer Foot & Battery Box, Braided hose

Also sprayed up the knurled hose fittings and battery harness straps with primer.

March 12, 2013

Knurled fittings for Battery Box Hose's - 1:1

I've bought a set of Knurled hose fittings off e-bay from Don Jarr. This will save me some time rather than make a set. Available access to a free lathe in work has been limited, due to them being used for work :-( lol :-D

So here they are after I did a bit of filling of holes etc.

Drilled and pinned & using Araldite to complete the bond, the two parts of the Battery Harness straps, together. Test fitted here in the pic.