Planned work:
woke up early......to early......buzzing with an idea and eager to crack on with it!
I've had this 'would it work' idea for a few weeks now, but a recent comment (said in jest), on Astromech.net in someone elses build thread, about R5 not being 'technically cannon' has spurred me into thinking, he's right!! So out have come my build plans to see if I can build a new......... Ah yes..........what is it I'm on about??? ......well.......I'lll post up again soon.
Progress work:
Have been away this half term, so frustratingly not had any time to finish off the slip ring wiring I started the prev week. I just need to wire up R5's head connector socket and the wires to the main power board.........more to follow.
Droid Builder

May 30, 2015
May 20, 2015
Slip-ring system 1.0
March 2015:
Slip-ring arrived, was a bit disappointed about the size of its wires. Assumed they would of been thicker, my bad. Still to work out how many wires I'll need or if need to double them up.......or to just buy another slip-ring lol.
May 2015:
With everything else going on, this next step had taken a back seat. So now am moving forward to see if the original unit will be up to the job.
Stripped the wire ends and tinned them.
Drilled a dia 22mm hole in the centre of the bodies top cross section.
Ordered some male & female connectors for the dome connection and from body to the slip ring.
The idea is to run a 12v power for the dome lights. A 12v power the will run the bad motivator unit. And a reduced down 6v power supply for the smoke system activation unit.
Drilled out a 22mm dia hole which the slip ring fits in snugly. I then fixed it with 3 screw's.

 Test fitting pictures.
Slip-ring arrived, was a bit disappointed about the size of its wires. Assumed they would of been thicker, my bad. Still to work out how many wires I'll need or if need to double them up.......or to just buy another slip-ring lol.
May 2015:
With everything else going on, this next step had taken a back seat. So now am moving forward to see if the original unit will be up to the job.
Stripped the wire ends and tinned them.
Drilled a dia 22mm hole in the centre of the bodies top cross section.
Ordered some male & female connectors for the dome connection and from body to the slip ring.
The idea is to run a 12v power for the dome lights. A 12v power the will run the bad motivator unit. And a reduced down 6v power supply for the smoke system activation unit.
Drilled out a 22mm dia hole which the slip ring fits in snugly. I then fixed it with 3 screw's.


May 11, 2015
Upgrade work on Dome rotation system 1.1
So the original grub screw fitted was small, about M3 size. The collar unit is made from aluminium, which is fine but you couldn't apply much force to lock the grub screw into place as the Allen key hex would slip in the hex socket! This was the reason for the Dome issues I had on Saturday at Corsham!
So, I found some M5 grub screws, drilled through and re-tapped the new holes to M5 size. I filled the end of the grub screw flat and to a depth that once fitted in the collar, it was flush with the hexagon face. Then when the wheel is fitted onto the hexagon, it acts as a stop if the grub screw tries to uncrew or be forced out by the motor shaft rotating.
I said 'some' grub screws, as I tapped the new collar holes right through.
Plan 1: a second grub srew can be secured on the opposite side,with the addition of maybe a location hole in the rear face of the shaft.

Plan 2: If the original upgrade doesn't work and Plan 1 is no better, then I can drill and pin the collar to the shaft.
So, I found some M5 grub screws, drilled through and re-tapped the new holes to M5 size. I filled the end of the grub screw flat and to a depth that once fitted in the collar, it was flush with the hexagon face. Then when the wheel is fitted onto the hexagon, it acts as a stop if the grub screw tries to uncrew or be forced out by the motor shaft rotating.
I said 'some' grub screws, as I tapped the new collar holes right through.
Plan 1: a second grub srew can be secured on the opposite side,

--------
The next upgrade was the rotating ring that the motor wheel runs against. When I had originally cut this out it was far from a perfect circle. At the time, I thought this wouldn't be a problem, thinking the motor/wheel assembly would be sprung loaded, as per 'the norm'.
But this caused slipping issues with the motor wheel, being fixed (although the bracket has some spring) it wasnt helping with opposite direction movement.
So I took the ring still attached to the lazy susan, into work and once fixed, slowley rotated it to get the outside edge cylindrical and concentric to the lazy susan. Half hour later, job done.
 And fitted with rubber strip for more grip.
On re-fitting the motor, I found it was now to high?? When the dome was rotating and the body in 3 leg mode, the wheel would catch on the underside of his dome. So I added a spacer to drop the motor bracket down. This has solved the problem.

On re-fitting the motor, I found it was now to high?? When the dome was rotating and the body in 3 leg mode, the wheel would catch on the underside of his dome. So I added a spacer to drop the motor bracket down. This has solved the problem.
April 30, 2015
Corsham Sci-Fi 2015 - event report & photos
Had another great time at this local event. This was R5's third year of attending but his very first event with all his systems operating. Feet motors, dome rotation and sound.
(His bad motivator and smoke system are extras still W.I.P. lol).
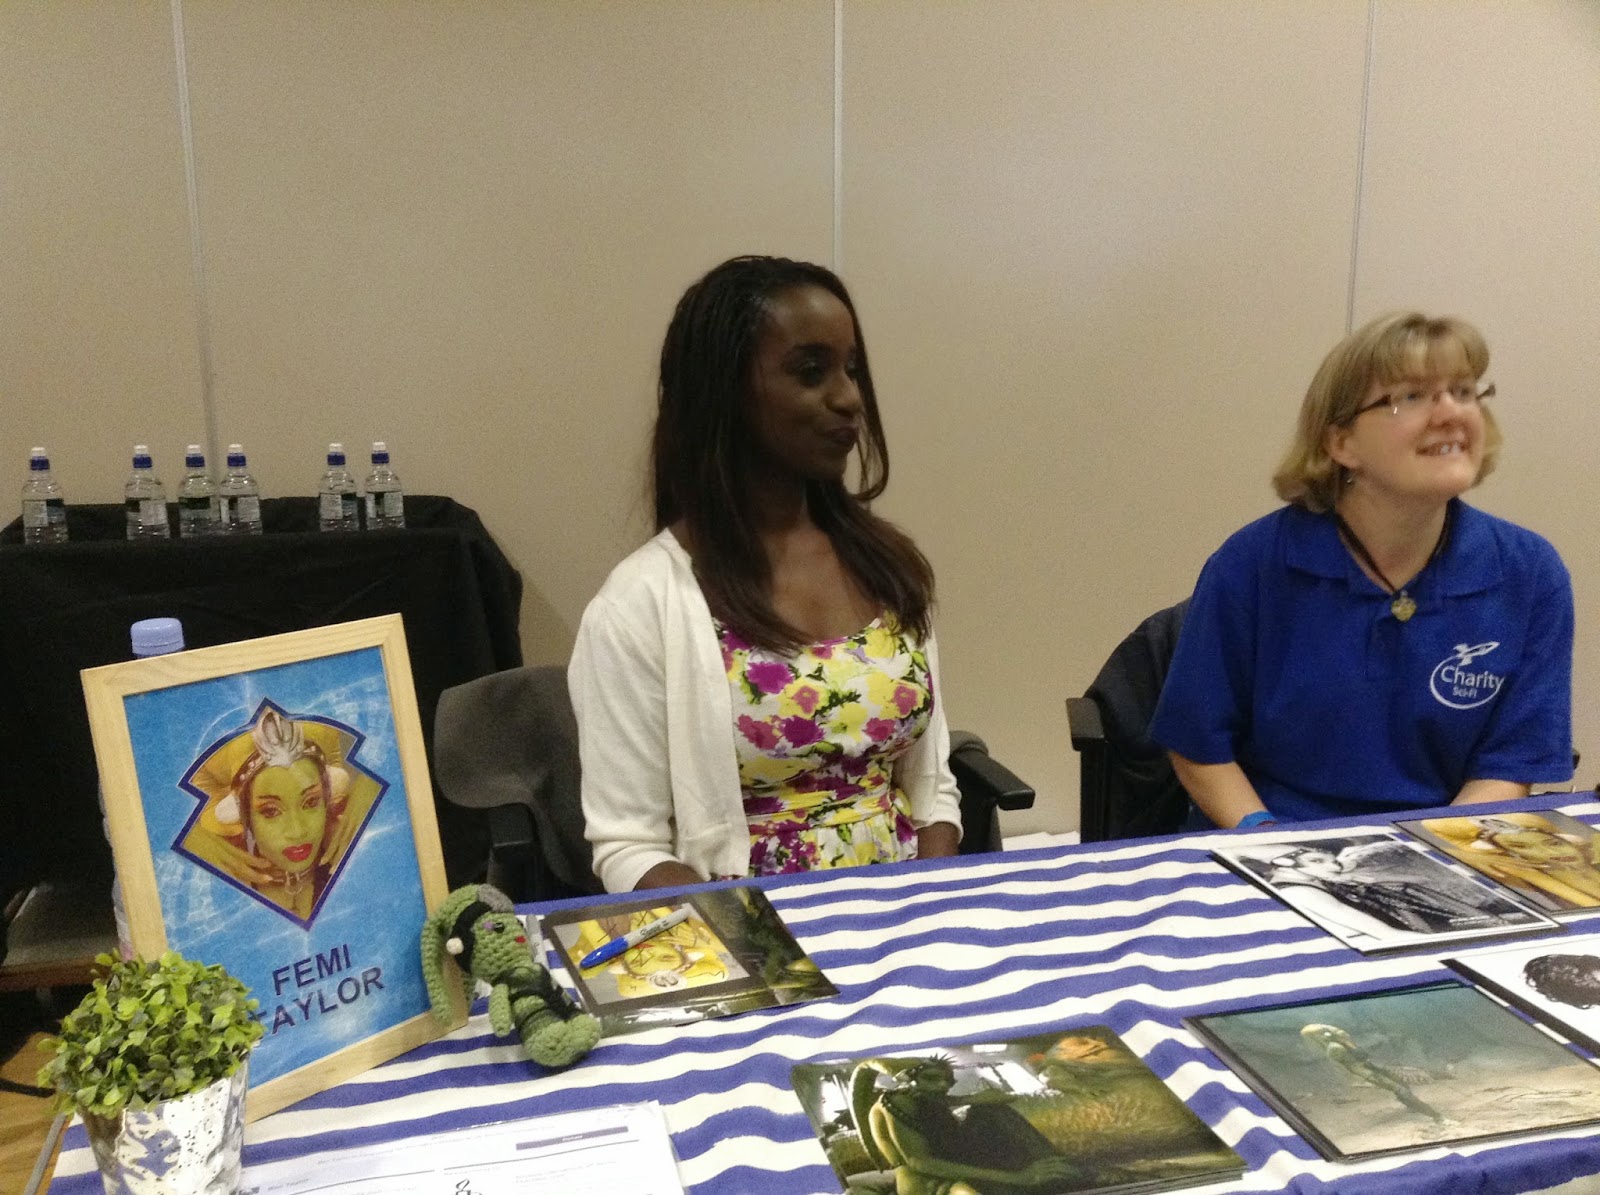
The event was supported by lots of costume groups. Southern Troopers, Milton Keynes Garrison, exewing group, 1st Sensory legion (link) to name a few. Plus all the great guests; Dave Prowse, Mike Edmonds, Femi Taylor, Trevor Butterfield, Danny John-Jules and others....
There was plenty to entertain the kids too. A fancy dress competition with two age groups, this was not for us lol, just the public :). There were making stuff area, stalls and other displays, like the Alien heavy load lifter & Alien, also an endo terminator skeleton. And opposite, the appropriately name 'Skynet' satalite company stall lol.
R5 had lots of pictures taken by the public and group pics with Jedi & Stormtroopers alike lol




R5 joined up with Mark of PodPad Studios, and his collection (only a few came today) of droids from Zoe, Izzy (Steampunk), K9 Borg, CID & his latest piece Bubo (from Clash of the Titans)
UK R2 Builders Club member, Paul, popped in too & was good to chat bout build stuff etc. Plus another builder, who’s name I've forgotten (sorry) also stopped to chat.
The main room quietened out in the afternoon, which isn't a bad thing as the droids got to roam a bit more. Loads of photos were taken and questions asked about building droids etc.
Day finished at four PM, and as I started to load R5 up, the rains came. The amount raised was split four ways with each charity receiving over £600 each!
(His bad motivator and smoke system are extras still W.I.P. lol).
The event was supported by lots of costume groups. Southern Troopers, Milton Keynes Garrison, exewing group, 1st Sensory legion (link) to name a few. Plus all the great guests; Dave Prowse, Mike Edmonds, Femi Taylor, Trevor Butterfield, Danny John-Jules and others....
There was plenty to entertain the kids too. A fancy dress competition with two age groups, this was not for us lol, just the public :). There were making stuff area, stalls and other displays, like the Alien heavy load lifter & Alien, also an endo terminator skeleton. And opposite, the appropriately name 'Skynet' satalite company stall lol.
R5 had lots of pictures taken by the public and group pics with Jedi & Stormtroopers alike lol
Event opening
All of these photo's were taken by my Son :)
Mark Enwright was there with his collection of droids and other props. Is always good catching up and getting build tips for tech looking things that are simple to make and don't cost the earth! He was also promoting his new company that he's set up turning a hobby for making props into a business. See his link at bottom of page.
R5 joined up with Mark of PodPad Studios, and his collection (only a few came today) of droids from Zoe, Izzy (Steampunk), K9 Borg, CID & his latest piece Bubo (from Clash of the Titans)
UK R2 Builders Club member, Paul, popped in too & was good to chat bout build stuff etc. Plus another builder, who’s name I've forgotten (sorry) also stopped to chat.
The main room quietened out in the afternoon, which isn't a bad thing as the droids got to roam a bit more. Loads of photos were taken and questions asked about building droids etc.
The event has even been in the local press, link here.
Day finished at four PM, and as I started to load R5 up, the rains came. The amount raised was split four ways with each charity receiving over £600 each!
Check out the groups at these links below:
April 26, 2015
Upgrade work needed on Dome rotation system 1.0
Yesterday I had to temporarily 'fix' the dome motor's socket to shaft grub screw. It screws through and secures onto a flat thats pre machined onto the shaft. When I first fitted this I was NOT happy at the small size of the grub screw and when tightening it the allen key would slip in the hex socket when being tightened up.
Well yesterday, it slipped under the strain/weight of R5's dome. At first I thought it was an electrical issue until I removed the dome to see the motor shaft still spinning, just not the wheel!
So my plan is to drill and tap a larger thread and use a larger grub screw with a flatter face for contact with the shafts flat. I'll also apply some thread lock to it too.
Corsham Sci-Fi 2015 - update
yesterday was another great day for the Charity Sci-Fi group. Lots of fun, lots to see and do, great guests as well. My Son did a great job of taking photos of event go'ers and guests and even managed a few selfies with them too lol. Lots of pics and more to come soon.
The amount raised was split between three charities.
The amount raised was split between three charities.
April 24, 2015
R5's prep'ed ready for Corsham Sci-Fi day 2015
An early night tonight! R5 is loaded and ready for transporting to Corsham tomorrow (Saturday 25th).
The plan is to have fun, take pics and video as well as try an give Twitter updates lol, So if you'd like to see whats happening, find R5 on Twitter here @JamesR5D4 :)
The plan is to have fun, take pics and video as well as try an give Twitter updates lol, So if you'd like to see whats happening, find R5 on Twitter here @JamesR5D4 :)
April 23, 2015
R5D4 - video of his limited sounds
Quick video of the limited sounds available to R5
.....well.....he doesn't say much in the film anyway lol

Just click on the pic to take you to R5's YouTube page
R5D4 - prep'ed ready for transportation
Spent two hours re-installing all of R5's electrical boards, sound system board and then testing it all.
This was the first time he was all together, dome on, lights on, sound on!

The sound system was loud! Which is a good thing as you forget that when testing in your garage or at home, (though not at half past 12 at night! lol). You normally DON'T have any loud background noise. But at event's, this increases dramatically. So to be on the safe side, I tested the amp on full power by flipping the two dip switches.......now THAT's LOUD!!! :D

This was the first time he was all together, dome on, lights on, sound on!
The sound system was loud! Which is a good thing as you forget that when testing in your garage or at home, (though not at half past 12 at night! lol). You normally DON'T have any loud background noise. But at event's, this increases dramatically. So to be on the safe side, I tested the amp on full power by flipping the two dip switches.......now THAT's LOUD!!! :D
April 22, 2015
New switch for unlimited powerrrrrr....... lol
With the new sound board in, I needed to distribute the power but AFTER the main switch. I'd missed this little detail when installing the main power switch and hadn't left enough cable.
In the process of sorting this, I broke off one of the switch rear connection tabs.
So ordered another switch.
Due to the shortness of the cable from the switch to the speed controller, I needed to add in an extension cable. And rather than solder up the cable to the stitch, I fitted spade connectors with their holes opened up to take the switches screw's. I then fitted heat-shrink over to ensure contacts were safe and this also prevents the screws from coming out.


Connected the last cable on and then fitted all back onto the control board.
Subscribe to:
Posts (Atom)