
December 2023:
Head box - transportation/storage
This was something I needed, so I measured & sketched up a suitable size box, allowing for foam padding. The box lid is going to be the top third of it, so that the foam insert, helps hold the head in place.

- I already had 3mm thick wood hardboard.
- Bought a length of some black 90° angle plastic.
- Bought some carbon fibre wrap and some catches.
Cut some of the wood to size, but didn’t have time to cut the fourth panel. (Forward to January 2024). All the panels are going to be secured with pop rivets……hopefully. They seem to be doing okay so far.
January 2024:
Cut the fourth panel out. Then cut all the panels to create the upper lid pieces. The smaller pieces in the picture below. [These I didn't actually use].

Cleaned the edges and then took them inside the house to measure up the available wrap.
I made sure there was enough to overlap the edges and stick to the inside faces. I also made sure that the wrap weave was all going in the same direction.


Next was to mark and drill holes for the pop rivets. Not sure yet if i need to add a second internal 90° length of plastic.

I marked and drilled each hole one at a time and used rivets to help locate correct position for the next hole.
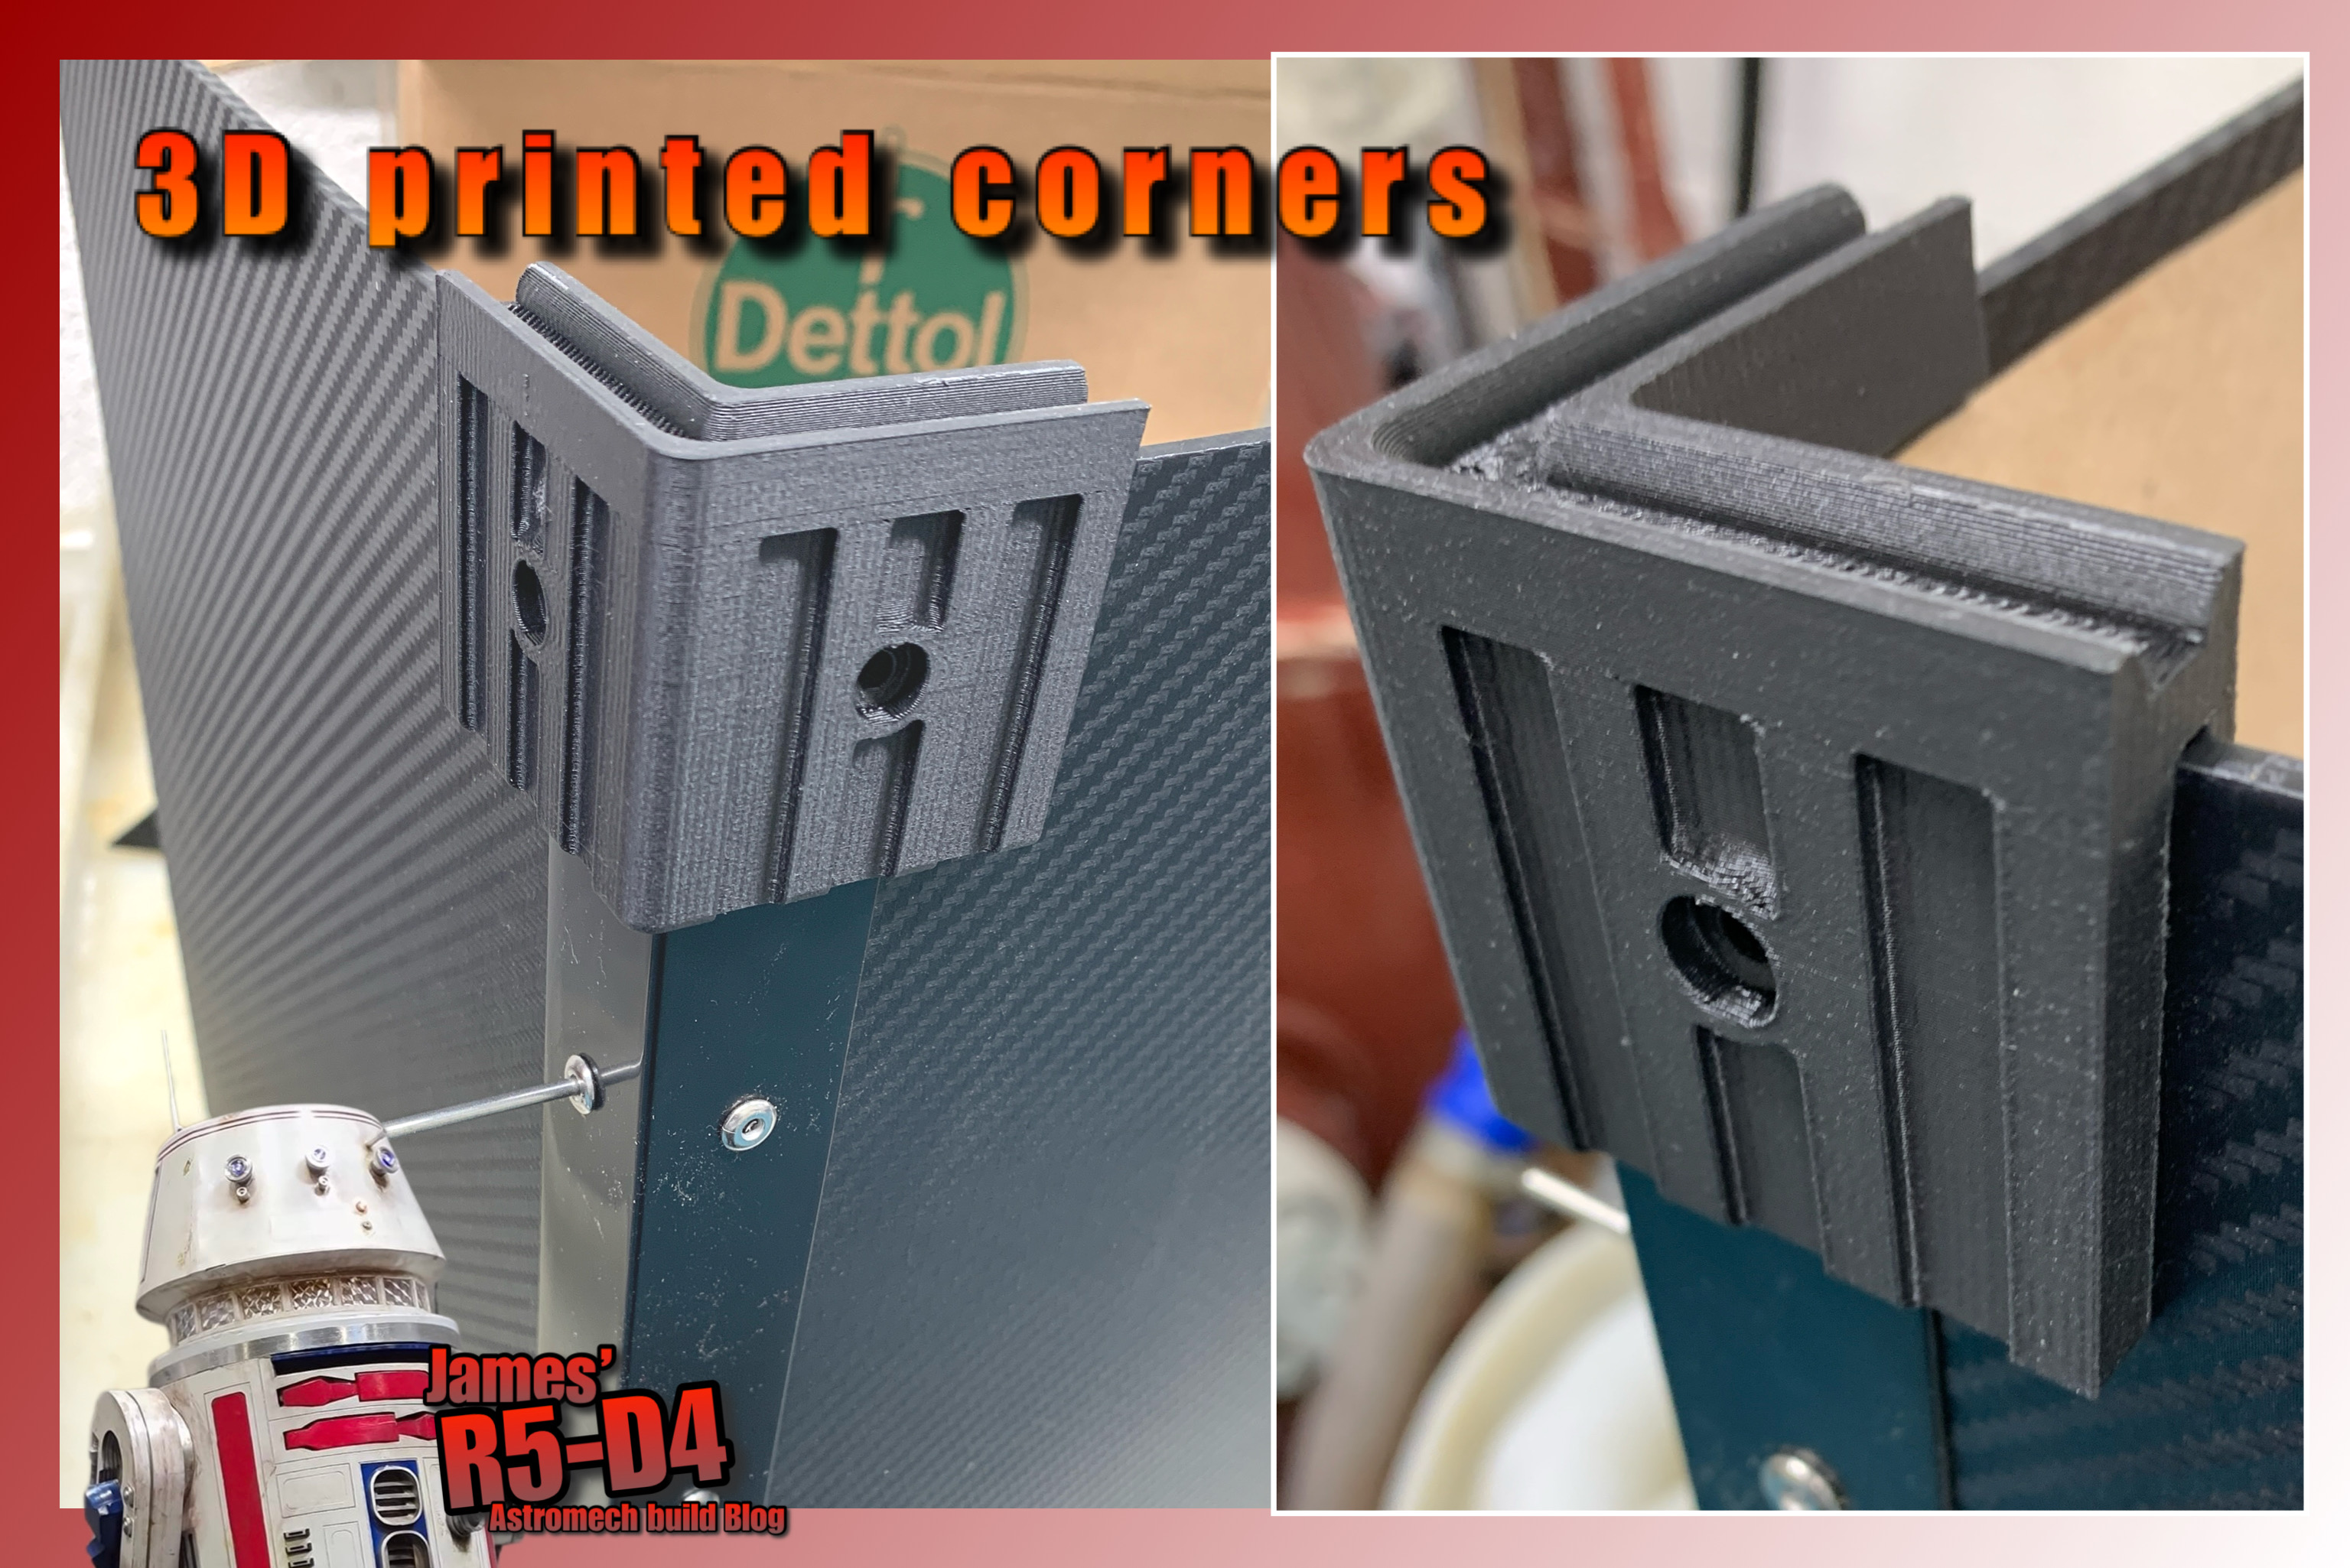
Corner pieces: Base
Looked at buying some, but wasn’t happy paying for something that wasn’t going to work with my design……so I drew one up in CAD. Added recessed so that the plastic angle would fit underneath. Securing holes for fixing to the wood panels. Added some ridges to the sides.

First 3D print worked. So set the printer to run overnight. These didn’t print, need to check and clean the printer??
But got them printed in the day. Am really happy with how they turned out. They really add rigidity to the box sides.
Next up was to add plastic side edges, drilled and temp held in place with rivets.
Corner pieces: lid 1 & 2
I then got on with designing and printing the lid corners. These have a lip to fit over the sides and then a recessed lip which will hopefully align with the upper lids corner pieces.
The upper wood pieces previously cut, now aren’t needed as the box has enough height to accommodate the ‘head’ + foam insert protection. [measure twice, cut once lol]
The upper lid corner(s) was drawn up for 3D printing. These have one length edges as well.

Next up was the edges around the lip of the box. These incorporated flats for the clasps. First lid corner/length piece printed, sketch image above, and picture below.
Even after cleaning the nozzle, the Ultimaker is still acting up, so can’t do any overnight printing. Came in next morning to find print had paused again.... noticed an exclamation warning...... on clicking on it, it showed the print HAD paused at layer 69, because I had told it too!!! 😂😂😂😂 I remember now seeing if the pause function worked, but as recent prints weren't high enough, I had forgotten this tick box. Hopefully everything will be back to normal.
First box length piece printed, after pause restart lol. I printed it longer than needed so it could be trimmed down to size. It's not a tight fit between the corners.

I drilled a hole for the pop rivet. But will add two more either end [see image below].
Next up was to position the clasp and screw it in place.
Each day, another piece was printed. To help strengthen the lid joins, I've printed some corner that fits on the inside edges.

The box isn’t going to have a lid handle, but two side ones. These I've bought off eBay.
I also printed off some yellow infills to identify the front orientation fo the lid to the box.
I’ve ordered foam for inside, so fitting of this and the handles will be in part 2.
No comments:
Post a Comment