February 29, 2016

Han Solo costume for my Son....... Vest 1.7

Pocket Flaps

My 'assistant' Karen suggested the other day about using fabric stiffener for the pocket flaps. To help keep there shape.
Han Solo vest

She had some already, so I cut it to size, hem material was folded over and ironed to help it stay flat & then sewn inside of hem flap edges.
Han Solo vest

Han Solo costume

Han Solo costume
Second of the three flaps I made
Front three done, Sunday night.

February 26, 2016

Han Solo costume for my Son....... Vest 1.6 'Pockets'

Karen brought over her sewing machine last night As I wanted to see if my notching of the pocket templates would work in real life lol.

Hemmed all the edges of the pockets, folded crease lines and ironed them. Then started to sew them on. First I drew on a chalk line for where the stitch lines are to go, as a guide for the top pockets. Then I pinned into position and started to sew. Another four hours work, but now I have something to show for it lol.
Han Solo

Han Solo

Han Solo; glove pocket

Looking at the bottom pocket, I was thinking it was a bit low.....?? But I do still have the pocket flap to sew on yet. Also the corners of the pockets need to have an extra stitch or two. But still a work in progress.

February 25, 2016

** Celebration Europe 2016 - Jedi News**

Jedi News

Jedi News tweeted an announcement about
the R2 Builders Club attending Celebration Europe. Read the full post here.

Han Solo costume for my Son....... Vest 1.5 'Pockets'

So I finished up the test pieces for the pockets.

Sized them to fit the smaller size Vest.
Han Solo Vest
Front layout

Han Solo Vest
Rear layout

I then got on with making templates of the pockets with folds for material to give them the full/expandable look. I gave each fold a half inch around the pockets.

Note: that these are just guides and extra material around the edges is needed to hem the pockets to prevent fraying!

I then got on with cutting out the material for the pockets.

Han Solo Vest

Still have the large rear pocket, pocket flaps & loops still to cut out of material.

February 23, 2016

Han Solo costume for my Son....... Vest 1.4 'Pockets'

Got around to measuring up and scaling the pockets etc, to fit onto the Vest.
Han Solo
Started scaling the pockets to suit Vest size.
Next will be to add extra for the folds to make them actual pockets.

~~~~~~~~~

Just for ref. purposes:
There's a lot of Fan Made, stuff out there, and some of it is top notch stuff, other stuff is Halloween/just for fun/one night only, stuff. By this I mean only that it's not 'screen accurate' enough to be of use in making your own outfit. If your going down the 'authentic looking route'. So if you want your outfit to be 'right', you need to look out the forums that really count!

Being on Forum's helps you to find the correct info from people who know there stuff!
One such forum is the Rebel Legion. Here you will find all the info on all the  'Rebel' characters from the Star Wars films.

February 22, 2016

Han Solo costume for my Son....... E-11 Blaster 1.9

Weekend work:

Scope Rail
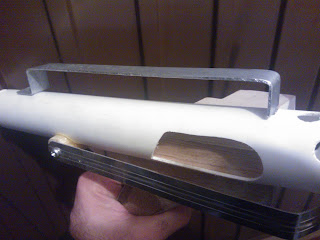
Found a scrap piece of aluminium angle, just the right length. Marked & cut it to width. Then notched and bent into shape the end. This then sloted into the small hole made in the tube.
E-11 Blaster, Scope railE-11 Blaster, Scope rail

Scope rail taking shape
E-11 Blaster, Scope rail

I then measured the length to suit the barrel and bent the end. This fill be fixed in place by the rear sight, yet to be made.

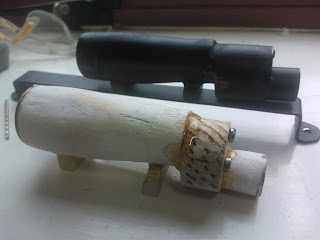
I marked out the scope's position on the rail and drilled clearance holes in the rail and the scope mounting feet, and then a smaller hole in the wood part of the scope. This was so the screw bit into the wood to hold it and not the Milliput. I also then trimmed down the scope feet to fit the width of the rail.

Rear Sight
I found an angle bracket piece that was just right for the rear sight insert. So this will be used. Marked and clearance holes drilled in the rear area of the scope rail and screwed into place.

Front Sight
Next I dug out the dremel, mini hacksaw & coping saw and started to work on the front sight. This, for me, is a test of the Milliput's strength and durability, as the front sight will see a lot of abuse whilst in use (holstering & generally getting knocked etc).
E-11 front sightE-11 front sight
 front sight, starting to cut out detail

E-11 front sightE-11 front sight
 Side cut out detail

I used the tip of the grinding bit to carve out the 'U' section of the sight
E-11 front sight

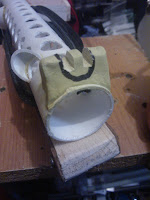
The ejection chamber shield came off, so need to look at fixing it back on.
(Can be seen missing in above pic of scope rail).

February 19, 2016

Han Solo costume for my Son....... E-11 Blaster 1.8 [M38 Scope]

M38 Scope
Bit more work done and the scope is almost finished.

Used the Milliput and made up the feet roughly. I then cut them to shape and filed to get the finished look. I then used Araldite glue to attach them to the main scope body.
M38 scope

M38 scope, E-11 Blaster
I know it's not a perfect 100% accurate copy of my own blaster's scope [in black] but it's a close enough copy for my Son's blaster.

Still need to finish off area's and also drill fixing holes in the two feet pieces to locate on the Scope Rail.

Blaster
Had intended to cut out from thin aluminium, the front sight. I did but forgot to scale it to the Dia 40mm PVC tube [as I had to do with my other builds]. Had already cut out the inner part, so decided to scrap that and go with my second idea, which was to build it from Milliput.
E-11 BlasterE-11 Blaster

The start of it, once dried and hardened off, I'll start to create the shape.

Han Solo costume for my Son....... Vest 1.3 'Hemmed edges'

Karen came over around 8pm, Jacob test fitted the vest. We marked position of where the pockets etc should roughly go and sized them accordingly.

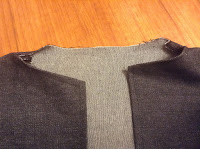
Well, we didn't get round to cutting any pockets, as after taking in the sides, permanently stitched, I then added the hem to all the edges. Sounds easy, but takes some getting used too, and these were just straight lines!! The tricky parts were the arm holes and the rear neck/collar. This I did slightly get carried away with and will need to be sorted, next time....

Might not look like much, but edging, ironing the hem lines, sowing hems, curved sections (arm holes) does take time, tonight was another two and a half'ish hours work.
Han Solo costumeHan Solo Costume

Han Solo costume

The Vest work so far....
Han Solo costume


Next time......after the collar fix.......will be looking at the pockets etc.

February 18, 2016

Han Solo costume for my Son....... Vest 1.2 'Cut & stitch'

So last night, our friend Karen came over with the Vest material & her sowing machine etc.

She showed me how to set up the machine, explained a few things to remember and then let me loose on some off-cut linen material lol. I tried out a few rows of stitching, made a small mistake of pulling/pushing a little bit which then bunched up the fabric. The knack is to just let the machine do the work, you just guide it. But saying as I've not used a sowing machine in about 30 years [cough] I don't think I did to bad a job...... :D
Han Solo costume
test run stitching

Once I'd got this out my system, we decided to get to actually cutting out the material for the Vest. So after I'd cut out the three pieces [two front, one back] I then went on to stitching them together.
Han Solo costume

Han Solo costume


This is just to hold the pieces together and we also used white thread so to be able to un-stitch if alterations are needed.
Han Solo costume
The neck area and arm holes are still to be done.

Tonight, Karen will be back round to help test fit the Vest on my Son and then onto the next stage.

February 16, 2016

Han Solo costume for my Son....... Vest 1.1A [mini update]

Thursday evening I took my Son round to my friend Karen's house to test fit the template Vest. All went great. Alterations were made to the template, details were marked up etc.

The plan was She was brining her sowing machine round on Saturday to give me a practice on it...with scrap material of course, but plans change.

But once she's happy with my work, It's onto the making of it!

She has also said about making the Shirt, she's looking for suitable material already, and what to do about the trousers too.

More next week.....

Han Solo costume for my Son....... E-11 Blaster 1.7 [M38 Scope]

Scope build update:
  • Sanded the wood filler, more is needed to smooth and shape.
  • Cut out a piece of wood for the front section, drilled & pinned it in place, also used Araldite glue.

E-11 M38 scopeE-11 M38 scope
  • I cut a smaller square piece of wood, rounded it, drilled and pinned & glued it to first piece.
E-11 M38 scope

  • Next was MORE wood filler and also a small copper washer to the end of the front of the sight.
  • I marked and drilled three holes on the front face of the scope, and glued in some pan head bolts, just to ad to the authentic look.

E-11, M38 scopeE-11, M38 scope

  • I've started work on the two pads, using Milliput. Never used this before, tho I remember my Brother used to use it when kids, building models etc.

February 12, 2016

Han Solo costume for my Son....... E-11 Blaster 1.6 [M38 Scope]

Progress on the Scope, finished shaping the main body and found a perfect fit metal washer, more of a ring than a washer tho. Glued it on with Araldite glue.

Once set, I started to apply wood filler to the still rough wood.
E-11 Blaster

Next I increased the depth of the slots in the main folding stock, rather than cut the ends to suit. This was also better as the bend's should be closer to the main body of the stock.

I cut and shaped two pieces of PVC pipe and again, using Araldite, glue the ejection port shroud and nozzel flash guards in place.
E-11 blasterE-11 blaster

February 11, 2016

Han Solo costume for my Son....... E-11 Blaster 1.5 [M38 Scope]

E-11 Scope - version M38


The one seen on Han Solo's blaster.

There were a few versions of blasters with different scopes fitted,
click the pic above or the following link, to take you to

~~~
Found this website to, is great for showing the different versions of scopes


I've been searching online for blaster scopes, but after some thought, I thought I have a go at making one out of wood......how hard could it be??? lol

So I used my scope as a guide and marked out a square length of wood I had. Not realising till later, I probably could of made the scope in one piece, but maybe the next one ;-)

I marked a diameter on the end face, then a few length dimensions and rough angle end points. Then in work this morning I started to cut wood.

Results so far.....
E-11 M38 scope
 This picture shows the amount of wood removed to create the angle.

E-11 M38 scope
 This view shows the angle better.

E-11 M38 scope
 Picture above, shows tools used.

E-11 M38 scope

The remaining guide lines are to be cut out on my lunchtime.

[I didn't take a pic of before.....didn't think it would work]

Han Solo costume for my Son....... E-11 Blaster 1.4

Last nights work.....

Folding stock arms
I cut two slots into the main part of the wood to allow the two cut down in length, & flattened, aluminium strips from an old indoor aerial, to fit in. I then drilled two holes and fitted screws to hold in place. They need to be made shorter to fit the rear bracket.
E-11 Blaster

E-11 Blaster

In the second picture, you can see where the black marker rad is I need to shorten the arms. The slots will be filled in later.