November 09, 2017

November 07, 2017

R4-D4 Dome work progress 2.0

I'll be keeping all dome progress now in one post,
was getting a bit much trying to order when work was done when lol.

So far, the weekend I managed to get a lot done.

  • measured and cut extension blocks.
  • drilled and screwed them all into place.
  • glued into place, curved panel no2.
  • had problems with glue not drying on panel no2.
  • had to fix glue problem by cutting out and redoing.
  • cut and fitted more of the curve panel strut supports.
  • sanded, applied wood filer, sanded and repeated.
  • fitting curved panel no3.
And now for the pictures:

Friday lunchtime I measured up and cut to length the extension blocks needed for height.
Test layout of spacing them.

Then on the evening I positioned them to give me an even spacing, without the blocks interfering with where the lazy susan location pins will protrude up into the dome. I then marked and drilled clearance holes and using decking screws (left overs) I secured them in place.
Once this was done I could then get on with gluing the next curved panel edge. This has to be done, one edge at a time to allow the glue to dry and hold the panel in place. Time consuming and fiddly too.

Trimming the excess edge of curved panel.

And an artistic picture of the dome curves and flats

This is the dome with one side of curved panel 2 glued in place.....gluing the second side is when things didn't stick well.

I know now why it didn't stick. Basically the inside panel was too wide and therefore had to much land that couldn't curve enough for the curved panel to make contact with. It did in the lower, less curved part, but the upper 'tighter' bend it didn't.

Whilst this was not setting, I carried on with cutting out the remaining triangles.

And using panel pics to secure in place whilst the PVA glue set.

Here are two more artistic pics of the inside of the dome structure.
 Where the Holo projector unit will go.


Now onto the 'fail' part. As mentioned above, due to the with of the backing piece of wood, it didn't make enough contact due to the curvature. So I tried to force PVA glue between the panels to go under the panel, but after a day, this still hadn't worked & the edge still moved when touched.

So I started to cut away a bit at a time till the wood to wood contact was good. I then applied PVA glue to bond what was good wood. Once dried I started to fill out the area with wood filler.

More on this in next post.

In the mean time I got on with cutting more 'rear' pieces and glued them onto one panel at a time. This is easier to only have to clamp two parts, instead of juggling three pieces, clamping blocks & clamps!

This then made clamping the edge of curved panel no3 a lot easier.
Glued in place, panel pics helping to hold curve.

Other work done:
  • mini locking blocks cut for the inside of the curved support pieces (pics to follow)
  • PVA washed over exposed sanded wood, seals and helps with smooth sanding.
  • a few coats of primer/filler spray on completed sanded & smooth wood work.
More in next blog, including electrical control of the holo projector servo unit.

November 03, 2017

R4-D4 - 3D printing internals 1.3 'Tangle Free wires'

More 3D printing.

I came up with this idea for tangle free wires. The concept is not a new thing, as I've found while searching more online. But this way hasn't been done before (as far as I can see online) so it's a simpler way of powering/rotating without tangling wires.


The idea is to use a normal bearing, sleeved, and push fitted into the rear of the holo eye.
(the 3D holo eye version off astromech.net forum)
The LED wire passing through the LED holder (also 3D printed) and passing through the centre of the bearing. The Holo Eye body is free to rotate on the outside edge of the bearing with the LED wires, staying fixed though the middle of it.


After several ideas and re-design's, I've finally (for now lol) settled on this version and gone with the large 10mm LED. Next is to re-wire the LED with heat shrink sleeves.


And this is it push fitted into the holo body.


Next up is to sort out connection of the servo to the LED holders shaft.

November 02, 2017

R4-D4 - 3D holo eye - painting pt2 - weathering

Saturday was spent hunting for my specific spray paint's that I've used in the past on R5. But my usual outlets have reduced their selection, combined with the manufacture changing & by the looks of it, discontinuing some of their colour choices.....NOT GOOD!

Looks like online shopping (eBay) will be my only option.....costing more £££

Anyhow, I did get a better 'silver' (only realised how good once I'd used it lol) and prayed up the 'ball' part of the holo eye.
 Plastikote - metallic 'silver'

Once masking tape was removed.

I then weathered the fluted nozzle for the worn look.
I wrapped masking tape around the nozzle, then took a file and carefully filed through the tape down to the black. I did this unevenly so as to create a 'random' effect.
 file removed some edges on the nozzle.

 the torn edges can be seen in the above picture.


Not bad result for a first attempt at doing it this way.

R4-D4 Holo Eye - LED choices??

Monday night I had some free time to wire up the new LED's to see which one I liked best.

One is compact (flat) and the other is large (10mm LED),

but is better as it gives a more diffused light.
(both bought off eBay)

I don't want any 'hot spots' so after a redesign again of the internal LED holder, I've gone with a single 10mm LED bulb version.

I'll post up pics and hopefully a video soon.

R4-D4 Dome - curved woodwork panels 1.2

With one side still clamped up with glue drying, I started on shaving down the high spots on the curved panel to make round and smooth.

After about 10 minutes, I was already pleased with positive results. See picture below.

Once done I'll be applying wood filler to the visible slots, then sand smooth again.

~~~
November 1st update.....
The second side stuck!!
Released the other side of the curved clamped panel & yes, it stayed stuck lol.
So I applied more glue to any unglued areas from the front and then applied wood filler to the open gaps before then applying watered down PVA glue to help strengthen and seal the wood for spray painting later.

October 31, 2017

R4-D4 Dome - curved woodwork panels 1.1

The glued panel held!!

Tuesday morning, in work, I released the clamps......and the panel stayed glued lol.
The baton on the outside, was to help keep
the panel flush with the triangle edge.

So after I'd stopped patting myself on the back lol, I got on with glueing up the other side of the panel......lets see how that goes!

October 30, 2017

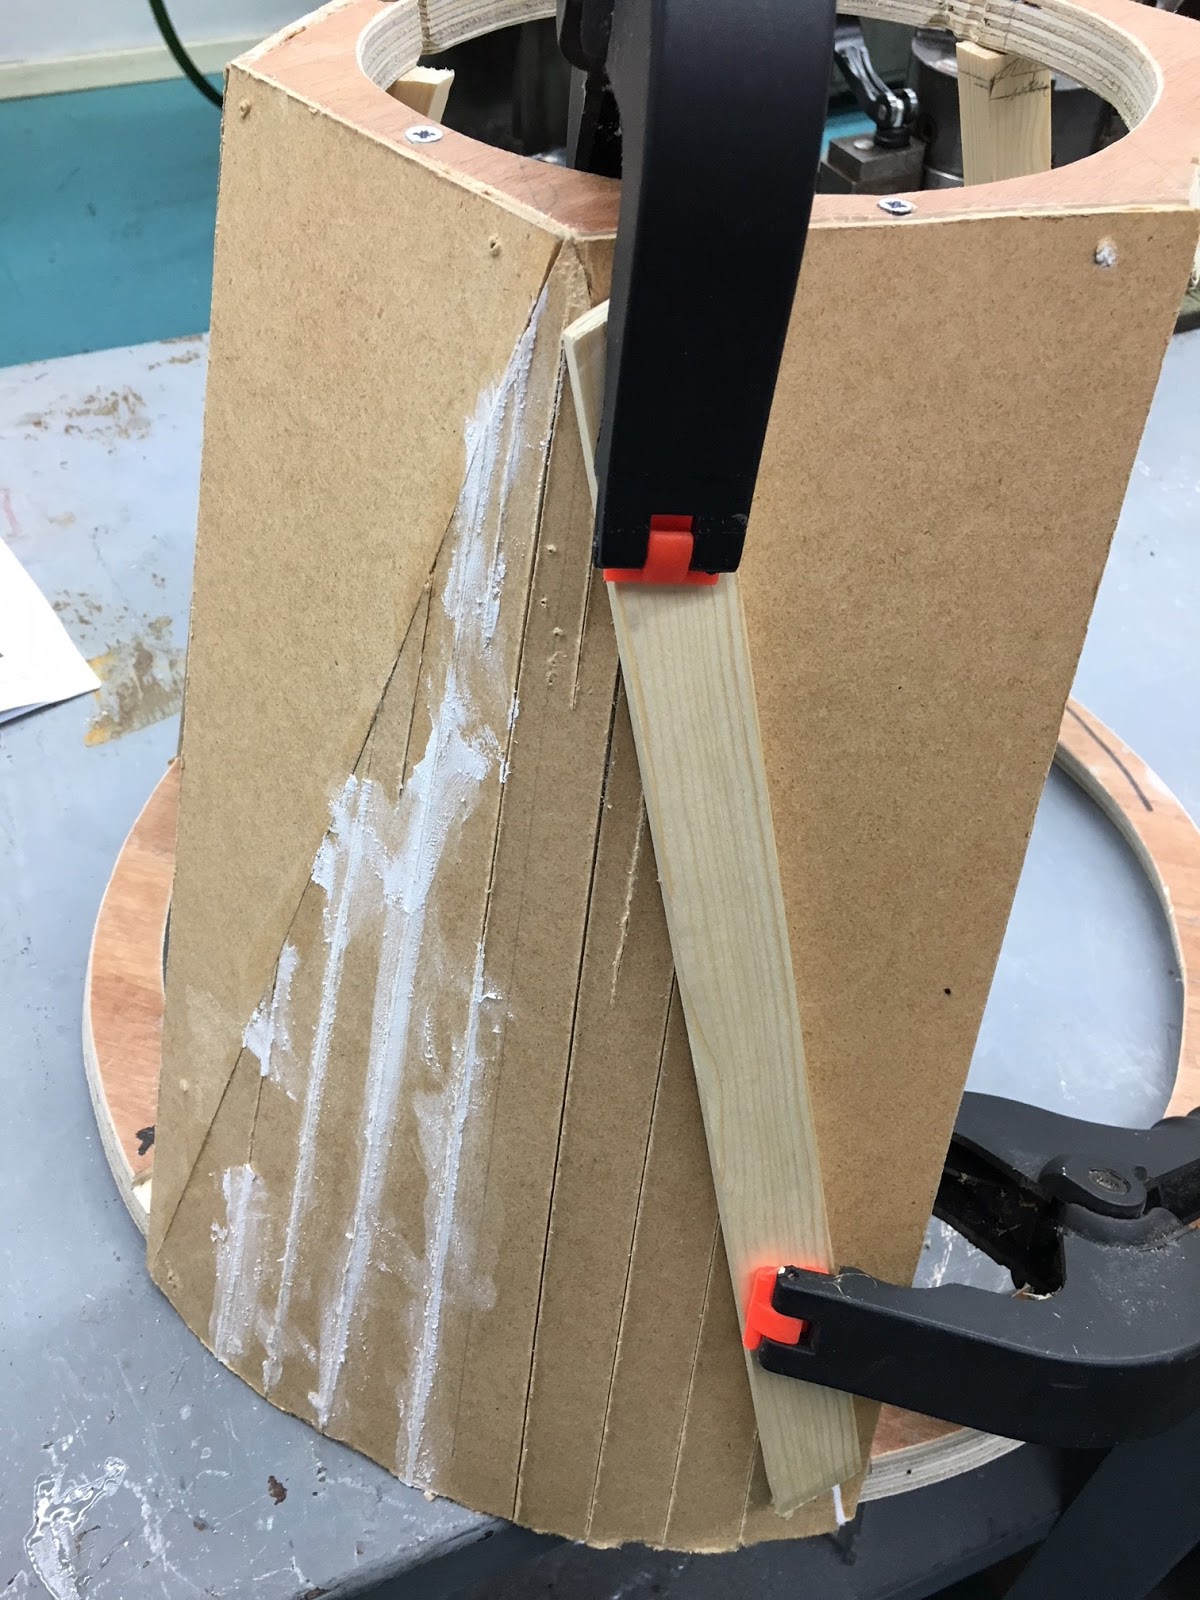
R4-D4 Dome - curved woodwork panels 1.0

Cut out one piece of hardboard to test as I attempt to create a curved panel.

With my other domes, they fact they are 'round' has meant not to much trouble in curving the sheet into shape. When I say easy I mean hard lol. A cylinder is easy, but restraining straps on a 'cone' shape tend to slide up and off. And because this frame is not just a cone, but also has large flats, this doesn't make it very easy to hold in place.


The lower section of the panel curves to the lower ring, quite easily, but the tapered/point....wants to remain flat. So I added score lines and 'helped' it to bend. Just like almost scoring through the wood to get a clean cut, the score lines help to reduce the resistance in the wood and allow it to bend (almost break). You can hear the fibers in the board tearing.

I needed an extra support to be able to press the panel against to hold and shape the panel.

 PVA glue applied to lower ring and one side of vertical edge.

 Panel in place and clamps applied.
I then cut up some off cuts and used this to help glue the panel in pace.
I also used panel pins on the end edges.

Clamps from rear, clamping blocks to hold everything in place.

I did this Sunday so will see how it all holds, will release the clamps tonight (Monday), will update next time.

October 27, 2017

New Dome - 3D holo eye - internals 1.2

So this is version 3, lol of my servo holder.

And here it is printed with the servo test fitted.

I need to re-do the holo eye internals for the LED's as I wasn't happy with the hot spots from them. And a diffuser wasn't doing anything to dim them.

New Dome - woodwork frame for........ R4-D4

There's still a long way to go, and home life has limited my available free time to actually work on the frame for the new dome. So I took it all into work to try and utilise my early morning starts & lunchtimes to crack on with this build.
This was my starting point, over a month ago now. I'm now happy that this is going to work to be able to share more of my work. The idea for the framework is a modified version, but also simplified version, of what I had seen online by another builder. Credit goes to : Scott Kraft (pithyscott on Instagram)


The side triangle panels will be possibly/temp held
in place with panel pins for the building purposes.
The above picture gives you an idea, the rear triangle is pinned in place.
The centre dowel was to help support the top while I messed around with the uprights.


 There is a upright missing on this side, this is because I need space for R4's holo eye unit to fit. I need to make up a different upright arrangement to support the triangle panel etc.

All uprights temp in place. Next up is to cut out the top plate, to save weight and also give access to inside the dome.

Here's the work for the holo eye box unit. Grooves cut into side panels for the front panel to sit in. Glued up and fitted together.


And the semi completed box unit. There are several different looking box designs, I've gone with fellow UK R2 Builders Colin & Brad (slightly different again).
This simple design suits me.


Next up was to glue in support fixing blocks, seen in picture below.
Still need to add two more to the lower angle face, to make four fixing points.

And here's a mock-up of some of the panels with the holo eye temp screwed into place.

Am on my 3rd attempt at a 3D printed servo holder to fit behind, am 90% happy I've got this sorted now.....well, until I get it all fitted up and it doesn't work! lol