Showing posts with label Front Vent. Show all posts

February 17, 2014

Front Vents 2.5 - mesh fitted

Got round to bending, cutting and drilling the last piece of angle bracket. Marked and drilled upper mesh location holes. Screwed them back into place.
R2D2, R5D4, Astromech DroidsR5D4

February 14, 2014

Front Vents 2.4 - mesh

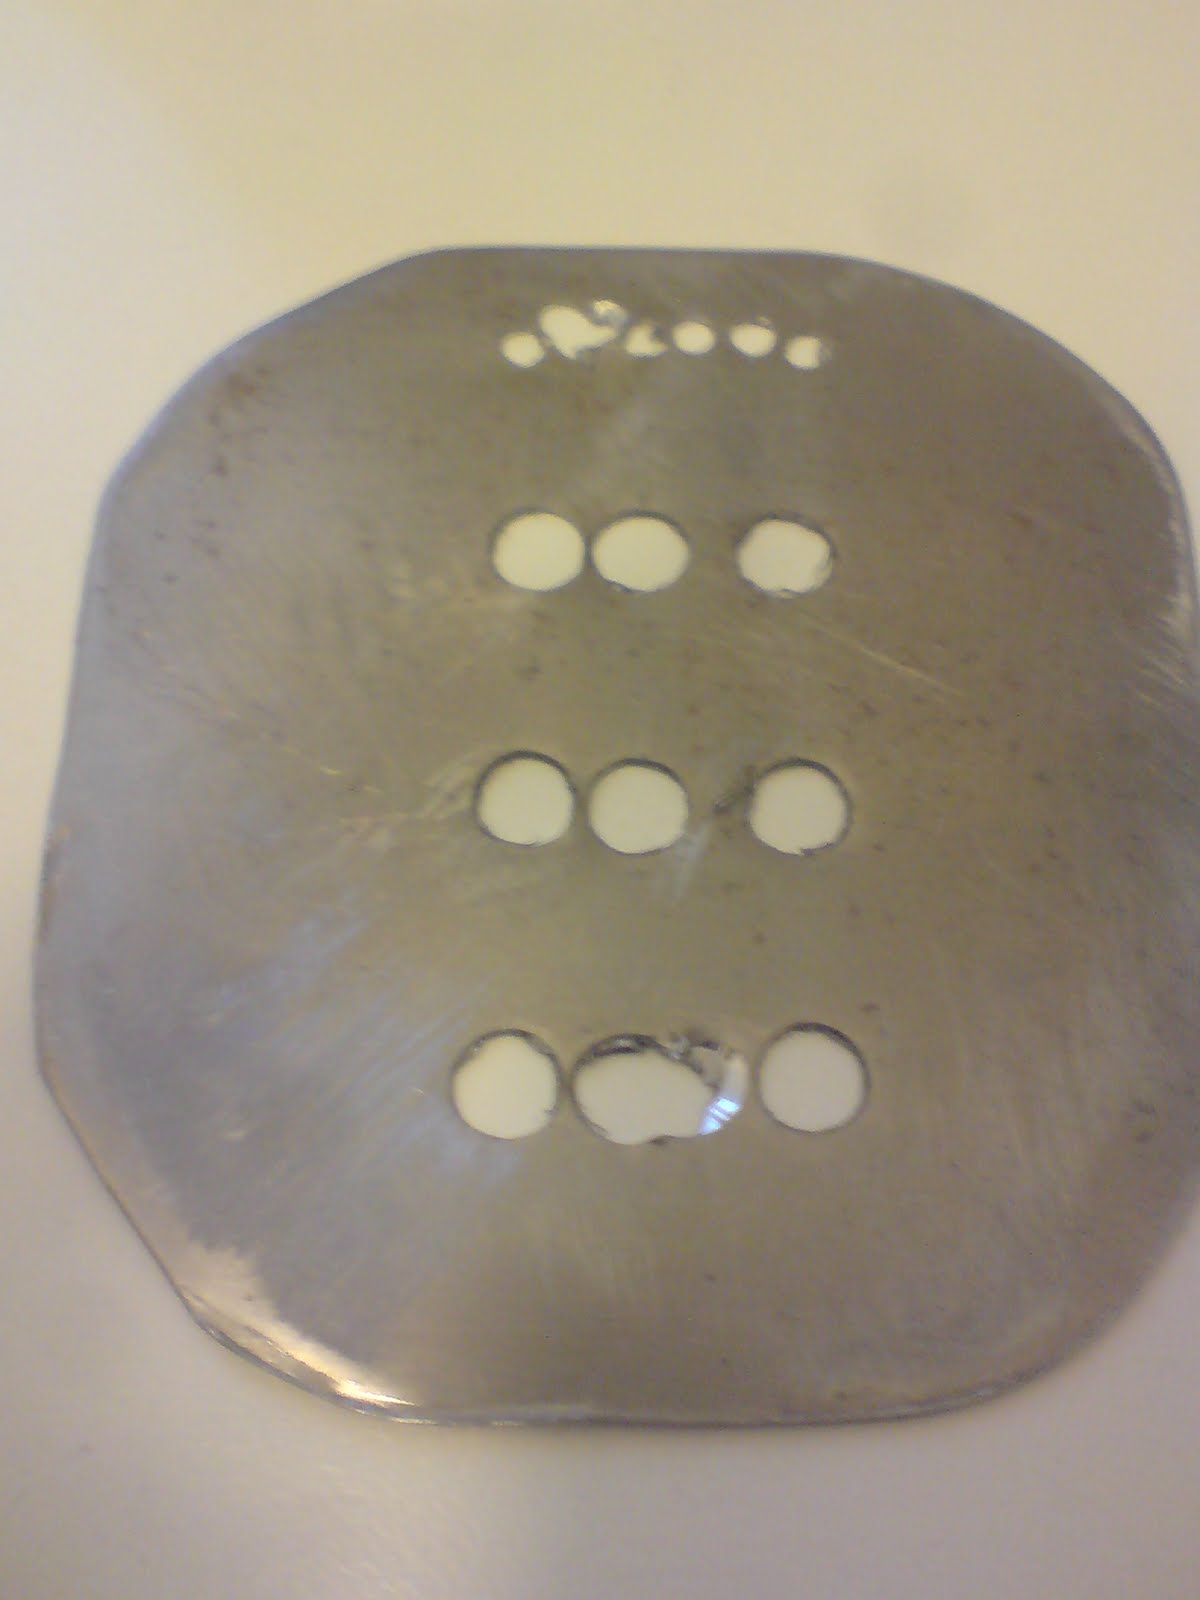
I wanted to make vent plates to block the view of R5's insides. So I marked up some perforated left-over metal, cut with metal cutters and drilled holes. Then used a grinder to remove sharp edges.
R5-D4 ventsR5D4 vents
These Im not sure to spray black or leave as they are??? Am leaning towards as they are.

February 13, 2014

Lower Centre Vent - bracket work


I finally got round to making, drilling and tapping threads for the Lower Centre Vent, bracket.

December 16, 2013

Front Vents 2.3 - Lower Centre Vent

Ive not been able to do much work at home, and it has been REALLY frustrating going out to the garage to get things and just having to glance at R5, say 'sorry buddy' and walk out again!

Today I'd had enough, the stars had aligned........somewhere, and i got 5mins (45mins) in the garage and thought I'd make a start on cutting out the lower centre vent opening. Well, I couldnt just cut out the hole, I had to go all out and make sure it would fit lol.

Used the dremel with drill attachment first, then gradually used it fitted with sanding drum to get final shape.

Next is to create a fixing bracket.

November 15, 2013

Front Vents - Fitted 2.2

Fitted top vent and bracket, found id not elongated the holes enough, but got it to fit in place eventually.

I've already marked out the lower vent hole, just need to have time to cut it out. Would REALY like ot get it done before his next event.......which is November 23rd @ the Fleet Air Arm Museum.

November 13, 2013

Front Vents - Fixing Bracket **UPGRADE** 2.1

Last night I wanted to mark and fit the top front Vent onto the brackets I had fitted ages ago, see Front Vents resin set post.

For whatever reason, rushing, it being late, not enough light in my garage..... I didn't notice that one of the two brackets I had fitted wasn't long enough to actually be secured to the Vent. So Plan 'B' is now in effect. This is actually how I thought I could of fitted them, just like the Power Couplers, in the first place lol.

So rummaged though scrap metal box and found some thin sheet metal. Measured, marked & cut a strip off. Then bent to shape and drilled fixing holes for it to be screwed to the inside frame.


The curved area along the bottom was so that only one of the Vents opening's won't be blocked. The one remaining, which can be seen in the picture below, will have it's opening traced onto the bracket, once it's been fitted and then this will be drilled out.

Next thing was to drill elongated holes [width ways, though not visiable] in the bracket and then drill and thread tap holes in the rear of the Vent. Am using M5 metric thread and hex socket head bolts.
R5D4, Vent, R2D2R5D4, R2D2, Vent, support bracket

September 02, 2013

Front Vents - Resin Set 2.0

Originally written last year sometime lol.

I wasn't happy with the front vents that I had made. I know I spent a lot of time making them, but I wanted them to especially look right as these are the bits that people will focus on. So was looking to buy a set from Don Jarr via ebay.

Well I don't have to save up as was kindly offered a spare set from a member of the UK R2 Builders club. These are very much appreciated indeed!

I measured and marked a centre line for the centre vents. Then drew roughly where the outside cut should be, then I started with a drill hole and then started sanding out to size with my dremel.
R2D2, R5D4, Vents

R5 - Top Vent
This is one of the brackets I fitted to support the top vent.
There will be more substantial supports for these as I can imagine these
being pushed in by kids! lol

And here's the top vent test fitted.
R5 - Top Vent test fitting

R5 - Top Vent test fitting

May 31, 2011

Front Vents...... update pt5

Top Vent almost finished. Finally got round to filing out the last rectangle slot. I need to file the edges to size and then it just needs glueing together. Next, the lower vent & internals.

May 18, 2011

Front Vents - internals

I made cardboard templates, to scale, for use with makeing metal vent internals. As was looking at makeing the vents as one piece. Sloped part and back as one, bent to shap them. Used thinner material, easier to cut & bend to shape than the back plate.

Pictures will explain this better :-D
The cardboard version

The Vents cut out and bent roughly to shape

The Vents fitted over the cardboard template to check.


Cut out a piece of metal plate for back part of internals. Then marked up & drilled holes for the cut out's. These holes I will file to correct shape.
Rear Vent Plate

Front Vents...... update pt4

Front Vent no1:
Last few days in work, I've been milling the vent surround. Milled away the outside of the prodruding part, to start the shape of the radius. Also on the hidden parts to reduce weight. Then filed the curved outside. It has taken a while, to complete the first Vent surround and I've learnt a lot, so hopefully the second vent surround will be a lot easier to make and I'll be able to make it quicker.

Heres the completed outside vent:


I dont think the pros got anything to worry about lol, but I'm happy :-)

May 17, 2011

Vent story so far.....

I've been busy working on finishing off the top Vent. Rather than posting bits here and there, I'm trying to finish it off and then post up one big progress, with better quality pics, than previous ones.

Is looking good and shouldn't be too much longer now....... I hope lol.

May 10, 2011

Front Vents...... update pt3

Got a little bit more done today on the first top vent. First thing this morning I drilled out the rear part of the vent surround. Then on my lunch break I drilled, counter-sunk & thread tapped the two parts together. This is so that when it comes to milling the inside and outside, both pieces will be 'paired'.

Two parts screwed together.
Hopefully tomorrow I'll be able to machine out the insides.

May 09, 2011

Front Vents...... update pt2

YES!!!! Lunchtime, I got on with drilling out the centre part of the Front Vent. I'm happier now with it looking more like it should, just need to mill round the edges and then onto the back half.

Is now starting to look like a Front Vent.......... if you squint your eyes a bit, lol.

Front Vents...... update

did some more milling on the front vent after work on Friday. But due to the cutter sizes available, it is going to take ages to machine the centres out! :-(. Will have to drill more first & then mill to finish off.


So am now thinking of another way to make them, just in case lol.

May 04, 2011

Front Vents - machining part 1B

May the 4th Be With You...........

Sorry, but it had to be said :-)


Lunchtime I squared up the first part of the Vent with second part blank behind it, so as to be able to machine them together. With limited time, I managed to machine off enough to be able to re-set them up to carry on machining on Friday.
machining the two blocks for one vent

And what it should look like when finished.

May 03, 2011

Front Vents

Found some material large enough to make up the centre vent surrounds. Unfortuantly they weren't deep enough. So will have to machine up a pair together and then fix them together.


The main parts that will be seen are of course the front face, outside edge that prodrudes out of the skin and the internals. So I'll machine a protruding lip and machine out the inside hole area.
Outside diameter shown,black marker. The 'tab' on the side will be inside the body, connecting the two parts together.