Showing posts with label Plans. Show all posts

June 07, 2019

New project.......Schumacher SST chassis - MSE Mouse Droid...?

Continuing on from this post.........

So a few week’s back, I spent some lunchtimes, cleaning the chassis of this RC.
I started to strip the car down piece by piece to service the broken/damaged parts. Namely the rear differential and the belt(s). One of them being broken. A stone had got trapped between the belt and the gears and chewed up both, breaking the belt itself.
Schumacher SST Sport, Schumacher SST '99 Pro chassis
The chassis was, I thought, a Schumacher SST Sport, did a bit of research to find out that it was in fact a Schumacher SST '99 Pro!
Thankfully the replacement parts I needed & have bought were the same!

Schumacher SST Sport chassis, Schumacher SST '99 Pro

Schumacher SST chassis

Schumacher SST 99 Pro chassis

Schumacher SST 99 Pro chassis

Schumacher SST Sport chassis
I gave everything a watch down with an old toothbrush to get rid of all the dirt & dust.
Schumacher SST 99 pro
 This is the damaged differential and needed to be replaced.
Schumacher SST
 This is the good one, it just needed to be stripped down and cleaned up, old dried grease to be removed & then re-oiled and re-assembled.
Schumacher SST
I found the belts, main gear and new differential online & on eBay.

Schumacher SST 99 Pro chassis
 All (mostly) cleaned up and re-assembled.
Schumacher SST 99 Pro
Here's the new differential fitting back into place.

Next:
  • Wheels & tyres
  • power & controller check
  • probably a lot of other things I'll find on the way lol.

May 24, 2019

Another project.....?

A friend from work gave me this a few years back, (thanks Steve), but didn’t have time to work on it. I still don’t have much free time lol, but just enough to make a start on it so that by the time it’s cleaned up I'll have decided what I'm going to build.

I did find a stone wedged between the gear and the belt, which explained why the teeth are a mess and the belt ultimatly broke.

Good news is that I have now tracked down the information needed to repaire the broken parts and move this projecct forward.

April 08, 2019

Next project...... Dome Bag 1.1

(5.4.19)
Going to event's with two domes can be a bit tricky, and also my garage seems to attrack dust. So I came up with this idea to protect (from dust) and be able to carry a dome easily.

And the 'Dome Bag' idea was created.

I did have a plan....but this first attempt was basically a test/WIP as I will eventually need another bag for the other R4 dome. Oh and maybe another for my R0 dome, but that's still being upgraded, so no rush to take that to any events.

Step 1: The Base.
I wanted there to be a padded surface as the dome connect with the body and this edge could get damaged. Now, this wouldn't stop damage if the dome where to be dropped, but a slight knock or bump would be ok.

I drew around the base of the dome, with the intention of cutting an extra bit larger for the side foam padding to sit on.......but due to distractions & thinking two steps ahead.....I forgot. So the foam diameter is the same size as the dome's outer edge.....that it's supposed to protect.
Dome bag, R5D4

Next I drew around this foam base & cut out the material to cover it, like a cushion. The material is just a single fitted bed sheet, costing about £6. Remember, this is just to offer some protection from dust, the actual structural strength comes later on in this build.
Dome bag, R5-D4
I pinned and using the sowing machine, stitched the two panels together, inside out, then turned them the right way and squeezed the foam panel inside.

Step 2: The Side. The next step was the side protection. I measured a height that would protect the upper edge of R5's dome, above the holographic, engine turned tape panels.
The material's was cut long enough to wrap around the faom to hold it in place.
Dome bag, R5D4
The second smaller piece was used as a guide for the turned over piece of material. I almost messed up again, by not allowing extra material for the fold.

I did however, mess up on the actual height of the material needed to cover the side height of the dome and also the top section......more about that 'upgrade' later.
Dome bag, R5D4
Using my daughters sowing machine, and re-learning on the go, lol, I managed to stitch a half decent straight line along the edge of the panel. I didn't want it to be loose, allowing the padding to move, so I got this right and it fits nice and tight.

So far this is all going as planned.....hahahaha......

March 14, 2011

Best laid plans and all that.....

Well I didn't manage to get anything done the weekend. Friday I'd printed off the base plans for R5's body, but then when rushing out the office door, I forgot to pick them up off the printer......

Well I have them now, but won't be able to start anything now till at least Thursday, due to family commitments. This doesn't of course stop me thinking and planning other parts of R5. That's one thing with a project build of this size, there's always plenty to occupy your time :-)

February 18, 2011

Rear Dome Rod

Started machining up the rear dome rod, or I will do once I can find some more material that's not three times the diameter I need!!

February 15, 2011

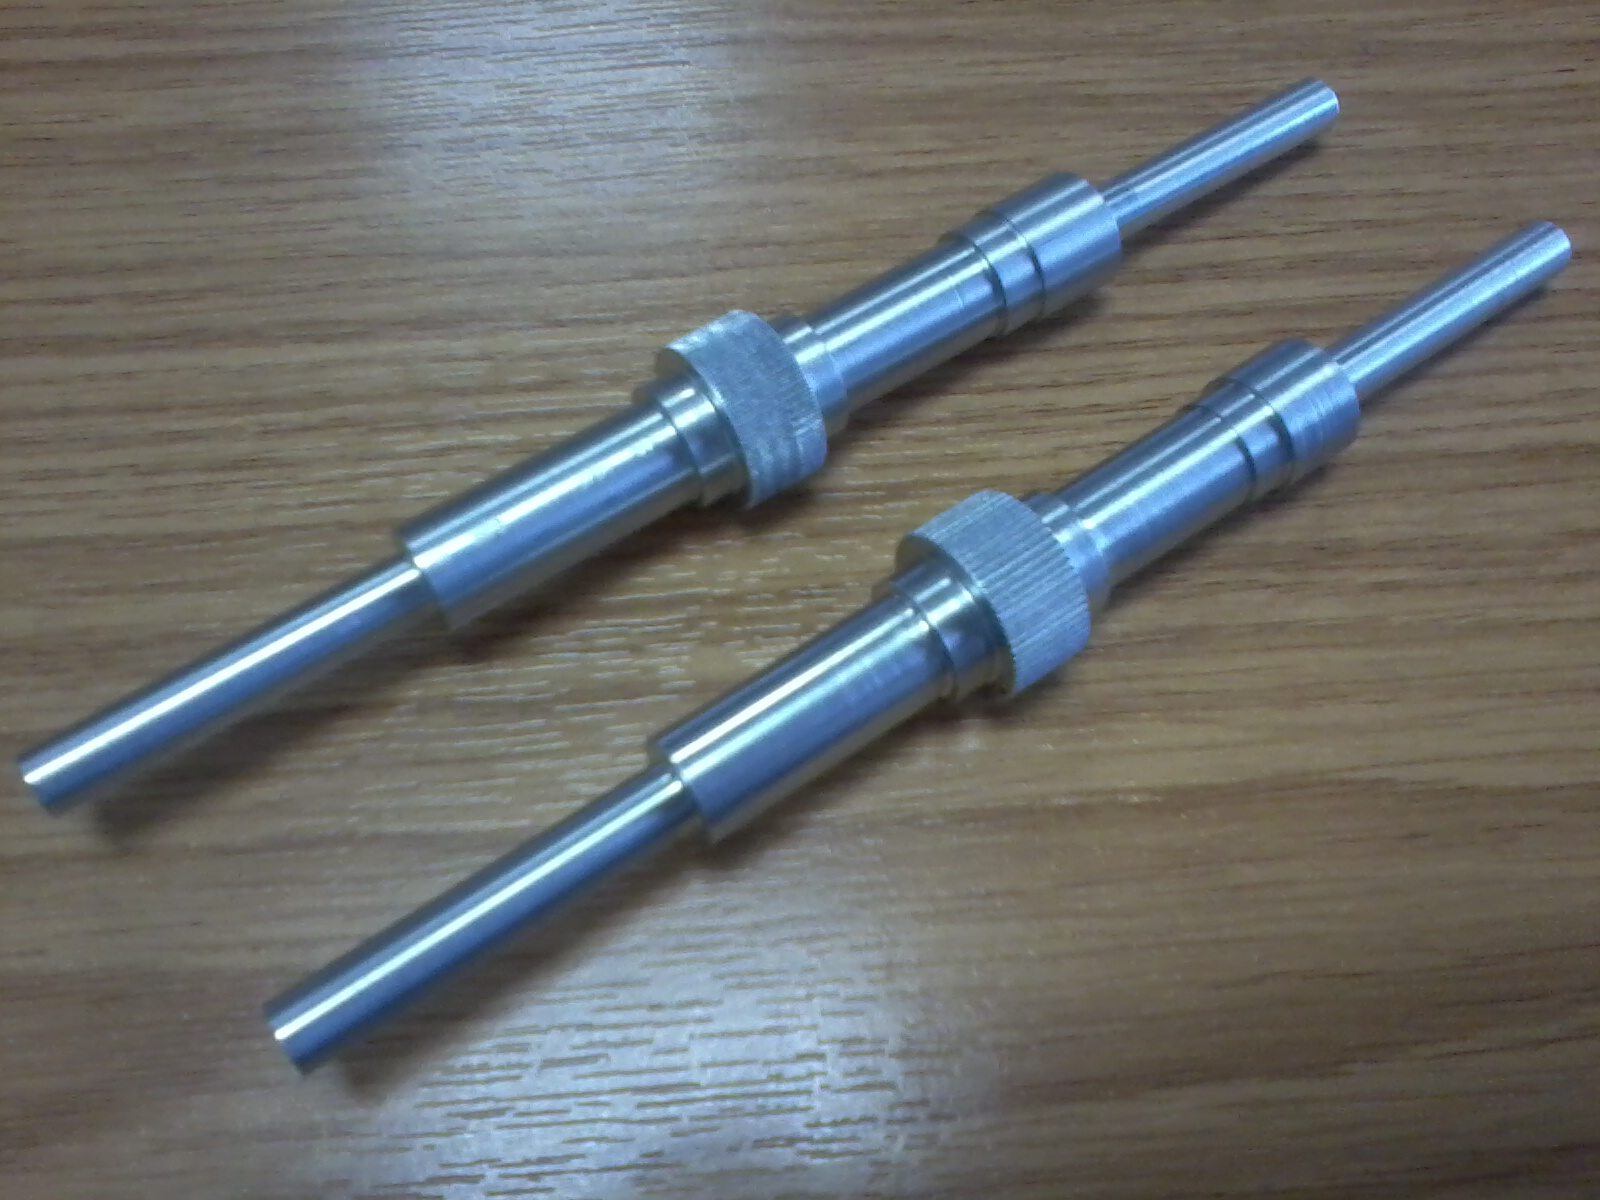
Dome Side Rods x2

Just finished machining up the second Side Dome Rod. The straight knurl looks better than on my first attempt, but well just say that's it's like that due to wear! lol

February 13, 2011

Dome Side Rod, picture update.....

There will be two of these. Due to material available, I had to make it in two parts. This actually made making it easier.
Side Dome Rod
Just need to finish the top half of the second Rod.

February 11, 2011

Photo's of work so far.....

As promised, here's work done so far:

Shoulder Buttons, (4 off)

Antenna
I had to make this in sections, the bolt will help secure from below.


The finished Antenna
The front 'sensor' is a push fit into the lower body section.
All made in several of my lunchtimes lol.