Am taking a break.
I have a lot of things to deal with at the moment.
I have these projects which I’d like to finish as well as other updates for R5, as I enjoy working on them, but I’m not giving myself enough time.
I’ll be back, once I feel better.
Droid Builder

Extra Projects & Event Page's
- Home
- Trading Card Dispenser (NEW version 3) - TCD [2020/2022]
- Trading Cards
- R5-D4's ....Bad Motivator development
- R5-D4 - silver neck details
- R4-D4 - Dome [wood build]
- R0-D4 Dome [wood build]
- 3D Printing
- *** Star Wars Shoes ***
- GOUD-4 Messenger Droid - Solo ASWS
- Event: Mshed Bristol 2025
- Event: Mshed Bristol 2024
- Event's 2018
- Event's 2017
- Event 2016 - "Celebration Europe"
- Event's 2015
- Event 2014 - Chippenham Sci-Fi
- R5-D4 - events page - The beginning (2013)
- ** R5-D4 patch **
- R5-D4 Photos
- Costume for my Son - Han Solo -
- Costume for my Son - Boba Fett
- Droid Caller - Han Solo style
- Scanning Crew Container - Transmitter Storage Box
- Stormtrooper - me
- Rogue One - trading card storage box
- Rogue One
- Jabba’s gate prop for Celebration 2023
- Treadwell Droid - WED-15-77
June 11, 2019
June 10, 2019
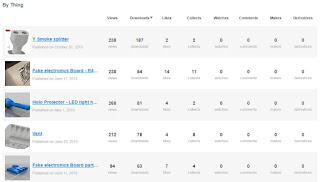
Thingiverse - Top 5 .stl's this month
Everyone loves free stuff, but it's even better when it's of actual use to you lol.
The top five downloads
this last month period - May 10th to June 10th.
My mini fake electronics part. This piece was combined into my larger R4 fake electronics panel, also on my Thingiverse account.
The Vape collar - large, is second. And it's nice to see that the two Solo display stands are still being downloaded.
Overall, since I started posting my work up, the Y-splitter has had the most downloads. This was designed as a test for R5's smoke system. Second place is the R4 Fake elctonics panel. The Holo projector holder is 3rd and the vent I designed up as part of a cooling mini airconditioning unit for my daughters bedroom (last years hot summer nights) is the 4th most downloaded piece.
It's nice to see that these are being used. These are all pieces I have needed and drawn up in my spare time. Thingiverse is a great way to share stuff.
Here's my link. Thingiverse @James_R5D4
Dome Bag - 2.5 base & side stitched up.
Friday evening I cut out the two pieces of material for the base foam. This time I allowed for the side of the foam, plus extra for hemming the edges. Next was to pin the two pieces together, this proved a challenge as some of the side material has to be gathered up so the two diameters match up.
Saturday I sewed the two pieces together and not without it's problems. The first being I pinned the two halfs the right way round, instead of inside out, so the stitching is on the inside when turned out the right way. The with areas of miss stitching having to be gone over again.
Side material for the foam diameter protection. Placed the foam onto the material and folded it over. Was going to pin but instead used a chalk line as a guide. I added pins away from the stitch area just to help hold the material in place. All stitched up and foam fed into the fold. Test wrap around the dome and..........there’s a gap?!?!?
June 07, 2019
New project.......Schumacher SST chassis - MSE Mouse Droid...?
Continuing on from this post.........
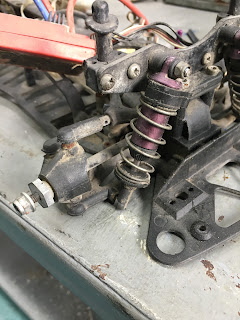
So a few week’s back, I spent some lunchtimes, cleaning the chassis of this RC.
So a few week’s back, I spent some lunchtimes, cleaning the chassis of this RC.
I started to strip the car down piece by piece to service the broken/damaged parts. Namely the rear differential and the belt(s). One of them being broken. A stone had got trapped between the belt and the gears and chewed up both, breaking the belt itself.
The chassis was, I thought, a Schumacher SST Sport, did a bit of research to find out that it was in fact a Schumacher SST '99 Pro!
Thankfully the replacement parts I needed & have bought were the same!
Thankfully the replacement parts I needed & have bought were the same!
I gave everything a watch down with an old toothbrush to get rid of all the dirt & dust.
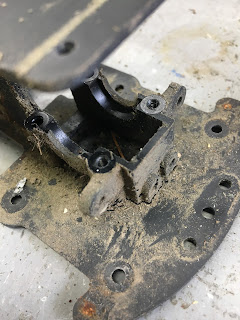
This is the damaged differential and needed to be replaced.
This is the good one, it just needed to be stripped down and cleaned up, old dried grease to be removed & then re-oiled and re-assembled.
I found the belts, main gear and new differential online & on eBay.
All (mostly) cleaned up and re-assembled.
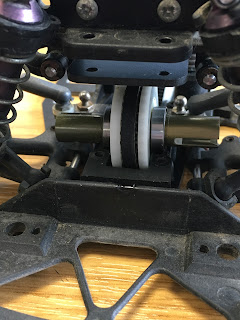
Here's the new differential fitting back into place.
Next:
- Wheels & tyres
- power & controller check
- probably a lot of other things I'll find on the way lol.
June 06, 2019
Dome Bag - 2.4 Sewing begins
Back from short break and first free time, I made a start on hemming the edges.
I had already ironed the edges over, as trying to hold the fold and stitch, without using pins, was a nightmare last time!
Next up was to sew them. Borrowed my daughters sewing machine and got to it. Ironing the edges made a huge difference and was SO much easier!
I'm still a newbie at this and looking back on this,
I should have allowed extra material to add an
extra fold of material to hide the frayed edges when hemming.
Once the thread was loaded up and the stitching was complete, this took about an hour to complete. I thought.....whilst this is all set up, I could look at the fold for creating the draw string. I hadn't ironed this crease, I suppose I could of done, again making life easier, but I hadn't thought that far ahead at the time of ironing lol.
So I placed the cord and folded over and pinned along the edge as I removed the cord. This bit was a bit tricky to do. Due to the location of the cord, I couldn't leave it inside the folded material as the material wouldn't then fit under the sewing machine's foot.
This took about half an hour to pin and then stitch & then another half hour trying to find something long enough to feed through the length of the hole lol.
And the finished folded draw string fitted.
Next:
- cut material out for the base foam.
- sew base material & fit the foam inside it.
- sew main panel up & fit the side foam inside.
- sew the two pieces together.....might do this before fitting the foam!
- sew on patch and fit cord lock.
Subscribe to:
Posts (Atom)


