May 12, 2016

'R0' dome build - 2.5 'Skin & squares'

Had to re-drill the three location holes in the base plate as my original ones id marked and drilled were slightly off. And to not cause confusion, I plugged the old holes with wood dowel.

Test fit of dome on R5's body.

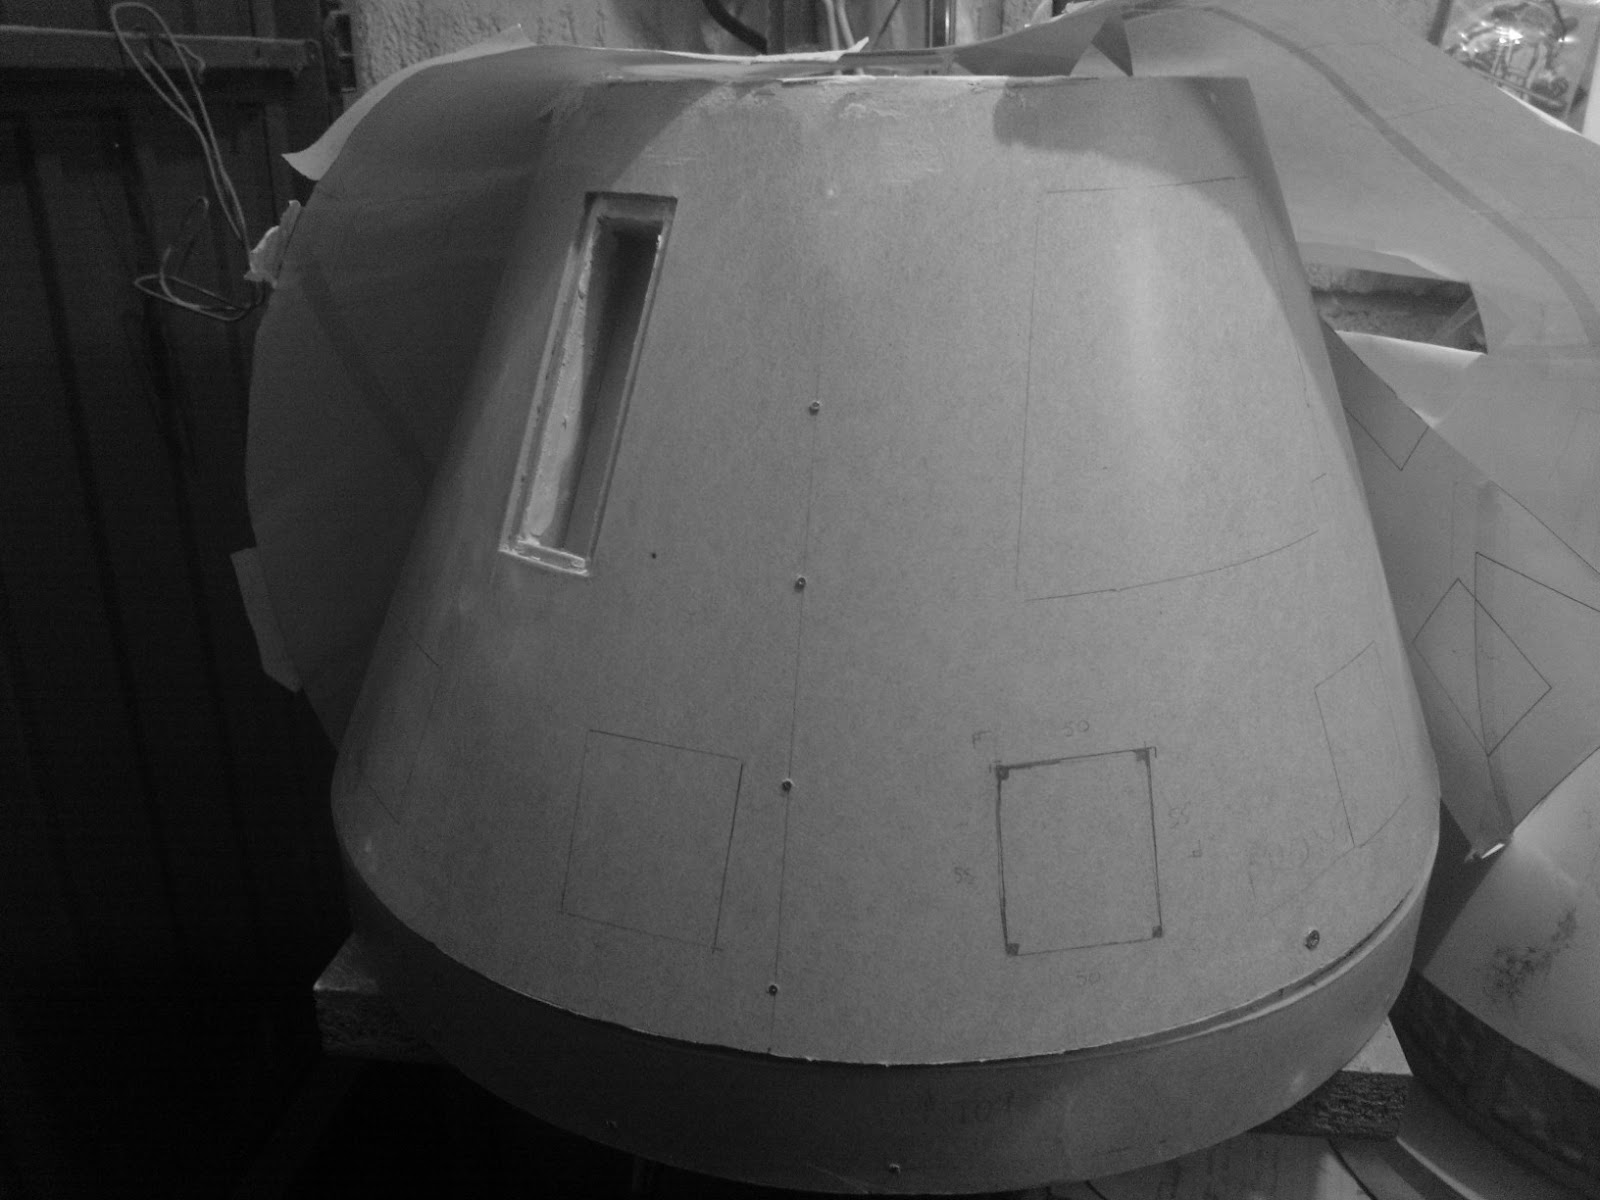
I cut out two more 'squares' only two left to go now. Marked up a test piece for the recessed part of the 'squares'. Using the saw blade, I cut grooves in the rear face, this helps the wood to flex and hopefully not split. 

Marked out suitable holes on the dome for securing the Radar Eye. I then found some plastic discs just the right size for the screws I found to use.
Here's the Eye test fitted to the dome.

May 11, 2016

'R0' dome build - 2.4 'Skin & squares'

I made a cardboard template for the lower 'squares' and a rectangular one for the two upper rear/side split panels.
This was just to make life easier. I used the paper template to be able to mark through it onto the wood skin and then used the cardboard template to draw around them once happy they were in there positions.
Also marked the Radar Eye's position
The upper rear sectioned panel, to be grooved

I then started to score and cut them out.
Here I'm grooving out the rear split panel
To do the grooving, I used my Stanley Knife to score to a shallow depth on both sides of the 'groove'. I then used the tool in the pic to peel off the layers of the hardboard, to the depth I wanted, by repeating the scoring.


I mixed up some more P40 fiberglass resin and started applying it all around the edges and joins inside the dome. This helps with strength, meaning some of the more obvious screws can then be removed.

May 10, 2016

'R0' dome build - 2.3 'Skin & recessed box no.2'

5th May
Whilst waiting for the recessed box glue to dry, I got on with mixing up some fibre glass body filler and make a start on reinforcing the insides of the dome, along the joins, around the boxes and the top & bottom edge gaps.

Top edge work
R0-L0
Recessed box no1
The bottom edge, I applied masking tape around the outside as I didn't want to push the fibre glass out.

The inside view.....

And once masking tape was removed.....

I finished up cutting, drilling holes and shaping the second box and using wood PVA glue, glued it into place.
R0-L0
Inner skin for recessed box no2.

'R0' dome build - 2.2 'Skin - recessed box no.2'

3rd May 2016
Once the second half of skin no2 had been fixed onto the dome, I marked out where the second recessed box would go.

Hmmmmmm, a bit close to the join than I'd of liked.....


Due to the printed plans not being 100% correct [multipule sheets stitched together] this is what caused my initial skin shape not matching up with my frame CAD drawn plans. The fact the wood wouldn't wrap 360 degs around the frame, without ripping, and then the new skin supports positions, this second recess has ended up being a be a bit close to the join and also the new skin support............Oh well, its marked up and there's not much I can do about it now lol, so lets get cutting


4th May 2016
I decided a little creative/artistic licence was required. So a slight correction with the marked hole and the recessed box is now not so close to the join.
I moved the marking of the hole round by another 5mm.
I then cut out the hole with the dremel. I used a paper template to mark out the recessed piece, I then cut it out.
 The left hand side recessed panel edge strip, still had to have some of it removed to fit around the second vertical skin brace.

Once the shape and fit were right, I glued it in place and clamped it. Next I measured and cut out other sides.

Here is the second recessed box going together.
Sill need to make up the ends with holes in.

'R0' dome build - 2.1 'Radar Eye'

The May Bank Holiday weekend (UK) I managed to work on the Radar Eye lens, in between 'life' and the dome itself.

Whilst searching the net for radar eye lenses, I found a Blog where the user had found and used the dome off a fake security camera. I watched a video about how he did it and then searched eBay for a cheap camera. Found this one for less than £2.

It came within a few days. Lol glad I only need the dome as the camera wouldn't fool anyone it was the real deal lol.

I placed a piece of paper on the dome skin and then the radar eye onto it. Then I drew inside the hole. I cut out the paper and used it as a guide to mark the plastic dome for cutting it out. This was the plan but when I transferred it to the Radar Eye rear hole, this plan wasn't going to work.


I thought that the radar eye hole should also be built up, but this seems to not be the case as the lens then doesn't sit correctly in it.

So I removed the material around the hole for the lens to sit how it should, as if it was to sit on an R2 dome. 
After a lot of shaping on the rear of the opening so the lens fitted as best as possible, I then marked again where best to cut with clearance.

Then used the sanding drum on the dremel to reduce and shape the lens to fit the rear of the eye.

A bit more sanding to get the edges of the lens flush with the radar eye, to achieve this final look.....

'R0' dome build - 2.0 'Skin pt2'

30th April 2016

I marked out the second part of the dome skin. I cut out more, around the edges, than I need as this helps with curving the material. The strapping down is the hard part!! But I got it held in place eventually lol.
R0-L0 astromech dome

R0-L0, R5-D4

In these pics you can see where the wood fiber doesn't like the tight curve asked of it. Thankfully though, it holds and these will be sanded out and later watered down PVA will be applied all over to soak in and strengthen the wood. This also helps prevent the spray paint soaking in so much.

I left this strapped up for a few days.

~~~

May Bank Holiday and I was able to get on with some more work.
Using the original vertical upright template, I cut two brackets. Next was to cut an angle onto the leading edge so that it matches the skin curve. Then they were screwed into place.

I realised that I'd screwed them to high up, so re-positioned them lower down, so the bottom of the skin would have something to be fixed to.

I had already cut out the skin, so positioned it centrally on the vertical and started to screw it into place. Working my way round both sides, top and bottom.


Then I clamped the extra edge down (no picture), marked where to cut and scored with Stanley knife to cut to size. Whilst doing this, I also trimmed the top skin edge.

Then screwed it down the first edge.
 Looks a bit uneven, but nothing that can't be fixed with filler.

~~~

3rd May 2016
Got my new dremel cutting discs today, and these came just in time! I used one to trim the edge off the end skin to be able to butt up against the first skin edge. I then screwed it down.

Next I started to sand the join to make it smooth and blend together.

'R0' dome build - 1.9 'recessed boxes'

Using Lars' plans as a guide to help with my wood build. I marked and cut out the inner pieces to make up the recessed box.
R0-L0 droidR0-L0 droid

Drilled one large hole for the dome rod to fit into and a smaller one for a screw to secure in place. This one goes at the top for easy access. Lol, learned my lesson when doing R5 :-D.
The lower larger one will be fitted with a piece of wood to stop it dropping through.


Applied PVA wood glue and clamped box in place.

Once dried I added wood filler to the gaps

And some glue to the rear joints to soak into the gaps.

The plan is to cover these and joins with fiber glass matt for strength and security.

'R0' dome build - 1.8 'Skin - recessed boxes'

27th April
I checked the off-set needed so that the recessed boxes, wouldn't interfere with the internal verticals. Once happy, I marked the first box.
R0-L0 dome


Cut out the first hole for the recessed boxes (3 off).
R0-L0 dome

Then I measured and marked up the strips that will be the skin recess/step. I roughed up the smooth surface a bit with sandpaper first before I applied wood glue and whilst letting it to set a bit, I grabbed some scrap wood and my G-clamps and glued them in place, one at a time.
R0-L0 dome

R0-L0 dome

R0-L0 dome
Next (pic below) on with the second side.
R0-L0 dome

For the upper and lower pieces, I cut vertical slots in the back face, to help them bend a bit to the dome curve.

Then roughed them up with sandpaper before glue and clamping into place.
R0-L0 dome

These have held really well (I sound surprised, lol) The opening is a lot stronger and once the rear recessed boxes are in, will be super strong.