May 23, 2016

'R0' dome build - 3.1 'Dome lid'

Started work on the lid angle.


I should of made the lower of the two height discs, a larger diameter. So as to take up space, therefore, using less glass fibre resin. Packed out with scrap wood to a diameter of 140mm. Glued in place, then started with the glass fibre.

Building up in stages as then I can finish off with filler.

It was late, so this was as far as I got.

Wasn't able to do much more over the weekend.

May 20, 2016

'R0' dome build - 3.0 'Dome Lid'

Last nights work:

Cut out last piece of the lid sections.

Marked their positions on the main base ring (to be), then drilled holes and secured then to it.


The height of the lid is given as 9mm, so I measured and marked two 100mm discs, both 3mm thick (+ the base) equals 9mm high. I found the centre on the base disc and positioned where the discs would go.
Disc's marked out and cut out 

Positioned centrally

Next I glued the two discs together. These will be glued to the base disc, before the lid angles are created.


I then marked out the excess material not needed, to keep weight down, and used my jigsaw, cut sections out.
marked out area to be removed

And afterwards. The central hole will be used for a sleeve unit for the pop up system.
[If I have time before Celebration Europe, that is]

May 19, 2016

'R0' dome build - 2.9 'Dome Lid'

Next was the dome lid. I found the top ring cut out and marked where the centre was going to be cut out. This will help keep the weight down.


Then using what sheet material I had, I marked out the 'recessed' Lip ring (which will be silver) & the lower edge of the actual lid.These are half sections as didn't have enough for whole discs.

I've an idea how to secure the lid, but first, I'll finish this bit.


~~~
Lol, was moving bags hanging up in garage, when I found the leftovers of another project from years ago, Aluminium grill! Perfect!

It's not circular holes, like I've seen, but this is an R5 knock-off lol, so will do for this build.

My plan is to secure it to the inside of the pictured ring it's sat on. Cut down in height tho.

'R0' dome build - 2.8 'Squares'

Before and after of this panel fitting, still work in progress

Glued in place last two rear panel pieces. And then worked on the square panels, gluing in place and applying wood filler.

Almost finished these now, just four more to go....

May 18, 2016

'R0' dome build - 2.7 'Skin & squares'

Weekend work:


Limited free time on Friday night, but managed to get some work done.

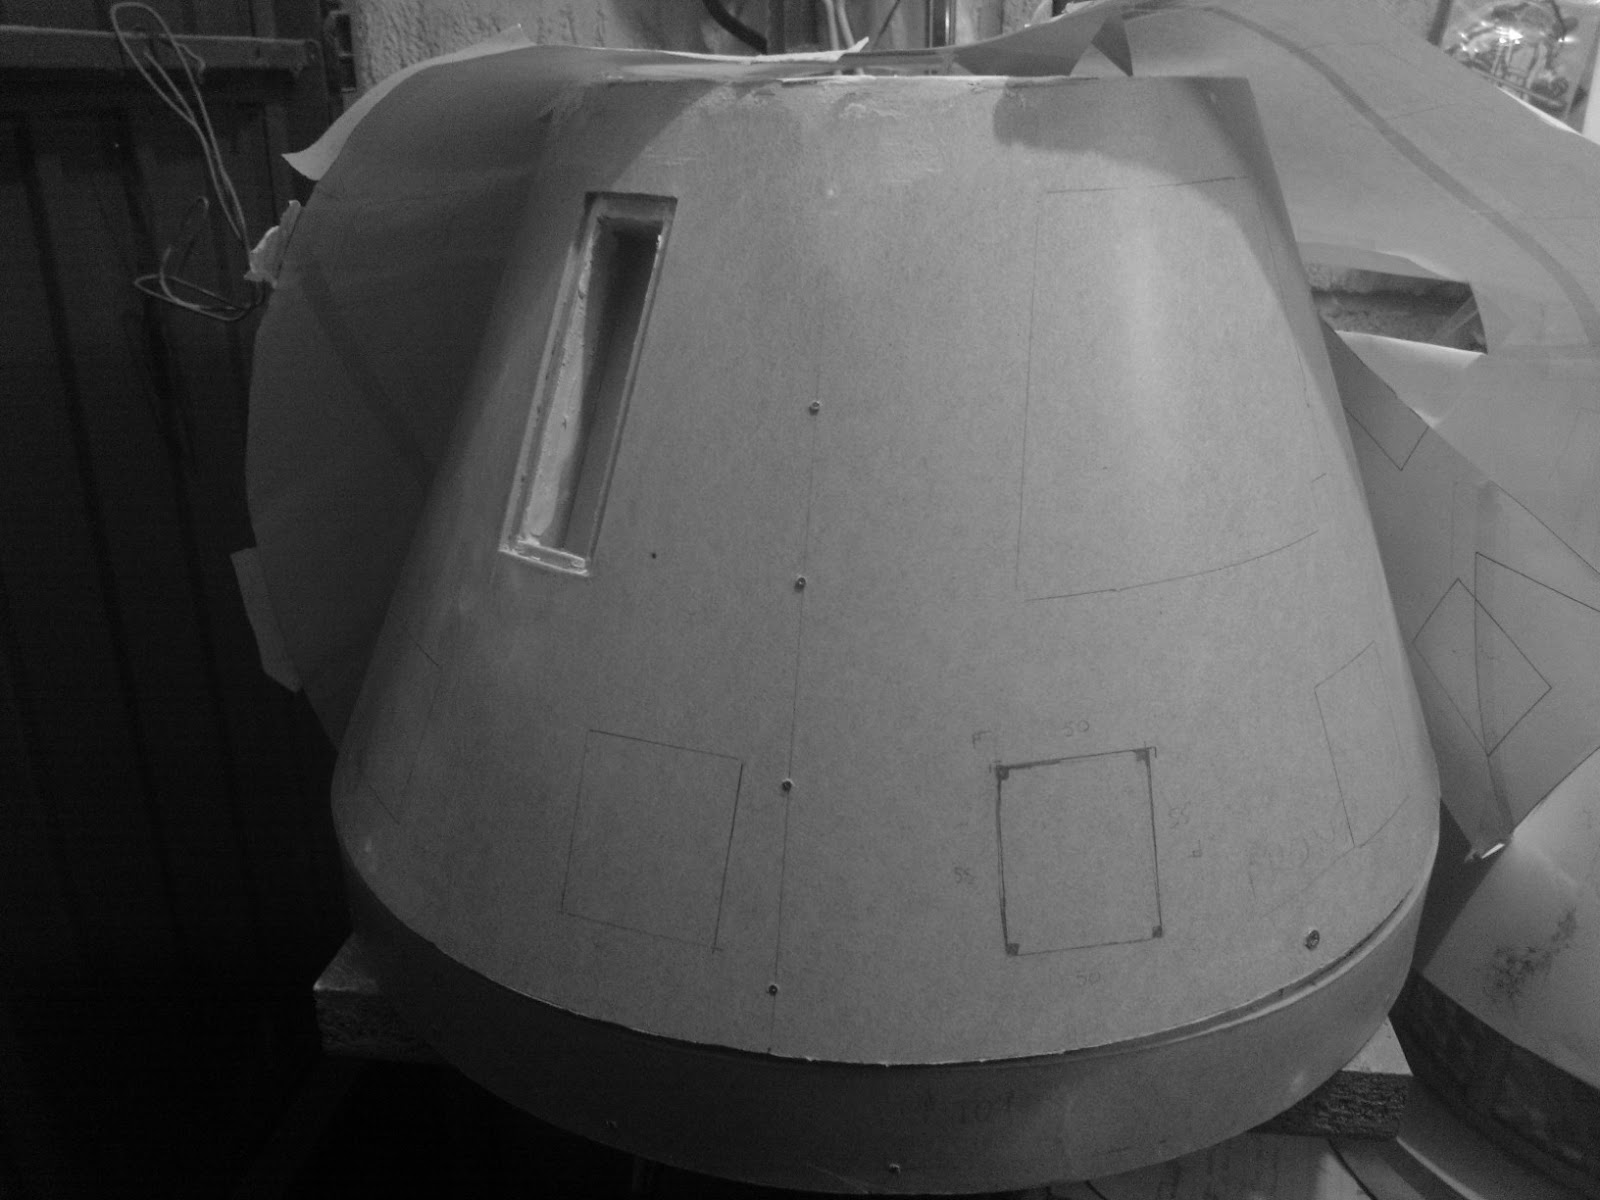
Cut out one more 'square', and then glued in one of the two rear panels I made earlier. Then whilst that was drying, I did some filling with filler in spots, removed some more retaining screws and pins and filled these too. Did some sanding and shaping of one lower edge that had the gap. This requires building up the edge to get the shape.
lower skin edge work
Also worked on the 'square' inside face that won't need a panel* made for it. (above pic)

Applied some more filler to blend in the inside faces of the recessed boxes.


* NOTE:
After cutting out the squares......they didn't ACTUALLY need cutting out, as seen in a ref pic I found. Then when re-reading Sigge's instructions, yep, I had mis-read his instructions. I could of just grooved them out. Lol, never mind, I still have some of the cut out pieces I can reuse and the grooves around these panels gives them more depth and a 'real' thickness to the dome.

The sample piece of frosted plastic arrived Saturday morning so measured it up and cut it to size. At first I was thinking of flush fitting it to the dome as it's thickness is to much to curve to the dome, but I want it to be curved, so onto the next frosted plastic.....

Did some more rear panel work, cutting out and grooving the rear. This is very time consuming process.

Test fitting of square on dome.

And then gluing them in position.

Then I had the issue of the second square cut out that was partially covered by a vertical support.
I cut out the panel as best I could, then scrapped away the remaining wood that was bonded to the vertical.


Next I cut a piece of backing that would fit and glued it into place.
This piece will need extra filler around where the groove will be.

May 13, 2016

'R0' dome build - 2.6 'Skin & squares'

Didn't have much free time last night, but wanted to try and glue one of the panels in place. With limited tools I couldn't clamp it in place to easily, so had to use a scrap piece of wood long enough to reach inside, the length of the dome and use my clamp to apply pressure to keep the panel in place whilst the PVA glue set.

It worked! These will have fibre glass resin applied around the edges etc for added strength from 'prodding' fingers lol.

This morning I've cut out two more rear panels & managed to get one grooved. Will get the other grooved lunchtime and can then glue both into place tonight.

........more updates on Monday.....

May 12, 2016

'R0' dome build - 2.5 'Skin & squares'

Had to re-drill the three location holes in the base plate as my original ones id marked and drilled were slightly off. And to not cause confusion, I plugged the old holes with wood dowel.

Test fit of dome on R5's body.

I cut out two more 'squares' only two left to go now. Marked up a test piece for the recessed part of the 'squares'. Using the saw blade, I cut grooves in the rear face, this helps the wood to flex and hopefully not split. 

Marked out suitable holes on the dome for securing the Radar Eye. I then found some plastic discs just the right size for the screws I found to use.
Here's the Eye test fitted to the dome.

May 11, 2016

'R0' dome build - 2.4 'Skin & squares'

I made a cardboard template for the lower 'squares' and a rectangular one for the two upper rear/side split panels.
This was just to make life easier. I used the paper template to be able to mark through it onto the wood skin and then used the cardboard template to draw around them once happy they were in there positions.
Also marked the Radar Eye's position
The upper rear sectioned panel, to be grooved

I then started to score and cut them out.
Here I'm grooving out the rear split panel
To do the grooving, I used my Stanley Knife to score to a shallow depth on both sides of the 'groove'. I then used the tool in the pic to peel off the layers of the hardboard, to the depth I wanted, by repeating the scoring.


I mixed up some more P40 fiberglass resin and started applying it all around the edges and joins inside the dome. This helps with strength, meaning some of the more obvious screws can then be removed.

May 10, 2016

'R0' dome build - 2.3 'Skin & recessed box no.2'

5th May
Whilst waiting for the recessed box glue to dry, I got on with mixing up some fibre glass body filler and make a start on reinforcing the insides of the dome, along the joins, around the boxes and the top & bottom edge gaps.

Top edge work
R0-L0
Recessed box no1
The bottom edge, I applied masking tape around the outside as I didn't want to push the fibre glass out.

The inside view.....

And once masking tape was removed.....

I finished up cutting, drilling holes and shaping the second box and using wood PVA glue, glued it into place.
R0-L0
Inner skin for recessed box no2.

'R0' dome build - 2.2 'Skin - recessed box no.2'

3rd May 2016
Once the second half of skin no2 had been fixed onto the dome, I marked out where the second recessed box would go.

Hmmmmmm, a bit close to the join than I'd of liked.....


Due to the printed plans not being 100% correct [multipule sheets stitched together] this is what caused my initial skin shape not matching up with my frame CAD drawn plans. The fact the wood wouldn't wrap 360 degs around the frame, without ripping, and then the new skin supports positions, this second recess has ended up being a be a bit close to the join and also the new skin support............Oh well, its marked up and there's not much I can do about it now lol, so lets get cutting


4th May 2016
I decided a little creative/artistic licence was required. So a slight correction with the marked hole and the recessed box is now not so close to the join.
I moved the marking of the hole round by another 5mm.
I then cut out the hole with the dremel. I used a paper template to mark out the recessed piece, I then cut it out.
 The left hand side recessed panel edge strip, still had to have some of it removed to fit around the second vertical skin brace.

Once the shape and fit were right, I glued it in place and clamped it. Next I measured and cut out other sides.

Here is the second recessed box going together.
Sill need to make up the ends with holes in.