Using a vape tank is not my invention, so can't take credit, it just seemed the next step in how to best get more smoke. Also this is STILL on a budget!
Since posting up and sharing of my original set up & 3D collar (on my Thingiverse page) other's have asked about this set up. And I've seen similar collars appear on other builds. Am happy to share what info I have & have also been asked if it would be ok of them to offer as a kit form to members over in the USA.
(credit given, thanks).
So here's was my latest upgrade:
This is the vape tank I bought.....it was actually the wrong one I was actually looking for, but it was late at night and think I clicked and bought by mistake. The one I wanted had the vent hole in the outside of the body....nevermind lol.
In the above picture:
'A' is where the inlet hole is, just above the thread.
'B' there are four grooves that cross, allowing air flow.
So in order for the collar to to fit and allow air flow, I had to modify my original idea into this version. This I've not posted up yet on my Thingiverse page.The new collar fits directly over the 'flat top 510 spring loaded connector. Which has slots in it. The collar's cut outs, lines up with the 510's slots to allow the air flow through to the vape inlet hole.
I had been working on the electronics etc on this set up, so it's still not put back together lol.
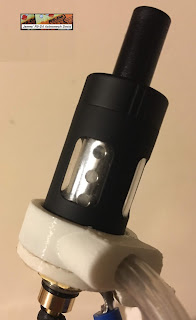
But here's a picture of the collar fitted onto the vape tank.
And how it would all be assembled.
This assembly diagram is missing the bracket, which can be seen in the previous picture. This would fit between the 510 flat top and the terminal connectors underneath.


No comments:
Post a Comment