January 29, 2014

Body Skin 4.8 - The last area of R5 get's it's groove on.....

....................I've got to come up with some better titles!

I decided to not put off any longer the work that needed doing on R5's last remaining area of his body.

Brief HIstory of work:
When I first started marking out and grooving his skin, see pics below, it was all new to me. So I gradually worked my way through the build, learning as I went. I only got so far round his body, then fitting his skirt to the frame and then primer applied and before I knew it I was spraying him up white.....just to see how it would look :D.

So last night I disassembled R5 of his Dome and Legs and started work on the last panel work. With the use of a Stanley knife and my own special tool, I started to carfully score and then groove out the last 'recessed' panel. The grooving is fun, the recessing is NOT fun!

R5D4 Rear Pocket VentRear Pocket Vent

The vertical slot's I'll do later on.

Next, I started to score out the grooves.....
R5D4 Body skin

Then comes the fun bit.......grooving.
As the hardboard is made of fibers, when you score to a shallow depth, you break them and create an edge. Then when you use the 'Groove' tool, the hardboard peals off in strips. I then used a fine grade of sandpaper to smooth out the groove. Once all this work has been done, I'll apply watered down PVA glue to seal, and then another light sanding.
R2D2 body skin panelR2D2 body skin panel

R5D4 body

Then I started on the LEAST fav part of the panel work.....which is probably why I stopped at this point, my fingers were hurting! lol. I scored the inside recessed area and then used a second Stanley blade [not in handle*] to shave out the recessed area.
*caution when using blades not the way they were intended to be used!

R2D2 body skin

R5D4 body skin
And this is as far as I got before I......my fingers.....called it a night lol.

January 28, 2014

20K mark!

WOW, over a thousand hits in less than a month!
20,000 hits and climbing! LOL
Thanks for viewing :)

January 27, 2014

Centre Foot - Wheel Upgrade 1.1

Saturday afternoon I dis-assemble the wheel and angles off the inner wood pad. This is what the wheel and the foot bolt onto inside the shell.

Then marked second new wheel bracket up and cut it out.


Once edges were smooth, I got to work on making sure there was enough clearance from the top of the wheel to the inside of the wheel mount. Once done I drilled both plates together for the main bolt hole. I then G-clamped the first bracket onto the wheel bracket and drilled two 4mm holes through both parts. 
r2d2 centre foot wheel r5d4r2d2 centre foot wheel r5d4
 Unclamped, and drilled a 5mm holes in the wheel bracket.

R2D2 centre foot wheel

I then tapped the new bracket M5 threads. Screwed back together, fitted new wheel and opposite side bracket, G-clamped it to wheel bracket to locate, removed wheel and repeated drill holes and tapping. The screws in the pictures were temperary ones, shorter ones will be fitted.

This is the end result....
R5D4 centre foot wheel

Whether it works is another thing! lol :D
Next is the internal base and the angles to clamp the centre leg to....

January 24, 2014

Centre Foot - Wheel Upgrade 1.0

When I built R5's centre foot, with 'rubber' caster wheel. It was a sort of stop gap. The idea being that it was basically just so I could push him from A to B.

But on his fist outing, even this was hard work. I'd seen other designs and chatted with other builders and saw that the most common wheel option is a 'scooter' wheel. These offer low profile contact..........they are more pointy, compared to my 'rubber' caster wheel which has quite a flat large contact area [See last pic].

These pics are what I'm hopeing to fit in place of the original rubber caster wheel.....
R2D2 Centre Foot wheelR2D2 Centre Foot wheel

This picture shows the original centre foot wheel.
R5D4 Center Foot

Looking at how to fit new wheel (borrowed from another old scooter). The internal platform will also need work doing to raise it up inside the shell, so the wheel's ground clearance is not so large.
Ive seen this alteration done before, so not my claim to fame :).

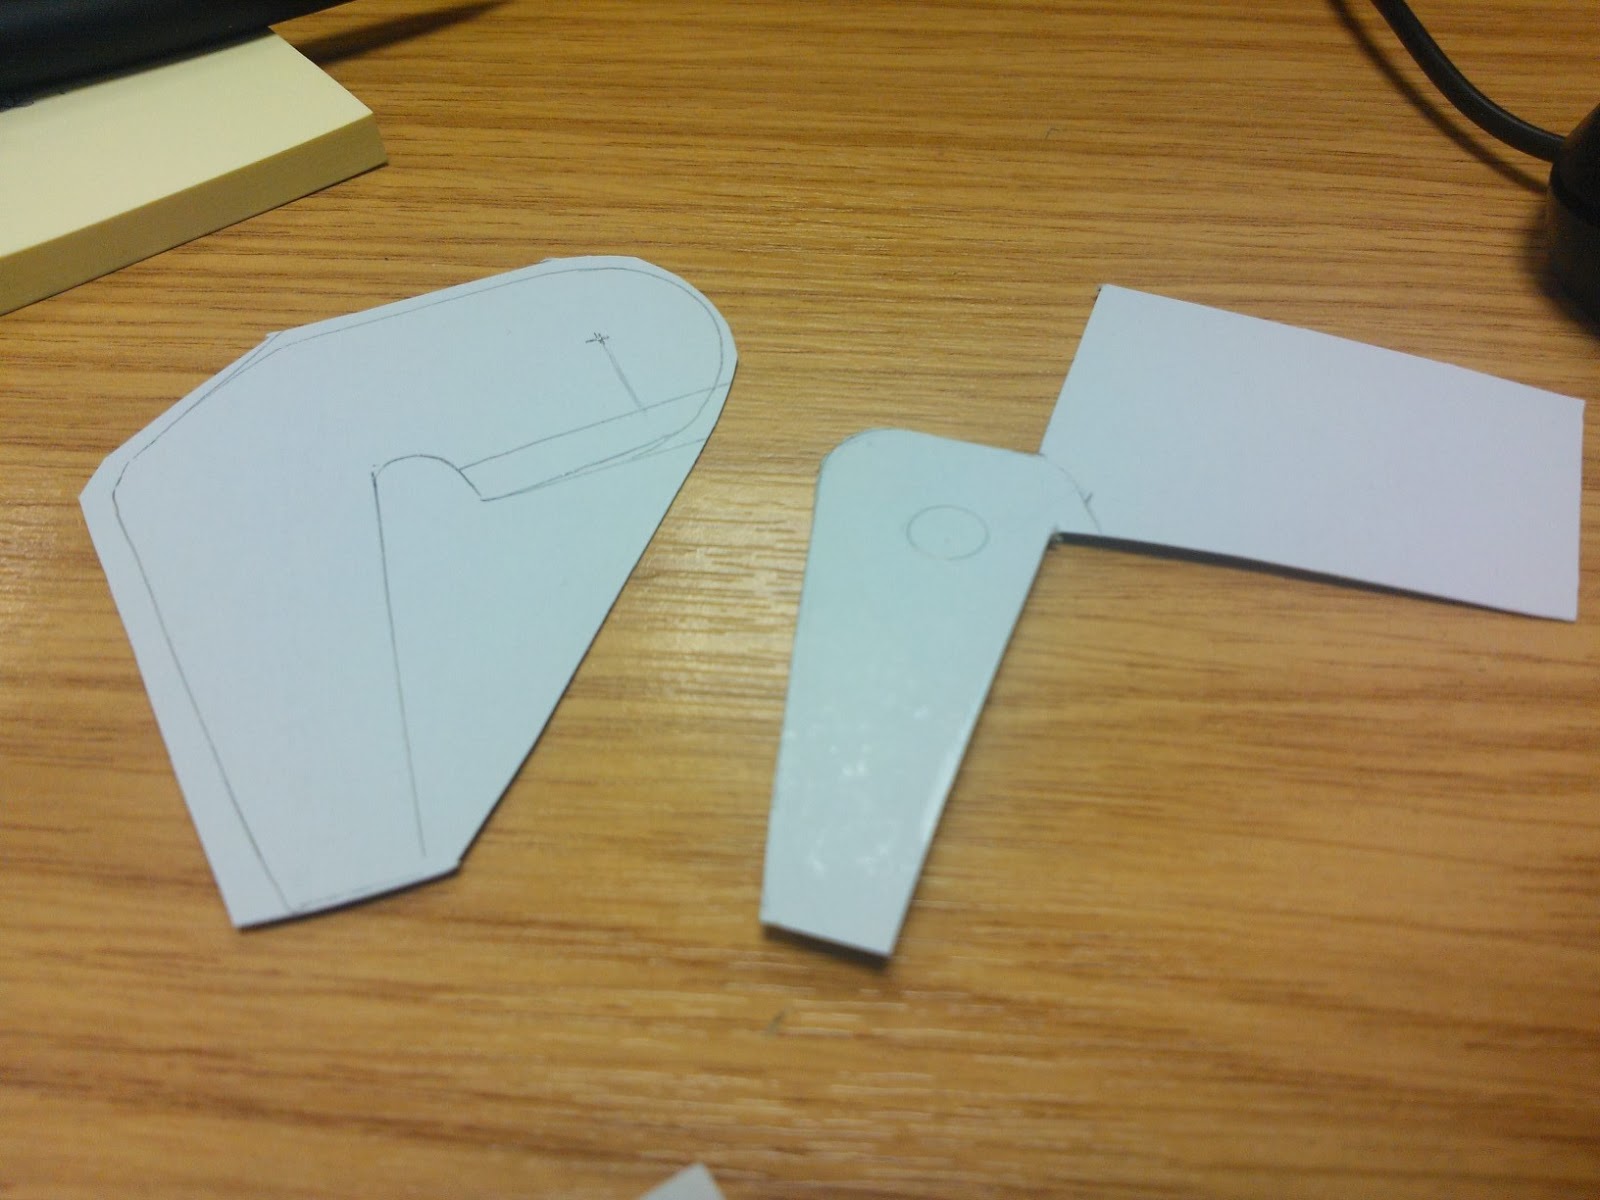
This morning I drew up cardboard test templates for centralising the scooter wheel, and raising it up to clear the wheel bracket insides. First attempt is on the right of picture.
R2D2 Centre Foot wheel
More to follow.....

January 20, 2014

Assembly - Battery Box No2 with Braided Hose & Outer Foot Shell

Thought I'd share a mock up of the battery box, hose fitted, battery straps & Outer foot shell no2.

Still working on the battery straps, as can be seen, the blue panels are not fixed on yet. And of course it all needs spraying up.

January 17, 2014

Battery Box No2 - 1.2 & Braided Hose

So grey primer is on. This helps hi-lights all the work still needed to be done :D
More filler where needed along with sanding.
R5D4 Battery Box.

I also got on with finishing off the set of battery straps I started making, last year, when I made the first set for box no.1. The idea being to keep the 'flow' going.......yeah, that worked didn't it!?! lol.
R5D4 R2D2 battery strapsBattery Straps for R5D4

These are simply made up of small pieces of hardboard over lengths of wood strip. Filed pieces and then wood filler inbetween the gaps. The top pieces are seperate, that are pinned & glued to the main strap.

Braided Hose
Cut ends off hose, taped up and fitted wall plugs & screws (test fitting) as still need to be sprayed.
R2D2 Braided Battery Box Hose

January 15, 2014

Battery Box No2 - 1.1

20.06.13

Cut the plastic guttering into strips, this helped utilise the curve. These were drilled & pinned in place with panel pins.
R5D4 R2D2 Battery BoxR5D4 R2D2 Battery Box


Once all pieces were fitted, P40 resin was used inside to stiffen everything up. Filler applied to smooth outside curves.

This is my attempt with available materials I had. For a proper way to build these, view Adam Strawson's amazing R2-D2 Build here.

~~~
**UPDATE**
05.11.13

Drilled the two holes for Knurled Hose Fittings to fit into.

~~~
**UPDATE**
10.01.14

So, with the foot shell No.2 left to dry. I turn my attention back to battery box No.2.

I was planning on doing the same process as before, but this is time consuming lol. So this time I marked the plastic guttering, cut it to length but kept as much of the curved width as possible. I then clearance drilled through into the wood ends. The plastic was then pinned in place with panel pins. The ends were then trimmed with a sander to length.

Next thing that needs making are the clips that the box hangs on/locates on [picture below]. These are just two sets of thin hardboard. With screws into the inside face of the Foot Shell. The Box hangs over the inside of the box.

There's a lower locating pin for the bottom of the box. I found this was needed as once the hose's are fitted, they 'kick-out' the battery box from the foot shell.
R5D4 Outer Foot Shell

So here's the battery box, so far. It's not a pretty sight, but it will look a lot better once finished.....honest :D

R5D4 wood built Battery BoxR5D4 wood built Battery Box

Wood filler in all the gaps, grooves etc. once dried, sanding & primer time.

January 14, 2014

Another Year of R5-D4 building

The month of January is the anniversary of starting this project to build my R5-D4 Unit,
back in 2011.

But it all started about 10 months before in 2010, with these two Droids........

R2D2 R5D4 Astromech DroidR6-E1, Emy, podpad studio's


I had heard about a local Sci-Fi event in Corsham
that I thought me and my children might like to go to.

Check out the
and find out about the money they raise and up and comming events.
This years is 26th April 2014

My Son was really into Boba Fett at the time so it was a bonus that Jeremy Bulloch [Boba Fett] along with others was going to be there!

For us, the main characters were the Star Wars ones, inparticular, R2 & his fully automated R6 buddy. Seen in the pictures above. All the kids, not just the little ones, were suitably impressed!
On closer inspection, I could see that they were both made from WOOD!

Those famous words every Dad knows so well, when asked.......
'Dad, can you make me one?' Came out of my Son's mouth,
on my stunned uttering of the words, 'I could build one!'

I soon searched the web and found the maker of these Astromach's @ Podpad studios.
And started to follow the build of his several other creations.
This gave me inspiration that I too could create and build my Astromech Droid.

And so after months of research and the realisation that a wood build was my only and cheapest build option, I began. It's taken a while to build, as only in my free time, late evening's, weekends & lunchtimes in work. I've learnt new skills, shortcuts, and so much more from following Blogs like this and also on the two main forums I'm a member of.....

The UK R2 Builders Club [this is the main UK info page]
&
Astromech.net [which you will have to register with]

So I'm now, hopefully, on the last stretch of the build and hopefully,
will get him motorised and Fully Operational ;)

So stayed tuned.........

January 09, 2014

R5 Build progress

Dome Rotation Unit
Using 8mm drill, I opened up the location holes in R5's dome, lower corresponding location ring. This has made a slight improvement to cut 'wobble' of the dome. The dome will be a lot more secure and the 'wing-nuts' easier to fit.

I had applied some lithium grease to the bearing which has made it less 'slippy' & less noisy.


Foot work, No.2
Applied wood filler to join between foot shell and th now lower bonded on 'skirt' base.
These pics show the lower section bonded onto the main shell.
R5D4 FeetR5D4 Foot


All edges were then lightly sanded, before primer was applied.
R5D4 Astromech Droid

'Bad Motivator' - clothing for Christmas 2013

Im always on the lookout for R5 related stuff, most of the merchandise though is for his more famous 'brother' R2! Lol.


Then last year I saw a picture that someone had created using the idea from the film makers 'Bad Robot'. The pic you see below is the creation.


I had to have one lol. So I tagged it onto the list my kids sent to Santa........ And it came :-)
I asked for a hoody as this was more practical than a T-shirt, plus I'd probably be wearing my UK Builders Club polo shirt at events.


Link to the website: www.shirtoid.com

There are other R5 designs too choose.

January 06, 2014

Motivator Dome Panel 1.1

Over the weekend, i glued up the pieces i had for the panel. It's made so that it's a snug, drop-in fit. PVA watered down glue was applied all over and left to dry. A light sanding then followed.


Here is the almost pre-finished motivator dome panel build.

January 02, 2014

Motivator Dome Panel 1.0

Decided to make a start on a panel to cover the Motivator pie hole, in case I needed a pie panel to cover it, think that explains it lol.

I used cardboard templates first, then cut out side supports. I've also made a piece that will be the fake upper 'groove'.

R5D4 Motivator Pie Hole Dome Panel
This is where the new panel is going to fit.
R5D4 Bad Motivator PanelR5D4 Bad Motivator Panel

These two images show the inside upright supports that the panel will be attached to.

Foot base work continued.....

Foot base work continued.....

This has been ongoing now for over a few month's, but am now back on the case.....

Marked the recessed slots that can be seen around the lower edge. I then used my dremel to router them out.

Then wood filler was applied all over to smooth everything and fill in the wood grain.
I drilled holes in the four corners and used the jigsaw to cut out the main opening. Next I had to cut and fitt the lower lip edge, that is on the bottom of the foot.

Monday 30th December
Well with the family off to watch Cinderella at the Hippodrome, i had a bit of time to work on R5. I used the jigsaw to cut out the lower centre rectangle. After sanding the edges, i started to rummage through my scrap wood pile for material for the 'skirt' part of the foot. Cut the strips to length, miter the ends, drilled clearance holes in the 'skirts', before using panel pins to secure in place.

Next will be wood filler to blend in the 'skirt' detail parts.

R5D4 FootR5D4 Foot

R5D4 footR5D4 Foot