October 29, 2013

Sci-Fi Fest: 23rd November 2013 @ FLEET AIR ARM museum

Fleet Air Arm Museum
Sci-Fi Fest

~ R5-D4 ~ Along with LOTS of others will be attending this event.

Good news for Sci-fi enthusiasts. Following the popularity of the annual Dalek Invasion, the Museum have announced that a new Sci-fi event will take place on Saturday 23 November. The Sci-fi Fest will appeal to all followers of the Dark Side. An intergalactic call has gone out, and all manner of alien life forms and time lords have agreed to attend including: Storm Troopers, Darth Vader, R2D2, Cybermen, Aliens, Klingons, Ghost Busters, Predators and more.

In addition, there will be family activities involving making your own take home space ship, celebrities, Sci-fi traders, face painting and souvenir photography to add to the occasion.

Organised by the Charity Sci-fi team whose extraordinary exploits have helped raise many thousands of pounds for worthwhile causes, this new family friendly event is on course to be the biggest event of its kind in the South West.

Advance Tickets are available on the Museums’ website, in the Museum Shop during normal Museum opening hours and will be available on the door. Numbers will be restricted.


October 25, 2013

Paul Johnson - Artist designer of this R5-D4 Astromech Unit

A few months ago a new member to the UK R2D2 Builders Club,
started on a different kind of building, on a computer, an R2-D2 Unit.

His next Astromech was R5.....WOW!!! Here is his work so far. I'll let the images do the rest of the talking!
R2-D2 & R5-D4 Wiz

R5-D4 Wiz

For more info and the latest updates on these creations and some more exciting updates, follow Paul on his twitter account Pauljwiz

October 24, 2013

Foot Build work continued..... Longer Caster Pads

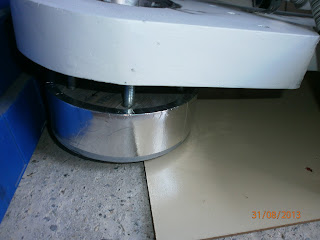
As part of my 'upgrade' work, I decided that the front casters were not far enough forward. Measured and cut out two new pads for the front wheels to be fixed to. This moves them forward a bit more, hopefully making them less prone to tipping.
R5-D4 Outer Foot


The new pad is now fitted and the old one is on the right.
When I built these, I didn't know how much the off-centre weight would effect the feet's movement when actually moving R5 around.


***** PLEASE NOTE THESE CASTERS ARE FOR SUPPORT/DISPLAY USE ONLY*****
***** THEY ARE NOT SUITABLE FOR USE WITH MOTORISED ASTROMECH'S *****

October 21, 2013

R5-D4's Head 3.7 - Conical shape forming???

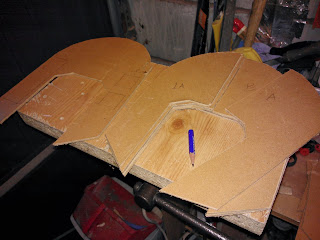
These photo's show MY challange I have in creating the conical shape R5 has. I'm looking to use as little material as possible, to keep weight down. But also make the curving of it as easy and as simple as possible.


R5D4 Bad Motivator
 The round disc on top is just a scrap piece I had from cutting out.......???
R5D4 Bad Motivator

R5D4 Bad Motivator

Fitting a Bad Motivator:
Drilled two holes dia 10mm. Fitted t-nuts in place.


R5D4 Bad Motivator
Used jigsaw to cut out pie hole.

R5D4 Bad Motivator
But because the outer curve runs over the top of the rear recessed, the jigsaw blade would hit it. So out came the dremel with the cutter fitted.


R5D4 Bad Motivator

R5D4 Bad Motivator
Next I cut out some angled pieces and glued them in place, for the inside faces of the pie hole. I used my angle gauge to make sure they would be below the finished level.

Cut a small strip of wood and trimmed to glued to outside edge. Then mixed up some resin and bonded it and the two sides in place.

(I placed some masking tape over the T-nut holes to stop them getting blocked up with resin.)
R5D4 Bad Motivator

Also dragged out some old electronic boards and got thinking and cutting to fit inside the pie hole.


Once I'd drilled and fitted the T-nuts.......I had to test fit the Motivator.
R5D4 Bad Motivator
BAD MOTIVATOR
R5D4 Bad Motivator

R5D4 Bad Motivator

R5D4 Bad Motivator
Inside Dome, fixing points for Motivator support plate

October 18, 2013

R5-D4's Head 3.6 - Bad Motivator work......

R5D4 Bad Motivator

Found M12 studding, nuts and suitable washers.

The studding fits up and through the middle of the Motivator, with the mesh removed, a washer and nut are fitted in place.

Cut off lower section of the Motivator, as how it is to be mounted, it would of protruded to much out of the Dome. Once I'd measured how long I needed the studding to be, it to was cut to length.

Drilled out a plate of aluminium [work scrap piece] and this will be screwed to the inside of the dome. The M12 studding will then bolt to this, making it [hopefully] extremly secure, against little hands trying to grab it!

Eventually I hope to make the Motivator able to 'POP-UP' like in the film, but for now, it will be fixed in place, semi protruding, out of R5's head.

October 15, 2013

Horseshoe No2 [for Leg No1]

Lunchtime I got to cutting out the slot for the Hydraulic Unit.

Drilled single hole, then threaded through the Coping Saw and got .....erm....sawing. lol
R5-D4

R5-D4

Next, glued the two sections together and apply more wood filler.

R5-D4's Head 3.5 - Bad Motivator work......

Five mins on the weekend, I managed to marked out R5's 'pie hole' positions, then drilled a hole large enough for motivator to fit in.
R5-D4's Bad Motivator

R5-D4's Bad Motivator

The hole is slightly larger than the pie hole marked, but this is just clearance and the markings are just for reference :).

Build update - Head, shoulders knees and toes..........scrub the last two and put a Foot No2 in there..... :)

It's been ages since I've had the time to be able to work on R5.

Outer Foot shell No.2 - The Saga continues.......
So decided to get to work on a more portable work piece, so to speak.
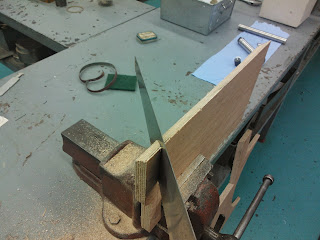
I had already marked out the second foot base edge. So decided, as the material was 'protable', to take it into work to cut it out on my lunchtimes.
R5-D4
wood being cut lol
Next was to 'chain drill' the middle piece or use the jigsaw. Time available.

Shoulder Horseshoe No2.
I did make a start on this earlier in the year, but when I started on the second leg, it got kinda left..... Now that R5 is due to make another appearance in a few months, I thought I'd better crack on with it! 
R5-D4 Leg, shoulder, horseshoe
Shoulder horseshoe No2 - WIP
R5-D4 Leg, shoulder, horseshoe
In order to save material, only three of the horseshoe's are whole pieces.
In order to save material, as I was running out, only three of the horseshoes are whole pieces. The front a middle and the rear. You can see these in the pic above. The Spacer horseshoe will also be a whole piece. The internal pieces of the build I have cut out in half sections. The whole unit will be glued and have fixing dowels, as the other horseshoe does.
R5-D4 Leg, shoulder, horseshoe


Next drilling for fixing dowels, and then taking apart to cut out the circle centre.
R5-D4 Leg, shoulder, horseshoe

Once central holes were cut out, edges trimmed and sanded. they were sealed with watered down PVA glue. And then the glueing together of the pieces began.
R5-D4 Leg, shoulder, horseshoe
Glueing begins
Whilst this was drying, I started on the recess parts. They were already marked, just needed drilling and fileing square. Pic below.
R5-D4 Leg, shoulder, horseshoe
Glued up the pieces and started filling with wood filler to swuare off edges.

October 03, 2013

R5 - upgrade work part 1

Before I got to work on cutting R5's body to fit his centre vents, I decided it would be easier to work on him if I stripped him down, so legs & head off for easier working.

Whilst shoulder spacers were off, i decided to apply the same silver tape that i used on the dome ring. This now matches.


I might have to respray the power couplers in proper silver.

Marked lower edge of leg to be trimmed so its not touching the top of the foot shell.

(Sorry, thought I had posted this update, it's a month old now lol.........still, more updates to come)