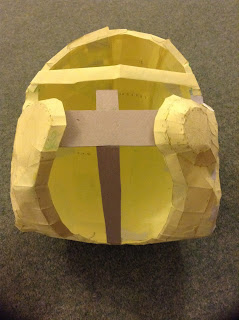
In part 1.0, I was getting used to the gluing together of the pieces of cut paper. One thing I discovered was that this design was actually for use with foam matting. Not a big deal I thought, until parts of the print were missing, as it assumes the thickness of the foam will replace the need for 'wall' sections. Never mind, I just got on with improvising lol.
Here is some of the missing pieces, the red highlighted sections.
 |
| TFA - Pepakura design |
 |
| TFA - Pepakura design |
Once I was happy with the basic shape, I started to reinforce the inside surfaces with more strips of paper to help with retaining the shape. I also added some pieces of cardboard for support and to help fix the front 'cheek' sections in place.
 |
| Side/front view |
 |
| view from below, showing the support cardboard I added |
 |
| front/side view |
I then mixed up a small amount of resin and started to apply it to the paper.
I had prev read up on this and using small amounts helps in a few ways.
- The resin can go off quickly, so glooping can happen as your trying to paste it on.
- As the resin soaks into the paper, the paper can sag and loose it's shape [hence why I went for applying more layers of paper.
Here is the start of applying the resin.
 |
| Resin applied to helmet |
 |
| As resin goes off quite quickly, I made small batches to paint it on. |
 |
| Making my way all over the helmet |
I left this to dry, going back to checking it, lol.


No comments:
Post a Comment