Showing posts with label Pepakura. Show all posts

November 16, 2016

Jessika 'Testor' Pava - helmet - 1.7

11.11.16
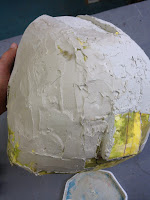
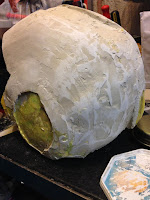
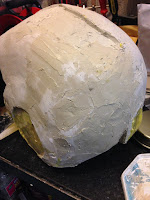
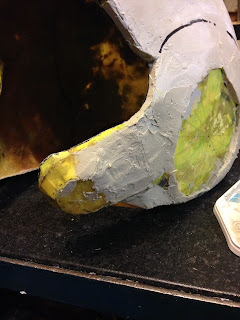
When able to, I've mostly been applying filler to the helmet, sanding and shaping and repeating.
X-wing pilot helmet
cheek section taking shape
I ran out of the second tin of resin, so need to get some more. Want to add more fibre-glass matt to really reinforce the helmets rigidity. I've had positive comments from work colleges which is always a good thing lol.

15.11.16
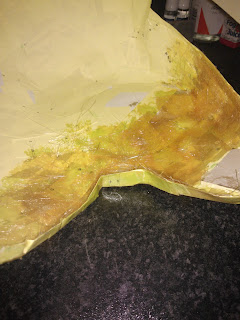
Picked up a new tin of resin Saturday, but wasn't able to do any fibre-glassing till Monday in work. The paper around the rear edge has seen a lot of action with handling of the helmet. Am also aware that the paper had started to break away, it hadn't bonded with the other paper. So as the fibreglass had already given the edge shape, so I ripped off the unstuck paper.
x-wing helmet
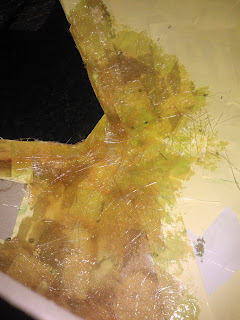
ripped off the unstuck paper

x-wing helmet
I'd had to do this in two other areas where curving the helmet meant taking the 'corners' off the Pepakura and so, took off the paper, which again, hadn't absorbed the resin fully. I didn't want the filler to come loose where it was thin. For this reason the inner areas of the helmet marked in black marker needed reinforcing.
x-wing helmet

x-wing helmet
Once this is hard I can carry on with applying filler to the outside.

16.11.16
Applied a second layer of fibre-glass & resin to this area to re-reinforce it structurally.
x-wing helmet

Whilst this was setting, I mixed up some more filler and applied it to the other edge of the rear crest.
x-wing helmet

More filler, sanding & filling to go.....

November 07, 2016

Jess Testor Pava - helmet - 1.6

So last few days, I've mostly been applying fibre-glass to the inside and edges of the helmet & then body filler all over, sanding and smoothing it all out, and repeat the next day lol.
X-Wing helmetX-Wing helmet
More filler, upper two pics
 More sanding & then more filler, bottom two pics.
X-Wing helmetX-Wing helmet

Am still working on the cheek areas.
X-Wing helmet

Next, as you may of noticed in the cheek pic above, was to trim down the edges.
x-wing helmet
I marked the edges that needed to be trimmed down. And then using my circular cutting blade on my dremel, trimmed off the excess.
x-wing helmet

x-wing helmet
I needed to open up the bottom so my daughter can get her head in.

October 26, 2016

Jess Testor Pava - helmet - 1.4

Finished off the original fibreglass matt that came in the box kit. More on order......
X-wing helmet
side up to the roof of helmet with fibre-glassed
Decided to not waist free time, so got on with mixing up body filler and applying it to the the areas that have already been internally fibre-glassed.
x-wing helmet
Car body filled being mixed up
x-wing helmet
First layer on
I then mixed up a second batch and applied it the the second area that has been fibre-glassed.
x-wing helmet
second batch of body filler
x-wing helmet

The pepakura design didn't have enough curves created for the channel section on the helmet roof, this will need a lot of work to re-create the smooth curved section.

October 25, 2016

Jess Testor Pava - helmet - 1.3

14.09.2016
Finished off the tin & still waiting on the next one lol.

I worked on the lower area and up and round the side 'ear' area.
This was as far as I got.

Whilst waiting, I started to look at the 'visor protector' (for want of a better word lol). This piece I was not looking forward too. The Pepakura file was for mat, so I'm using ref pics to help create the actual look & curvature of it. Which is not so easy as with mat, you just hold the two ends and bend to the shape you need.


---

Well this was on hold for a few weeks, kids back to school, old/new routines started back up.....and I had no spare time. Plus I had/have two events to attend with R5, Chippenham Sci-Fi Day (Sept 17th) & Feel The Force Day in Peterborough on October 1st.

25.10.2016
UPDATE..... Finally got motivated (is the best way to describe it) to do some more fibreglass matting on the helmet. Will post updates soon.

September 05, 2016

Jess Testor Pava - helmet - 1.2

I finished covering the outside of the helmet with resin to harden up the paper.
This make's handling of it a lot easier, without deforming the (paper) shape so easily.

Next was to start applying fibreglass to the inside of the helmet.

I started on the 'cheek' area first, as this is structurally not very strong, hence the cardboard supports, and with the weight of the fibreglass going in I didn't want additional strain being put onto them.


TFA X-wing Helmet
Fibreglass being applied to 'cheek pad' area
TFA X-wing Helmet

TFA X-wing Helmet
Work so far
Although this is only the first layer of fibreglass matt, it has already strengthened the helmet.
As there is a lot of external curvature work to be done, another layer of fibreglass matt will need to be applied in case smoothing the outer area breaks through.

I bought this kit for when I made R5's cone shape on his dome, and the resin is coming to the bottom of the tin, so will need to get some more soon.

Jess Testor Pava - helmet - 1.1

In part 1.0, I was getting used to the gluing together of the pieces of cut paper. One thing I discovered was that this design was actually for use with foam matting. Not a big deal I thought, until parts of the print were missing, as it assumes the thickness of the foam will replace the need for 'wall' sections. Never mind, I just got on with improvising lol.

Here is some of the missing pieces, the red highlighted sections.

TFA - Pepakura design
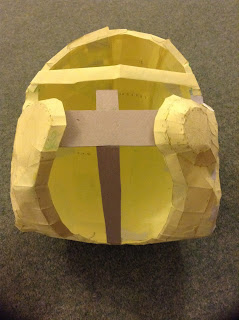
Once I was happy with the basic shape, I started to reinforce the inside surfaces with more strips of paper to help with retaining the shape. I also added some pieces of cardboard for support and to help fix the front 'cheek' sections in place.
TFA - Pepakura design
Side/front view
TFA - Pepakura design
view from below, showing the support cardboard I added
TFA - Pepakura design
front/side view
I then mixed up a small amount of resin and started to apply it to the paper.
I had prev read up on this and using small amounts helps in a few ways.

  • The resin can go off quickly, so glooping can happen as your trying to paste it on.
  • As the resin soaks into the paper, the paper can sag and loose it's shape [hence why I went for applying more layers of paper.
Here is the start of applying the resin.
X-wing helmet TFA
Resin applied to helmet
X-wing helmet TFA
As resin goes off quite quickly, I made small batches to paint it on.
X-wing helmet TFA
Making my way all over the helmet
X-wing helmet TFA
I left this to dry, going back to checking it, lol.

September 02, 2016

Next project - Jess Testor Pava - outfit for my daughter - 1.0

The Force Awakens, Jess Pava

My youngest has always liked Star Wars and was supper excited that the new films have strong female characters to inspire and aspire too. Phasma, Rey, Jyn, and then when I told her about an actress who was a Stormtrooper in TFA & there is also a female rebel pilot (had to pause and rewind the DVD to show her Jess) she wanted to be all of them lol.

She was happy to have a dress up Rey costume for Christmas. But since making my Son's Han Solo costume, she since asked if I could make a Jess Pava Rebel Pilot outfit.

So my quest for info began days after returning from CE3.

The Rebel Forum has a large resource of information. This has & will come in handy, tho just like my Son's, the outfit will be a close representation of the outfit, due to a tight budget. But it will be the best as it possibly can be.

A friend from the UK Builders group, Colin A, is also on the path for his Son lol, tho he wants an Original Trilogy Rebel Pilot outfit. So, Colin had already done some research on jumpsuits, straps etc and kindly passed these on to me.

He also put onto pepakura. I've seen this type of work before, but it was an area I had no real need for with any of my previous projects. But this could be how I could make Jess' helmet. So I followed the sent link, printed off the 'plans' and got to cutting and sticking.

Work up to before my holiday....
pepakura - TFA Rebel helmet
I've done a bit more work on this since returning home, so will update soon.