Showing posts with label Rebel Pilot. Show all posts

May 22, 2019

Jessika 'Testor' Pava - 2019 Update...

Jess Testor Pava

Well.....it's been a while and should really get back onto this project. My daughter did re-try on the jumpsuit last year sometime & yep, you guessed it, she'd grown in height. I obviously wasn't thinking ahead and had cut off the extra length in the legs as thought to use this material for pockets etc. So am going to have to start over on this by buying a new one.

Cosplay Jess Testor Pava
The chest box I made out of cardboard, this was great fun to make. You can check out the start of this project here.

I have since then been asked by her if we could make a few other outfits so I need to source info on these and see if these are viable, easier/simplier/longer lasting lol

February 02, 2018

Jessika 'Testor' Pava - helmet - 2.4

work done: 15.6.2017

Next up I started on re-doing the 'blast shield'. I'd already attempted this once, but wasn't happy with it, so decided to try again a different way. This is all new to me so I soon realised I had to think back words.... by this I mean that I make the shield, then make a cast of the shield, to then make it into a mold, just like the helmet.


Started off by making the shape using cardboard.

A few more layers of cardboard to make more rigid,
before applying fiber glass matt and resin.

Here is the first layer of fiber glass matt applied.
I added another layer on top of this to help strengthan.

Once this was dried I started to mix up and apply car body filler.
I ran out so this was all that was left in the tin.

pic....

Whilst waiting, I started looking at the details that I could add to the helmet to be included in the actual casting of it. Rather than have to stick extra pieces on.
I started on the cheek detail (circled in yellow below)

Other's have done these, so there was plenty of ref pics to work with.
And this was the mocked up version...in cardboard.

And here it is glued into place

I still need to fill in the gaps etc and then seal it before applying primer etc.
But it's looking good, and after all, this is for my daughter so scale is not 100%

Jessika 'Testor' Pava - Flight suit 2.2

Work done last year 13.6.2017.....Thought these following post's had been posted


Usual busy family weekend stuff, but i was able to re-make a start on the blast shield. Using a hot glue gun to get started, i cut out and positioned roughly where the sides would go. Next was over the top strips, cross strips, followed by larger flatter pieces.

The start of the cardboard strip framework.

Next then was to start applying fiber glass and resin to form the base of the shield.

Resin applied to framework.


The plan is to create the shield, then make a silicone mold to then create a slush cast from it.

June 09, 2017

Jessika 'Testor' Pava - helmet - 2.3

With my daughters timely reminders that I've not done any work on her costume lol, I got back on to working on her helmet.

I've been reading but mostly watching since I started this project, You Tube videos of how to cast helmets and this multi-part tutorial has been invaluable source of info for a first timer, budget build attempt at casting a helmet.
Click on the picture to take you to his You Tube Channel
He stopped posting due to work commitments but as his viewing numbers show, he has been useful to others.

~~~~~~~~~~~~~

Here's the start of me applying cardboard around the edges.
the force awakens rebel pilotthe force awakens rebel pilot

I've also ordered some clay, and next will be to buy silicone tubes.
Am looking forward to this with each little step lol.

November 24, 2016

Jessika 'Testor' Pava - helmet - 1.9

Two steps forward, one step back :(
Thought I was getting somewhere, but had a few set backs on the build.


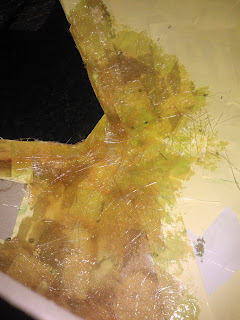
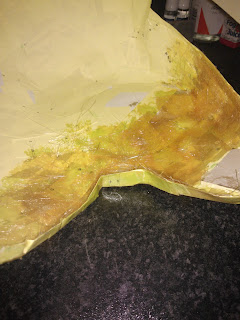
Found another weak point on the helmet. So had to chip off the filler and remove the paper. Then found there wasn't any fibreglass behind! One thing with using yellow paper is that it's not easy to see the difference.
x-wing helmet

So this needs fibre-glassing and then re-filling.

Next was the blast shield
Well, what a mess! The sides didn't take the right shape of the helmet, the main curve section moved when the fibreglass was setting and the recessed channel section didn't fit the helmet. This became more noticeable when test fitting.

Didn't take any photos as was to disappointed

So I cut off the side flats. Trimmed down the upper curved section as was too large and the recess channel more noticeable as a mis-alignment with the helmets. When lining this up the shield is lopsided. Am going to try to recover this...... But not happy with the wasted time, money & materials :(

But was STILL not happy.....hence no pictures.

Decided to carry on with working on the raised ear area crescent, as can just be seen in the above picture. Below, I made up some cardboard walls. I covered the cardboard with masking tape as this stops the filler sticking to it and leaves a smooth finish.

 Hole filled in as well on rear of helmet

Taking shape. Some sanding, shaping and then more filler in the gaps.

I also filled in some other areas.
 This rear area needed to be raised up to by symmetrical


More disappointing updates to come.....

September 05, 2016

Jess Testor Pava - helmet - 1.2

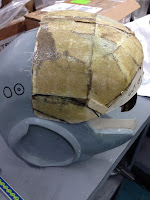
I finished covering the outside of the helmet with resin to harden up the paper.
This make's handling of it a lot easier, without deforming the (paper) shape so easily.

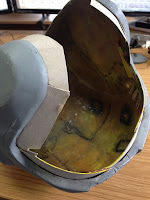
Next was to start applying fibreglass to the inside of the helmet.

I started on the 'cheek' area first, as this is structurally not very strong, hence the cardboard supports, and with the weight of the fibreglass going in I didn't want additional strain being put onto them.


TFA X-wing Helmet
Fibreglass being applied to 'cheek pad' area
TFA X-wing Helmet

TFA X-wing Helmet
Work so far
Although this is only the first layer of fibreglass matt, it has already strengthened the helmet.
As there is a lot of external curvature work to be done, another layer of fibreglass matt will need to be applied in case smoothing the outer area breaks through.

I bought this kit for when I made R5's cone shape on his dome, and the resin is coming to the bottom of the tin, so will need to get some more soon.

Jess Testor Pava - helmet - 1.1

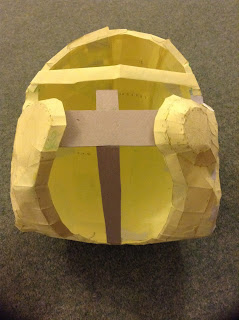
In part 1.0, I was getting used to the gluing together of the pieces of cut paper. One thing I discovered was that this design was actually for use with foam matting. Not a big deal I thought, until parts of the print were missing, as it assumes the thickness of the foam will replace the need for 'wall' sections. Never mind, I just got on with improvising lol.

Here is some of the missing pieces, the red highlighted sections.

TFA - Pepakura design
Once I was happy with the basic shape, I started to reinforce the inside surfaces with more strips of paper to help with retaining the shape. I also added some pieces of cardboard for support and to help fix the front 'cheek' sections in place.
TFA - Pepakura design
Side/front view
TFA - Pepakura design
view from below, showing the support cardboard I added
TFA - Pepakura design
front/side view
I then mixed up a small amount of resin and started to apply it to the paper.
I had prev read up on this and using small amounts helps in a few ways.

  • The resin can go off quickly, so glooping can happen as your trying to paste it on.
  • As the resin soaks into the paper, the paper can sag and loose it's shape [hence why I went for applying more layers of paper.
Here is the start of applying the resin.
X-wing helmet TFA
Resin applied to helmet
X-wing helmet TFA
As resin goes off quite quickly, I made small batches to paint it on.
X-wing helmet TFA
Making my way all over the helmet
X-wing helmet TFA
I left this to dry, going back to checking it, lol.

September 02, 2016

Next project - Jess Testor Pava - outfit for my daughter - 1.0

The Force Awakens, Jess Pava

My youngest has always liked Star Wars and was supper excited that the new films have strong female characters to inspire and aspire too. Phasma, Rey, Jyn, and then when I told her about an actress who was a Stormtrooper in TFA & there is also a female rebel pilot (had to pause and rewind the DVD to show her Jess) she wanted to be all of them lol.

She was happy to have a dress up Rey costume for Christmas. But since making my Son's Han Solo costume, she since asked if I could make a Jess Pava Rebel Pilot outfit.

So my quest for info began days after returning from CE3.

The Rebel Forum has a large resource of information. This has & will come in handy, tho just like my Son's, the outfit will be a close representation of the outfit, due to a tight budget. But it will be the best as it possibly can be.

A friend from the UK Builders group, Colin A, is also on the path for his Son lol, tho he wants an Original Trilogy Rebel Pilot outfit. So, Colin had already done some research on jumpsuits, straps etc and kindly passed these on to me.

He also put onto pepakura. I've seen this type of work before, but it was an area I had no real need for with any of my previous projects. But this could be how I could make Jess' helmet. So I followed the sent link, printed off the 'plans' and got to cutting and sticking.

Work up to before my holiday....
pepakura - TFA Rebel helmet
I've done a bit more work on this since returning home, so will update soon.