July 27, 2015

R5-D4's transport platform 1.5 - UPGRADE

Saturday, I got to finishing off some things that needed doing to the platform to make it actually fully useable lol. As it was, there was no where to mount his centre leg and also he wasn't securely stable if platform was moved.

Original location bolt holes for the stand were no good once the car ankle stabiliser stands were used on the platform. So I made and fitted two location pins for the stand. These are just to help stop things moving around.

Platform now fitted with location pins for stand

The batteries can be stored under the stand.
R5D4R5D4
The foot/ankle stands also fit on the platform. These may also get location pins, but as the whole lot gets strapped down, they may not be needed. 

R5D4
In the previous pictures, you can see the new 'slot' to the rear of the platform, between his legs. This is where his centre leg 'slots' into place.
R5D4
R5 fully installed on his transport platform. Just need to add some location points for the battery boxes to secure them and also some storage for transit bolts and tools.

I'm considering installing some sort of push bar to be fitted to the base, rather than have hand's on his shoulders.....

His head will be fitted onto his body, it is now for storage purposes.

July 23, 2015

Motivator Pie hole - internal wall's upgrade

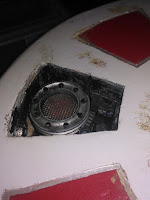
The internal walls of the motivator pie hole need some work done on them. So cut up some circuit board and shaped them a bit. Keeping it simple, the boards are flat with low flat chips on them. Then sprayed them up with grey primer. I added some holes and fed some thin wires through. These were glued in place with a few then being cut. I added these after the primer to retain the wire colours. I then sprayed some black over them. The can I used was old and rather than give a nice fine mist, it spat the paint out. Wasn't what I wanted, but actually, it's not that bad lol.

Next I painted the inside of the pie panels with grey paint, before glueing in the circuit boards. These had to be positioned so as to allow the motivator movement up and down. Once this had all dried, I got out some black pained and filled in between the circuit boards to darken the sides up and give it the burnt, smoke damaged look.
R5D4, bad motivator

R5D4, bad motivatorR5D4, bad motivator

Car transportation unit - Leg supports

After taking R5 to a few events now, I realise that he need's better restraints for the transporting in the rear of the car. Either new ankle leg locking stands or something.

R5 is too tall to go in through the rear hatch when in three leg mode, requiring outer feet and centre leg/foot assembly to be removed. I had made a 'stand' which fit's up inside his skirt [centre leg removed] and this is what he sit's on whilst in transport.

But even with him strapped down, he is still unstable going round corners. So new leg/ankle supports are a must. These can be bolted to the legs for support, using the original T-nuts.

So I dug out his original wood internal frames and started cutting these up to fit the new angle they need to be to sit level with the floor.
R5D4

R5D4

Now working on the second leg support.....

July 17, 2015

'Bad Motivator' - upgrade to power lift 'Blown' status 2.0 [You-Tube]

So I was happy that the pop-up motivator system working, but not really with them ended both at the same time. As, well, in the film, after the smoke stops pouring out of R5,
his motivator is still in the UP position.


So I ordered another timer relay (that was delivered super quick) and wired this up to the motivator's actuator. With the intention of having different switch off times.


So the smoke and sound ends (once sound is wired up) and then after a while the motivator operation ends and drops back down. Sound sample was added to video for effect.

July 16, 2015

My R5-D4 makes the grade!!

When I started building R5-D4, it was for the 'challenge' of attempting to build him.


When he was standing, head-less, at his first event, it was a very 'nervous' moment. As he was next to some quality, working, droids!

R5 with a borrowed R3 clear dome, thanks to Ian [pic]


Then when it was his first moving event, I was stupid 'excited' [note the grin on face in pic below] about him participating with Giles & Ian!

R5D4, R2D2, R4D5

R5's not fully complete yet.....bout 99.5% lol, but representing the R2 Builders club at events, is something I take great pride in. He's still waiting on his sound link up for his bad motivator, but rolling around at events is a really good feeling,
bringing kids big & small the world of Star Wars to life :).


Yesterday, I received my club membership badge in the post.
This means a lot as a builder :).


Nice art work Colin! lol

July 14, 2015

'Bad Motivator' - upgrade to power lift 'Blown' status 1.9 [You-Tube]

.......sorted out the Motivator to lower back down after being activated......here's a VERY short video.

I fitted a simple rubber band to the actuator, so retract the motivator after the power switches off.
R5D4, Bad Motivator

The noise from the pump vibrating on the inside of the wood dome, was a bit to loud for my liking, regardless of the fact that at an event you probably wouldn't hear it! So I uncliped the cable tie and cut up some foam, wrapped it round the pump and tied it back into place. This is now a lot quieter!
R5D4, smoke, bad motivator
It may not look pretty, but it does the job lol.

I have another small addition for the electrics to make things look and act how I'd really like.......

July 13, 2015

'Bad Motivator' - upgrade to power lift 'Blown' status 1.8 [You-Tube]

Installation Time!

Got home last night and started on fixing the electronics board into position. But soon realised that this position was not a good idea! Do to the material being screwed to was flexing and moving the outer skin. So back to the drawing board.

Whilst looking inside the dome, it came to me to just make a bracket and secure the board to the inside roof, like everything else lol

So in work this morning, I got to cut up an angle strip of Aluminium and drilled location and fixing holes into it. This can now be fitted and all wired up!

So on Saturday, I fitted the bracket to the inside roof of dome. Then attached bad motivator board to the bracket. Had to do some power re-wiring inside R5 to sort 12 volt power to board, then using multimeter, adjusted the voltage regulator to 6 volts. Topped up the e-Cig unit with some more fog juice and here's the first test video in action.

There was a bit of wind when I video'd hence the gaps in the fog showing.

I'll adjust the timer once the sound is sorted. Next is to wire up the actuator to pop up the motivator.

July 09, 2015

'Bad Motivator' - upgrade to power lift 'Blown' status 1.7

Last night I trimmed board down the board so it can fit in this position. Will have to reposition the timer relay.
Bad Motivator, R5D4Bad Motivator, R5D4


Dome wires previously set up for individual power of lights, motivator and smoke....not now required, so I could use these for other things (???) Only the 12 volt feed is needed to then be distributed to motivator and smoke via dome board.

'Bad Motivator' - upgrade to power lift 'Blown' status 1.6 [You-Tube]

Not had much time to work on this recently, but got back onto Monday.

I'd found a suitable piece of MDF that I could mount the components onto. I then did a bit of re-cutting of wires (see prev post pic) to shorten them to better fit the board and layout of them all.

Once layed out, I marked and drilled securing holes and fixed down with mini cable ties.
Not very pretty, but necessary.
R5D4, Bad Motivator

And here's the test video showing the timer relay in action. I connected an LED to the 12 volt output to show power, the voltage regulator has it's own LED power indicator already.


I just need to add some labels to identify what power and where wires go where lol.

Next is to test connect up to the Dome and the Bad Motivator & Smoke system to test for real!!

July 02, 2015

'Bad Motivator' - upgrade to power lift 'Blown' status 1.5

Components arrived at the weekend, sooner than I'd expected lol. But wasn't able to try them out till Tuesday.

As always the instructions for at least one components wiring diagram are......well, inaccurate......would be putting it mildly! lol. A black& white picture, no colour identities, component picture doesn't actually match the component! But it didn't take long to sort.

So this is the plan for connecting it all up.
R5D4, Motivator, Bad Motivator

And here's it all wired up for testing, using an LED as the motivator/smoke side of things.
The cigarette plug, connects to the 12v power adaptor.

And here it is again, this time with the voltage regulator fitted. Again, this is just a test fitting.
R5D4, Bad Motivator
The voltage regulator will be connected up to the smoke system (pump & E-Cig) as this runs at 6 volts. There will be another connection to link up to the 12 volt to the door actuator to activate the Motivator.

The remote triggers the circuit, which activates the timer relay, sending power to the motivator and smoke system. After the set time, the timer switches off and system deactivates. There is a bonus fail safe in that another button has to be pressed to reset the first button......well it's a bonus for now....lol

July 01, 2015

R5-D4 visits Glenfrome Summer Fair 2015

This was R5's first event where I didn't have to make an early start lol.

As the school is only about a twenty minute drive, I arrived around 11am to assembled & prep R5. It was a strange feeling walking through the corridors, was remembering everything being bigger tho lol. Mind you it was over 30 years ago. And even though there was a lot of new building work done over the years, there was a lot of stuff that hadn't changed.

It was a very hot sunny day and there were lots of stalls and games to be played. It took me back to my child hood and my Son was really interested in me telling him about when I used to go there. R5 was driving around almost non stop for the three hours the fair was open! His batteries were almost drained lol. The kids loved him and he had hugs of loads, did scare one little person, but she was very small lol. Parents and kids asked me lots about him and how he was built. So a good day all round.
R5D4

R5D4

R5D4, Glenfrome Summer Fair 2015

R5D4, Glenfrome Summer Fair 2015
We look forward to next year :)