March 2022
Planning out the electronics/electrical connections etc.
This has been the most concentrated effort of work to get things ready for Birmingham's event @MegaCONlive [26th March 2022].
….well…..I got it working on the bench, but there was a problem once installed in R5’s dome.
The smoke system worked ✅
But the magnetic actuator didn’t have enough to move the motivator assembly ❌
So back to the drawing board & a new lighter motivator assembly .........
October 2022
I eventually returned to this project as have time. I thought I’d try out an idea that Brad 'BHD' had a few years ago to activate HIS bad motivator’s on his droids.
It utilised a servo, pivot arm and a track system. His droids are gone, but his webpage Blog is still lives on 😎👍🏽
Link: Brad’s R2-X2 Droid build
For lightness I dug out a rail and bearing carriage I'd salvaged from a 3D printer.
Next up was to measure the carriage’s holes position, so that I could draw up in Inventor CAD, an adapter to a-fix to it for the Bad Motivator. I then needed a bracket to secure the servo to and also the rail. So again I CAD’ed up a design and 3D printed it off. It was a Friday, so I knew that this would have to be ‘modified’ lol. Sure enough, with the help of my soldering iron, (melting plastic to reshape areas, the servo fitted into place.
I’m using a metal gear servo for strength, the new motivator isn’t overly heavy, but just to be safe as it will see a lot of action.
As this setup is in R5’s dome, my standard arrangement to activate the bad motivator, is via a remote control fob.
I have been toying with and have tested out using, one of the other transmitter’s receiver’s (I have a few spare and connected it up using the last free channel on my transmitter). This is still a work in progress idea.
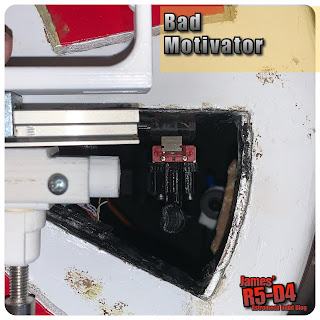
After printing the components, I test fitted the assembly unit into R5’s dome, only to find that the rail was further over than existing setup. The new assembly is fitted inside the dome, the old one, resting on the top of it. the 'white' component is the original 'Bad Motivator' location piece, the inside 'black' component is the new 'BMs' location piece. So I had to do some CAD alterations.
The next set of prints worked much better, fit wise. On test fitting, I had trouble with the actual motivator fitting up through the pie hole, without it catching on the new rail. This was due to orientation.
I’ve always accepted this motivator design as (at the time) was the only version available. But I think its now time I stopped wrestling with that nagging feeling and CAD up the motivator ‘that I envisioned years ago when I first sketched it up from what/how I saw it from screen caps’. (Said in Moff Tarkin’s tone of voice 😂).
…….So that’s Mondays project!
Next was to install the brass inserts, drill a few holes to secure parts and wait for a dual relay switch to arrive.....


No comments:
Post a Comment