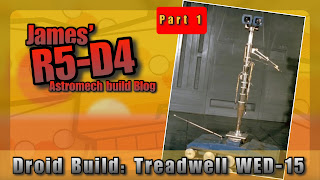
November Friday 4th 2022
The start of another droid, but not another Astromech. Something that there aren’t many of, especially here in the UK. Like R5, this droid has been a favourite for me for its unique design.
The Treadwell droid or ‘WED-15’ has it’s own section on ‘Rebel Droids forum’ for them. A few builders have sketched things up and there are some 3D stl files, but nothing complete in so much that there is not just one set of plans. So I’m going to combine these with my own idea’s, based on vintage film photos and other info, to create my own.
I will eventually produce PDF drawings with dimensions, for others to use and also upload the stl files, if everything works out lol 😆.
I made a start on producing the head component, in 3D AutoCAD Inventor, using dimensions off blueprints. The outside profile wasn’t to hard to reproduce, but the inside carved out section was a bit more of a challenge.
Then after a bit more editing, I decided to make a start on printing the head.
To save on time and not waist filament, I sectioned the head into two halves, so no support material required. I also printed two of the lens holder front pieces, as there was space on the print bed, and the print was going to be done over the weekend (works Ultimaker S5 printer, free time).
The printer uses a 0.4 nozzle and all my prints this size are at 0.2 layer height.
Before I set the printer to produce a mirror version of this set, I first needed to do some tweaks to allow the front lens holders to sit into them properly as there is a recess in the front.
Tuesday (7th), morning, back in work to find the printed parts came out great (see above picture), the joining faces needed to be smoothed, and once done, the two halves were glued together.
As mentioned, the second tweeted set of two halves, was set to run overnight.
Wednesday (8th)
I made a start on drawing up the main head plate, that the eyes fix too.
Although this has cut outs in places, I didn’t want to risk my first print being structurally weak, so went with a solid plate design. To be honest, unless you really study the closeup pictures, this is not an easy detail to notice.
This piece was left to print overnight, along with some other detail pieces.
Thursday (9th)
The main head plate, printed great!
The one head pivot piece did as well, but I wasn’t 100% happy with the one fixing point (as I had drawn it up with two), so I redesigned this piece to have two location points. I was going to use bolts, but decided that it would be more convenient to draw up 3D printable pieces. So I drew up locking pins. These are a push fit and can/could be glued in place.
They have a flat edge so easy to print, but also they won’t bind up when fitting through the holes. The tabs are to help removal and can be removed if gluing in option is needed. These just needed a light sanding on the front edge.
I used a piece of metal tube which I will replicate as a 3D component, later on, as the main pivot bar. (See picture below).
And here is the main head plate assembly.
The locking pins were printed off.
After I had drawn up the head plate, on Wednesday, I made a start on the upper neck pivot ‘rings’. (Below picture)
Held off on printing this piece as wasn’t 100% happy with the size diameter’s, so I’ll do some more research over the weekend and compare with the blueprints. The above is a visual reproduction of the film droid.
#treadwelldroid #3Dprinting #autocadinventor #rebeldroids #thesearethedroidsyourlookingfor


No comments:
Post a Comment