Volume control box holder:
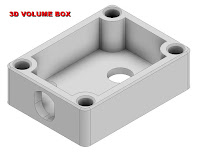
Designed this up to hold the volume control unit.
First attempt at thread inserts as well.
Was thinking of using acrylic sheet for the lid, but may just 3D print one.
Update: 22.6.2020
The volume control box holder, needed to be slightly modified. I should of made the cable hole larger as the two struggled to go through. So had to trim off the upper section. Not the end of the world as the idea was to fit a lid. Also the hole for the rotary had to be opened up a bit, printer tolerance. The best bit tho was the fitting of the thread inserts.
Volume control knob:
Update: 22.6.2020
The volume control box holder, needed to be slightly modified. I should of made the cable hole larger as the two struggled to go through. So had to trim off the upper section. Not the end of the world as the idea was to fit a lid. Also the hole for the rotary had to be opened up a bit, printer tolerance. The best bit tho was the fitting of the thread inserts.
-------------------
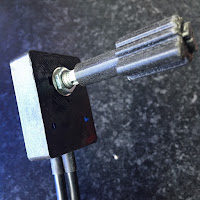
Yes I did look for a long one but thought why not just design and print one. It is designed to go through the 18mm thick base.
Update: 22.6.2020
Volume control knob, needed only its shaft hole to be opened up. I wanted it to be a tight fit, but was a little to tight at first.
Utility arm bracket:
Volume control knob, needed only its shaft hole to be opened up. I wanted it to be a tight fit, but was a little to tight at first.
-------------------
Three similar designs, to save time with seeing which one works.
Update: 22.6.2020
Utility arm bracket, these printed great, but still they need redesigning as I just can't get the flat parts to fit the curved angle of the arm. So back to the drawing board for these.....
Next up:
The Digital Voltage units. I didn't have one to hand when I was drawing up this model for another project, so missed a few details. Both are not major things and one was easily solved by trimming the fixing tabs off the digital meter.
Once tabs removed and rear circuit board filed down a bit, the digital push fits in. The upper recessed tab I had originally intended to have printed labels stuck in stating the voltage. On hind sight though this is a bit pointless as you'd visually see the display.
Lastly, the mini voltage regulator needed a new holder.
The regulator clips into the holder and is a snug fit. I need to add a securing holed tab.
When I'm happy with these, they will go up on my Thingerverse page.
Utility arm bracket, these printed great, but still they need redesigning as I just can't get the flat parts to fit the curved angle of the arm. So back to the drawing board for these.....
---------------------------------------------------------------------------
Next up:
The Digital Voltage units. I didn't have one to hand when I was drawing up this model for another project, so missed a few details. Both are not major things and one was easily solved by trimming the fixing tabs off the digital meter.
Before tags were removed, seen on right of picture.
Once tabs removed and rear circuit board filed down a bit, the digital push fits in. The upper recessed tab I had originally intended to have printed labels stuck in stating the voltage. On hind sight though this is a bit pointless as you'd visually see the display.
-----------------------------------------
Lastly, the mini voltage regulator needed a new holder.
The regulator clips into the holder and is a snug fit. I need to add a securing holed tab.
When I'm happy with these, they will go up on my Thingerverse page.


No comments:
Post a Comment