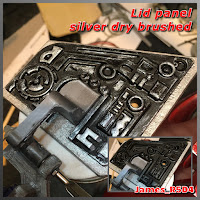
After two design attempts, third time was lucky lol.
And got itself 3D printed off.
I added a recess and opening for a single LED, in the design. After I had re-levelled the printer bed before printing this third version.
After cleaning up the print, it got a coat of filler primer paint. Whilst this was drying, I got on with other parts of this project. The lid panel opening edges had a coat of silver paint.
The lid panel’s underside had a line added that would need wood filler to smooth flat. After it had dried it got a light sanding. It and the lids edges then got painted silver. (See above picture).
I decided to spray the 3D print, mat black and then dry brush it with silver paint.
I mixed up two part Araldite to fix the 3D print to the underside of the panel lid. Remembering to fit the LED lol. Whilst this was setting, I mixed up some more to fix the magnet into the servo arm that will fix onto the lid panel.The servo holder has also had some re-working done, to incorporate two magnets that will secure it to the inside of the lid.
.....picture to come.


No comments:
Post a Comment