November 9th 2020
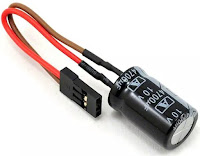
One thing with servos that has bugged me since starting to use them with R5's build, is the twitching that sometimes happens. So I did a search for the cause of this and found loads of, mostly old, YouTube video's referencing 'Glitch Busters'.
So after having a search online and ultimately looking on eBay lol, I decided I'd have a go at making one myself. Capacitors ordered and I already have the connectors.
Connected up a capacitor and plugged it into the system......no noticeable difference, but I'll leave it in just in case lol :D
November 16th 2020
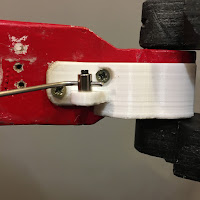
Worked on the servo fitment. Cut the four screw threads down to correct length needed. Also opened up the upper axle hole in the wood, to allow the utility arm to move more freely. I fitted the white 3D printed bracket, which I screwed into position, but the thickness of the base, pushed the utility arm up and it rubbed then on the skin opening.
................So I removed this part of the bracket
I had test printed off a new 3D piece of the screen which would allow the servo linkage to pass through it.
This piece would require a bit more alteration as I had not left space for the bracket, once in the closed position.
Next design change is to give a bit more space top/bottom of opening and to fill in the original smaller opening, seen in above picture. You can see I also tested out fitting springs to the servo arm.
Final design of the one piece screen has been drawn up and will be printed shortly. Hopefully I've got everything right lol.


No comments:
Post a Comment