So I have now named this project 'TCD' lol.
Monday I started to design up a 'box' to put the electronics in for ease. This was drawn up in AutoCAD Inventor. In my last post regarding switch relays, it had given me an idea on how this could also apply to this project.
'switch' - update:
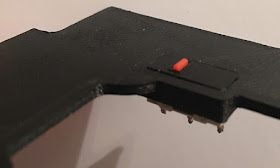
I printed a lower plate that the switch could fit into. I wired a switch to activate an LED when the pressure was released.But the pressure required to keep the switch down wasn't achievable, so I'll have to think of another position to locate a switch.
Back to the electronics box:
After a few redesigns and only a few actual test 3D prints, I'm really happy with the finished box. Here's my instagram post picture.
Really please that the two clips I designed actually work [on my second test print lol]. It's the fine tuning of the sizes, plus here, minus there so that the tolerances fit when they come together.
Ultimaker Cura image on the printer plate
And here's the soldering up of the components that will fit inside it.
This version is for my first attempt, but this could be customised to by controlled by other methods. In the above picture, you have the 'remote control' [bottom left], a 'timer relay' [top orange box] and a 'micro voltage regulator' [right]. Not shown in this picture will be an LED to indicate power. At some point I want to fit another [probably a remote LED] to indicate via the micro switch.


No comments:
Post a Comment