Extra Projects & Event Page's
- Home
- Trading Card Dispenser (version 2) - TCD [2020/2022]
- R5-D4 - Trading Cards
- R5-D4 - silver neck details
- R4-D4 - Dome [wood build]
- R0-D4 Dome [wood build]
- 3D Printing - Star Wars stuff
- *** Star Wars Shoes ***
- GOUD-4 Messenger Droid - Solo ASWS
- Event's 2018
- Event's 2017
- Event 2016 - "Celebration Europe"
- Event's 2015
- Event 2014 - Chippenham Sci-Fi
- R5-D4 - events page - The beginning (2013)
- ** R5-D4 patch **
- R5-D4 Photos
- Han Solo - costume for my Son
- Droid Caller - Han Solo style
- Boba Fett - costume build for my Son
- Scanning Crew Container - Transmitter Storage Box
- Stormtrooper - me
- ROGUE ONE - trading card storage box
- Rogue One
August 21, 2020
Glynn’s R2 takes on The Humber - #CALM charity event
Transmitter switch cover update.....3D printed
What a nightmare trying to match up the thread for the new switch nut on the transmitter. After three attempts, I decided to go with one of my original ideas, which was to fit a switch cover/lock. So after a few iterations, I settled on this version.
I recessed the nut into the lower part of the bracket, making it easy to fit onto the threaded part of the switch. The locking part is pinned with a sel-lok pin through and is not too snug a fit onto the switch arm itself. This just means that the switch can't accidentally be triggered, not that it could be as it requires an amount of actual force to click it. But it looks good rather than just having the nut.
I'll post up on Thingiverse soon. So click follow and/or on Twitter for notification of it going live.
Droid Builders UK - You Tube Channel
Check out the Droid Builders UK You Tube Channel: click link here
It has video tutorials on all aspects of droid building, 3D printing, soldering, just to name a few. So if you interested in droids, these are the video's your looking for!
~~~~
subscribing to the channel,
you will be keeping up-to-date
with future events info posted online
Tutorial - Remote Control Drive setup - Droid Builders UK
The video tutorial I made for the Club, is now up online.
Dual Remote Control Drive setup Tutorial for Droid Builders Live,
is a 'how to' video showing how to connect up the speed controller,
transmitter and motors.
August 18, 2020
CALM Charity update - Glynn's R2D2 long walk
August 14, 2020
Funko Pop Astromech 3D - Finished printing update.
The second half [rear] printed great and didn't require much clean-up. The support did come away for the antenna, but it still printed ok.
 |
| half sections together |
The above picture shows the two half's together....no, your eyes are not playing tricks on you lol, the centre line is angled. I thought the dome and body were all lined up on there plan's, but only the dome was. This isn't a problem though as the side dome rods help hide the join.....plus once painted etc. And the body join line will be hidden once the legs are attached.
And here is the almost finished model. Not glued, just propped up together.
![funko pop, r5-d4, 3d printing Funko R5-D4 Astromech [3D printed]](https://blogger.googleusercontent.com/img/b/R29vZ2xl/AVvXsEi7awh6eqUw9rnF51ocJLiD3vKVcHnEaJZ8bGVpe7KAiE9i-hz03vn3sYHA_nl-eljkYwQRe7fnkIh7dVLWBU6wDHXvUgRk76nOm-s-Em4E9ZuvH90Ng37_s0w8ofgy_ceen_tzSl_raJ4/w301-h320/Funko+R5+complete.jpg) |
| Funko R5-D4 Astromech [3D printed] |
I had to get stl versions created for two fellow builders who's droids were not produced by Funko. These will all go up on my Thingiverse page, once they have been printed and checked as OK.
I have also completed the battery box hoses to a more satisfactory (me) standard lol. I forget that once printed, the details that I agonizes over....don't really needed to be worried about.
 |
| Battery box hoses |
A morning [5 hours worth] working on another dome not produced by Funko, so a bit or artistic licence has been taken :D. Again the body/dome will be one non-bobble head piece.
It's blue but not R2....??
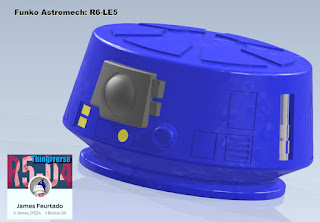 |
| R6-LE5 dome |
The owner was very pleased and will be printing the full droid version soon.
August 12, 2020
Funko Pop Astromech 3D - Finally....almost finished
So in my last Funko POP update, I mentioned a few new ideas to print off the parts and the time involved. I will admit that the printing times are something I don't enjoy lol.....especially when it's just development/testing prints.
The works printer has been tied up since I got back into the office, frustrating, but hay, it is there's lol 😃. I did get to print the updated legs, feet and battery boxes, now with less inner's to print, saving on material and time. These only took about 4 hours to print and because they were separate's, I could print them in their best orientations. These came out great, though I would recommend upping the infill lol 😃 (think I had it on 10%). I've updated my Thingiverse page with these new 'hollow' parts.
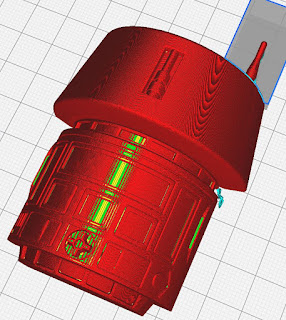
Next up was the body/dome print. This print will be for the NON-bobble head version I've been working on, as this will also be an option. I wasn't happy with the length of time it would take for a test print and if it didn't print ok or fail, it was a lot of filament to waste. So I half sectioned the model and printed the front half first. This saved on time/filament as hardly any support material would be needed.
It printed better than I hoped! Some parts on it didn't print 100%, scale was too small for the detail to be printed and these I have slightly modified for next time. The print time for this was over 8 hours, so left it to print overnight.
And here's the first half printed off. You can see the details missing around the centre vents and the utility arms, more to do with the settings I believe.
I set the printer to print the rear half over night....
It printed great, though the support did come loose for the antenna, but it still printed, so it actually looks like the original bent version lol.
........More updates to come including another dome...!
August 10, 2020
Sounds for droid 2020 - 1.6 transmitter switch test
Forgot to post this.....
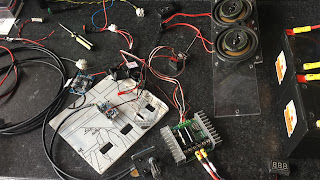
A few weeks ago I was asked to do a tutorial video for the Droid Builders UK Live 2020 event, check out the website here & the You Tube channel here. It didn't get aired due to time, but whilst I was working on all the electrical's, I swapped over the transmitter switch I had originally fitted, with a momentary version.
The original 'switch' was a dial which wasn't needed so after watching some YouTube videos on how too, I swapped it for a switch.
Here are my Blog links to prev. work done.
I wanted to have a momentary switch, rather than a normal 3 position one.
As I had already done the hard work in Parts 1 & 2, this was just a simple un-solder and re-solder the new switch.....except that what I didn't realise at the time was that the thread is an M6.....not an M5. So I'll have to make a new switch nut.
August 06, 2020
Funko Pop Astromech 3D - build update
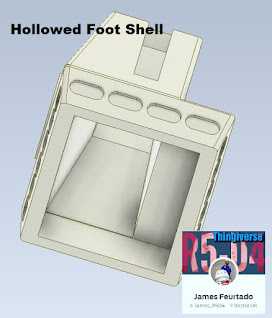
I've also been reducing the amount of fill, see image above, by making some of the components, hollow. To print a full R5 would take around 16 hours, assembled, though printing the parts as individual's takes about 18 hours.....
......more progress updates soon.
R5 Button Badges
August 04, 2020
DBUK 2020 - Charity #CALM - **total so far £7700!**
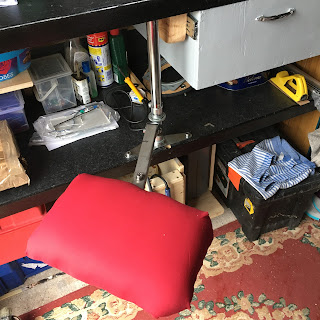
Workbench lockdown 2020 - new paint & finished seat

After cleaning off dirt and chipped paint, I started with painting the vice.....and then the visible parts of the metal bench framework. There’s still some parts I need to paint, but so far it’s looking good.
The seat needed modifying, the arm was just a few inches to short, so when sat on the seat my long legs would hit the bench. I found a extra piece of the steel angle and some flat plate. Had to buy a carbide tip drill bit to drill the holes through, then clamped the pieces together.
Next up I used some 18mm thick leftover wood stapled on some thick foam that I had for the dome bag projects. To cover it I used some of the material also used for the bags.
It’s not bad and is actually comfortable to sit on.
August 03, 2020
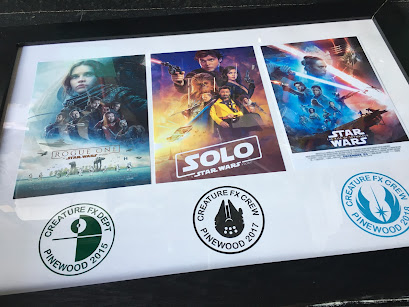
Created a new picture frame - R1, SOLO, TROS.
DBUK 2020 Live - round-up






![Funko POP, R5D4, 3D printing Funko Astromech V2: head & body [non-bobble]](https://blogger.googleusercontent.com/img/b/R29vZ2xl/AVvXsEiQUzkQJLr3K04LkHJKyB21TY0YoXj_G8n9QVm5l94WsPP9UBOg24heE9rfh7QN2Y-yWoqhoH9FheAz1FhadMrKhsEilc_5NF6D73iGtL_ENItoYmem2NkDkYSlyYe1iK7DJOIgMxZj3qk/w291-h320/AssemblyR5-Funko+-+V2+socket.jpg)


